Stark & Wayne Cloud-Native Consultants 2022-05-12T15:44:51Z https://www.starkandwayne.com/feed/atom/ WordPress https://www.starkandwayne.com/wp-content/uploads/2021/04/cropped-SW_Logos__shield_blue_on_transparent_with_border-32x32.png Chris Weibel <![CDATA[Cloud Foundry TCP Routing – The Rest of the Story]]> https://www.starkandwayne.com/?p=11541 2022-05-12T15:44:51Z 2022-05-12T15:44:50Z

The story is real, but what is the part of TCP Routing you need to know about still?

pic

Photo by Gary Bendig on Unsplash

The documentation to configure Cloud Foundry for TCP Routing is a great reference for getting started on your journey to implementation but there a few missing pieces which I think I can help fill in if you are deploying on AWS. 

Assumptions

  • I need an ELB to listen on tcp ports 40000-50000 and forward the traffic to the tcp-routers. The default range of 1024-1033 is fine for some folks, others, not so much.
  • I want to use a vm_extension to add tcp-router's as they are recreated without manual intervention.
  • I have an AWS account with an ELB listeners quota of 100 and I want to use all 100 ips
  • I want to use Terraform to create the ELB and any necessary supporting resources.

A quick side bar: why an ELB instead of a NLB?

I'm glad you asked. My goal is to have as many tcp ports as possible with a single load balancer. As of this writing, NLB's have a default quota of 50 target groups, each target group can manage a single port. A classic ELB has a default quota of 100 listeners. 100 > 50, therefore the ELB wins!

The link to the soft quota limit for ELB listeners is at https://docs.aws.amazon.com/servicequotas/latest/userguide/request-quota-increase.html

Steps to Implement

  1. Create the ELB with Terraform 
  2. Use the ELB name to modify the Cloud Config
  3. Create the ops file
  4. Set router groups with cf curl
  5. Use cf cli to create shared domain
  6. Test with an app

Step 1: Create the ELB with Terraform

This is one of the places where the documentation isn't 100% helpful, however the good people who have been maintaining BBL help us out. In particular this chunk of Terraform is a great place to start: https://github.com/cloudfoundry/bosh-bootloader/blob/main/terraform/aws/templates/cf_lb.tf#L244-L1041

To support a different range of ips requires a few easy changes. Start by replacing the ingress block in the two security group definitions:

  ingress {
    security_groups = ["${aws_security_group.cf_tcp_lb_security_group.id}"]
    protocol        = "tcp"
    from_port       = 1024
    to_port         = 1123
  }

with

  ingress {
    security_groups = ["${aws_security_group.cf_tcp_lb_security_group.id}"]
    protocol        = "tcp"
    from_port       = 40000
    to_port         = 40099
  }

You'll also need to replace the block of listeners defined in the resource aws_elb.cf_tcp_lb:

  listener {
    instance_port     = 1024
    instance_protocol = "tcp"
    lb_port           = 1024
    lb_protocol       = "tcp"
  }
  ...
  98 bottles of listeners on the wall, 98 bottles of listeners...
  ...
  listener {
    instance_port     = 1123
    instance_protocol = "tcp"
    lb_port           = 1123
    lb_protocol       = "tcp"
  }

With something like:

  listener {
    instance_port     = 40000
    instance_protocol = "tcp"
    lb_port           = 40000
    lb_protocol       = "tcp"
  }
  ...
  98 bottles of listeners on the wall, 98 bottles of listeners...
  ...
  listener {
    instance_port     = 40099
    instance_protocol = "tcp"
    lb_port           = 40099
    lb_protocol       = "tcp"
  }

Don't feel like copy/paste/modifying the same 6 lines of code 99 times? Here's a quick python script that you can run, then copy/paste the results into the Terraform file:

start_port = int(input("Enter starting port (40000):") or "40000")
end_port   = int(input("Enter ending port (40099):") or 40099) + 1

for x in range(start_port, end_port):
    print("  listener {")
    print('    instance_port     =', x)
    print('    instance_protocol = "tcp"')
    print("    lb_port           =", x)
    print('    lb_protocol       = "tcp"')
    print("  }")

Cute, right? Anyway, I called this listeners.py which I can run with python3 listeners.py, copy in the output and enjoy.

If you are going to just use the section of BBL code highlighted with the few changes above you'll need to provide a couple more values for your terraform:

  • subnets - No guidance here other than to pick two subnets in your VPC
  • var.env_id - When in doubt, variable "env_id" { default = "starkandwayne"}
  • short_env_id - When in doubt, variable "short_env_id" { default = "sw"}. Shameless plug, I know.

After your terraform run is complete, you'll see output like:

Outputs:

cf_tcp_lb_internal_security_group = sg-0f9b6a5c6d63f1375
cf_tcp_lb_name = sw-cf-tcp-lb
cf_tcp_lb_security_group = sg-0e5cd4f4f262a8d87
cf_tcp_lb_url = sw-cf-tcp-lb-1943122948.us-west-2.elb.amazonaws.com

Register the ELB CNAME with your DNS provider to point to tcp.APP_DOMAIN, in my case:

  • My apps are in *.apps.codex.starkandwayne.com
  • Therefore I'm using tcp.apps.codex.starkandwayne.com as my TCP url I need to register with DNS
  • So tcp.apps.codex.starkandwayne.com has a CNAME record added for sw-cf-tcp-lb-1943122948.us-west-2.elb.amazonaws.com

Step 2 - Configure Cloud Config

Add to cloud config:

vm_extensions:
  - name: cf-tcp-router-network-properties
    cloud_properties:
      elbs:
        - sw-cf-tcp-lb  # Your name will be in the terraform output as `cf_tcp_lb_name`

A quick update to the bosh director:

$ bosh -e dev update-config --type cloud --name dev dev.yml
Using environment 'https://10.4.16.4:25555' as user 'admin'

  vm_extensions:
  - name: cf-tcp-router-network-properties
+   cloud_properties:
+     elbs:
+     - sw-cf-tcp-lb

Continue? [yN]:

If you take a peek at cf-deployment you'll see that the tcp-router is looking for a vm_extension called cf-tcp-router-network-properties here: https://github.com/cloudfoundry/cf-deployment/blob/v20.2.0/cf-deployment.yml#L1433-L1434 so once you configure the cloud config, cf-deployment is already configured to use the extension. What this means is whenever a tcp-router instance is created, BOSH will automatically add it back to the ELB once it passes the health check.

Step 3 - Create the ops file

Since I need a custom port range, some of the properties in cf-deployment.yml need to be changed.

An example ops file to change ports for the routing release:

- path: /instance_groups/name=api/jobs/name=routing-api/properties/routing_api/router_groups/name=default-tcp?
  type: replace
  value:
    name: default-tcp
    reservable_ports: 40000-40099
    type: tcp

When you include this new ops file in your deployment you'll see the change with:

Task 4856 done
  instance_groups:
  - name: api
    jobs:
    - name: routing-api
      properties:
        routing_api:
          router_groups:
          - name: default-tcp
-           reservable_ports: 1024-1033
+           reservable_ports: 40000-40099

Step 4 - Set router groups via cf curl

Post deployment however CAPI still has the old ports:

$ cf curl /routing/v1/router_groups
[
   {
      "guid": "abe622af-2246-43a2-73f8-79bcb8e0cbb4",
      "name": "default-tcp",
      "type": "tcp",
      "reservable_ports": "1024-1033"
   }
]

To configure the Cloud Controller with the range of ips to use:

$ cf curl -X PUT -d '{"reservable_ports":"40000-40099"}' /routing/v1/router_groups/abe622af-2246-43a2-73f8-79bcb8e0cbb4

Step 5 - Create shared domain

The DNS is configured for tcp.apps.codex.starkandwayne.com and the name of the router group from the ops file is default-tcp. Using the cf cli Cloud Foundry can then be configured to map these two togther into a shared domain:

cf create-shared-domain tcp.apps.codex.starkandwayne.com --router-group default-tcp

If you run the cf domains command you'll see the new tcp domain added with type = tcp

$ cf domains
Getting domains in org system as admin...
name                                status   type   details
apps.codex.starkandwayne.com        shared          
tcp.apps.codex.starkandwayne.com    shared   tcp    
system.codex.starkandwayne.com      owned    

Step 6 - Push an App

To create an app using tcp, there are a few options:

  1. With the cf cli v6: Push the app with the domain specified and a random portcf push myapp -d tcp.apps.codex.starkandwayne.com --random-route
  2. Create a route for a space, push an app, then map the route to the space. $ cf create-route tcp.apps.codex.starkandwayne.com --port 40001 $ cf push myapp --no-route # see next section for example app $ cf map-route myapp tcp.apps.codex.starkandwayne.com --port 40001
  3. Create an app manifest which contains routes:, then specify the app manifest in the cf push (cf push -f manifest.yml) with the contents of manifest.yml being:applications: - name: cf-env memory: 256M routes: - route: tcp.apps.codex.starkandwayne.com

In the previous examples, swap --port with --random-routefor the app push to pick any available port instead of a bespoke one. This will help developers from having to guess which ports are still available. 

Testing an App

Once the application is pushed, for instance with cf push myapp -d tcp.apps.codex.starkandwayne.com --random-routewhich uses cf-env, you can use curl to test the access:

$ curl http://tcp.apps.codex.starkandwayne.com:40001

<html><body style="margin:0px auto; width:80%; font-family:monospace"><head><title>Cloud Foundry Environment</title><meta name="viewport" content="width=device-width"></head><h2>Cloud Foundry Environment</h2><div><table><tr><td><strong>BUNDLER_ORIG_BUNDLER_VERSION</strong></td><td>BUNDLER_ENVIRONMENT_PRESERVER_INTENTIONALLY_NIL</tr><tr><td><strong>BUNDLER_ORIG_BUNDLE_BIN_PATH</strong></td><td>BUNDLER_ENVIRONMENT_PRESERVER_INTENTIONALLY_NIL</tr><tr><td><strong>BUNDLER_ORIG_BUNDLE_GEMFILE</strong></td><td>/home/vcap/app/Gemfile</tr><tr><td><strong>BUNDLER_ORIG_GEM_HOME</strong></td><td>/home/vcap/deps/0/gem_home</tr><tr><td><strong>BUNDLER_ORIG_GEM_PATH</strong></td><td>/home/vcap/deps/0/vendor_bundle/ruby/2.7.0:/home/vcap/deps/0/gem_home:/home/vcap/deps/0/bundler</tr><tr><td><strong>BUNDLER_ORIG_MANPATH</strong></td><td>BUNDLER_ENVIRONMENT_PRESERVER_INTENTIONALLY_NIL</tr><tr><td><strong>BUNDLER_ORIG_PATH</strong></td><td>/home/vcap/deps/0/bin:/usr/local/bin:/usr/bin:/bin</tr><tr><td><strong>BUNDLER_ORIG_RB_USER_INSTALL</strong></td><td>BUNDLER_ENVIRONMENT_PRESERVER_INTENTIONALLY_NIL</tr><tr><td><strong>BUNDLER_ORIG_RUBYLIB</strong></td><td>BUNDLER_ENVIRONMENT_PRESERVER_INTENTIONALLY_NIL</tr><tr><td><strong>BUNDLER_ORIG_RUBYOPT</strong></td><td>BUNDLER_ENVIRONMENT_PRESERVER_INTENTIONALLY_NIL</tr><tr><td><strong>BUNDLER_VERSION</strong></td><td>2.2.28</tr><tr><td><strong>BUNDLE_BIN</strong></td><td>/home/vcap/deps/0/binstubs</tr><tr><td><strong>BUNDLE_BIN_PATH</strong></td><td>/home/vcap/deps/0/bundler/gems/bundler-2.2.28/exe/bundle</tr><tr><td><strong>BUNDLE_GEMFILE</strong></td><td>/home/vcap/app/Gemfile</tr><tr><td><strong>BUNDLE_PATH</strong></td><td>/home/vcap/deps/0/vendor_bundle</tr><tr><td><strong>CF_INSTANCE_ADDR</strong></td><td>10.4.23.17:61020</tr><tr><td><strong>CF_INSTANCE_CERT</strong></td><td>/etc/cf-instance-credentials/instance.crt</tr><tr><td><strong>CF_INSTANCE_GUID</strong></td><td>32064364-6709-44b9-4a91-a1f3</tr><tr><td><strong>CF_INSTANCE_INDEX</strong></td><td><pre>0</pre></tr><tr><td><strong>CF_INSTANCE_INTERNAL_IP</strong></td><td>10.255.103.15</tr><tr><td><strong>CF_INSTANCE_IP</strong></td><td>10.4.23.17</tr><tr><td><strong>CF_INSTANCE_KEY</strong></td><td>/etc/cf-instance-credentials/instance.key</tr><tr><td><strong>CF_INSTANCE_PORT</strong></td><td><pre>61020</pre></tr><tr><td><strong>CF_INSTANCE_PORTS</strong></td><td><pre>[
  {
    "external": 61020,
    "internal": 8080,
    "external_tls_proxy": 61022,
    "internal_tls_proxy": 61001
  },
  {
    "external": 61021,
    "internal": 2222,
    "external_tls_proxy": 61023,
    "internal_tls_proxy": 61002
  }
]</pre></tr><tr><td><strong>CF_SYSTEM_CERT_PATH</strong></td><td>/etc/cf-system-certificates</tr><tr><td><strong>DEPS_DIR</strong></td><td>/home/vcap/deps</tr><tr><td><strong>GEM_HOME</strong></td><td>/home/vcap/deps/0/vendor_bundle/ruby/2.7.0</tr><tr><td><strong>GEM_PATH</strong></td><td></tr><tr><td><strong>HOME</strong></td><td>/home/vcap/app</tr><tr><td><strong>INSTANCE_GUID</strong></td><td>32064364-6709-44b9-4a91-a1f3</tr><tr><td><strong>INSTANCE_INDEX</strong></td><td><pre>0</pre></tr><tr><td><strong>LANG</strong></td><td>en_US.UTF-8</tr><tr><td><strong>MEMORY_LIMIT</strong></td><td>256m</tr><tr><td><strong>OLDPWD</strong></td><td>/home/vcap</tr><tr><td><strong>PATH</strong></td><td>/home/vcap/deps/0/vendor_bundle/ruby/2.7.0/bin:/home/vcap/deps/0/bin:/usr/local/bin:/usr/bin:/bin</tr><tr><td><strong>PORT</strong></td><td><pre>8080</pre></tr><tr><td><strong>PWD</strong></td><td>/home/vcap/app</tr><tr><td><strong>RACK_ENV</strong></td><td>production</tr><tr><td><strong>RAILS_ENV</strong></td><td>production</tr><tr><td><strong>RAILS_LOG_TO_STDOUT</strong></td><td>enabled</tr><tr><td><strong>RAILS_SERVE_STATIC_FILES</strong></td><td>enabled</tr><tr><td><strong>RUBYLIB</strong></td><td>/home/vcap/deps/0/bundler/gems/bundler-2.2.28/lib</tr><tr><td><strong>RUBYOPT</strong></td><td>-r/home/vcap/deps/0/bundler/gems/bundler-2.2.28/lib/bundler/setup</tr><tr><td><strong>SHLVL</strong></td><td><pre>1</pre></tr><tr><td><strong>TMPDIR</strong></td><td>/home/vcap/tmp</tr><tr><td><strong>USER</strong></td><td>vcap</tr><tr><td><strong>VCAP_APPLICATION</strong></td><td><pre>{
  "application_id": "2d19faba-0cae-4cb7-8078-67c092cfcc33",
  "application_name": "test",
  "application_uris": [
    "tcp.apps.codex.starkandwayne.com:40001"
  ],
  "application_version": "16d2c062-932b-4902-b874-0ea519e01dd8",
  "cf_api": "https://api.system.codex.starkandwayne.com",
  "host": "0.0.0.0",
  "instance_id": "32064364-6709-44b9-4a91-a1f3",
  "instance_index": 0,
  "limits": {
    "disk": 1024,
    "fds": 16384,
    "mem": 256
  },
  "name": "test",
  "organization_id": "d396b0c6-872f-46a2-a752-bdea51819c06",
  "organization_name": "system",
  "port": 8080,
  "process_id": "2d19faba-0cae-4cb7-8078-67c092cfcc33",
  "process_type": "web",
  "space_id": "4e081328-2ac1-4509-8f51-ffcbfc012165",
  "space_name": "ops",
  "uris": [
    "tcp.apps.codex.starkandwayne.com:40001"
  ],
  "version": "16d2c062-932b-4902-b874-0ea519e01dd8"
}</pre></tr><tr><td><strong>VCAP_APP_HOST</strong></td><td>0.0.0.0</tr><tr><td><strong>VCAP_APP_PORT</strong></td><td><pre>8080</pre></tr><tr><td><strong>VCAP_SERVICES</strong></td><td><pre>{
}</pre></tr><tr><td><strong>_</strong></td><td>/home/vcap/deps/0/bin/bundle</tr></table></div><h2>HTTP Request Headers</h2><div><table><tr><td><strong>accept</strong></td><td>*/*</tr><tr><td><strong>host</strong></td><td>tcp.apps.codex.starkandwayne.com:40001</tr><tr><td><strong>user_agent</strong></td><td>curl/7.79.1</tr><tr><td><strong>version</strong></td><td>HTTP/1.1</tr></table></div></body></html>%

Additional Reading

These links are to documentation used to put this guide together

  • Primary document on how to configure deploy CF with TCP Routing here
  • Configuring routes/ports for apps after tcp routing is setup here
  • bbl terraform to create the tcp load balancer here
  • Trouble shoot tcp app issues here

Good Day!

PS: I grew up listening to Paul Harvey on the radio in my parent's station wagon. You are missed good sir!

The post Cloud Foundry TCP Routing – The Rest of the Story appeared first on Stark & Wayne.

]]>

The story is real, but what is the part of TCP Routing you need to know about still?

pic

Photo by Gary Bendig on Unsplash

The documentation to configure Cloud Foundry for TCP Routing is a great reference for getting started on your journey to implementation but there a few missing pieces which I think I can help fill in if you are deploying on AWS. 

Assumptions

  • I need an ELB to listen on tcp ports 40000-50000 and forward the traffic to the tcp-routers. The default range of 1024-1033 is fine for some folks, others, not so much.
  • I want to use a vm_extension to add tcp-router's as they are recreated without manual intervention.
  • I have an AWS account with an ELB listeners quota of 100 and I want to use all 100 ips
  • I want to use Terraform to create the ELB and any necessary supporting resources.

A quick side bar: why an ELB instead of a NLB?

I'm glad you asked. My goal is to have as many tcp ports as possible with a single load balancer. As of this writing, NLB's have a default quota of 50 target groups, each target group can manage a single port. A classic ELB has a default quota of 100 listeners. 100 > 50, therefore the ELB wins!

The link to the soft quota limit for ELB listeners is at https://docs.aws.amazon.com/servicequotas/latest/userguide/request-quota-increase.html

Steps to Implement

  1. Create the ELB with Terraform 
  2. Use the ELB name to modify the Cloud Config
  3. Create the ops file
  4. Set router groups with cf curl
  5. Use cf cli to create shared domain
  6. Test with an app

Step 1: Create the ELB with Terraform

This is one of the places where the documentation isn't 100% helpful, however the good people who have been maintaining BBL help us out. In particular this chunk of Terraform is a great place to start: https://github.com/cloudfoundry/bosh-bootloader/blob/main/terraform/aws/templates/cf_lb.tf#L244-L1041

To support a different range of ips requires a few easy changes. Start by replacing the ingress block in the two security group definitions:

  ingress {
    security_groups = ["${aws_security_group.cf_tcp_lb_security_group.id}"]
    protocol        = "tcp"
    from_port       = 1024
    to_port         = 1123
  }

with

  ingress {
    security_groups = ["${aws_security_group.cf_tcp_lb_security_group.id}"]
    protocol        = "tcp"
    from_port       = 40000
    to_port         = 40099
  }

You'll also need to replace the block of listeners defined in the resource aws_elb.cf_tcp_lb:

  listener {
    instance_port     = 1024
    instance_protocol = "tcp"
    lb_port           = 1024
    lb_protocol       = "tcp"
  }
  ...
  98 bottles of listeners on the wall, 98 bottles of listeners...
  ...
  listener {
    instance_port     = 1123
    instance_protocol = "tcp"
    lb_port           = 1123
    lb_protocol       = "tcp"
  }

With something like:

  listener {
    instance_port     = 40000
    instance_protocol = "tcp"
    lb_port           = 40000
    lb_protocol       = "tcp"
  }
  ...
  98 bottles of listeners on the wall, 98 bottles of listeners...
  ...
  listener {
    instance_port     = 40099
    instance_protocol = "tcp"
    lb_port           = 40099
    lb_protocol       = "tcp"
  }

Don't feel like copy/paste/modifying the same 6 lines of code 99 times? Here's a quick python script that you can run, then copy/paste the results into the Terraform file:

start_port = int(input("Enter starting port (40000):") or "40000")
end_port   = int(input("Enter ending port (40099):") or 40099) + 1

for x in range(start_port, end_port):
    print("  listener {")
    print('    instance_port     =', x)
    print('    instance_protocol = "tcp"')
    print("    lb_port           =", x)
    print('    lb_protocol       = "tcp"')
    print("  }")

Cute, right? Anyway, I called this listeners.py which I can run with python3 listeners.py, copy in the output and enjoy.

If you are going to just use the section of BBL code highlighted with the few changes above you'll need to provide a couple more values for your terraform:

  • subnets - No guidance here other than to pick two subnets in your VPC
  • var.env_id - When in doubt, variable "env_id" { default = "starkandwayne"}
  • short_env_id - When in doubt, variable "short_env_id" { default = "sw"}. Shameless plug, I know.

After your terraform run is complete, you'll see output like:

Outputs:

cf_tcp_lb_internal_security_group = sg-0f9b6a5c6d63f1375
cf_tcp_lb_name = sw-cf-tcp-lb
cf_tcp_lb_security_group = sg-0e5cd4f4f262a8d87
cf_tcp_lb_url = sw-cf-tcp-lb-1943122948.us-west-2.elb.amazonaws.com

Register the ELB CNAME with your DNS provider to point to tcp.APP_DOMAIN, in my case:

  • My apps are in *.apps.codex.starkandwayne.com
  • Therefore I'm using tcp.apps.codex.starkandwayne.com as my TCP url I need to register with DNS
  • So tcp.apps.codex.starkandwayne.com has a CNAME record added for sw-cf-tcp-lb-1943122948.us-west-2.elb.amazonaws.com

Step 2 - Configure Cloud Config

Add to cloud config:

vm_extensions:
  - name: cf-tcp-router-network-properties
    cloud_properties:
      elbs:
        - sw-cf-tcp-lb  # Your name will be in the terraform output as `cf_tcp_lb_name`

A quick update to the bosh director:

$ bosh -e dev update-config --type cloud --name dev dev.yml
Using environment 'https://10.4.16.4:25555' as user 'admin'

  vm_extensions:
  - name: cf-tcp-router-network-properties
+   cloud_properties:
+     elbs:
+     - sw-cf-tcp-lb

Continue? [yN]:

If you take a peek at cf-deployment you'll see that the tcp-router is looking for a vm_extension called cf-tcp-router-network-properties here: https://github.com/cloudfoundry/cf-deployment/blob/v20.2.0/cf-deployment.yml#L1433-L1434 so once you configure the cloud config, cf-deployment is already configured to use the extension. What this means is whenever a tcp-router instance is created, BOSH will automatically add it back to the ELB once it passes the health check.

Step 3 - Create the ops file

Since I need a custom port range, some of the properties in cf-deployment.yml need to be changed.

An example ops file to change ports for the routing release:

- path: /instance_groups/name=api/jobs/name=routing-api/properties/routing_api/router_groups/name=default-tcp?
  type: replace
  value:
    name: default-tcp
    reservable_ports: 40000-40099
    type: tcp

When you include this new ops file in your deployment you'll see the change with:

Task 4856 done
  instance_groups:
  - name: api
    jobs:
    - name: routing-api
      properties:
        routing_api:
          router_groups:
          - name: default-tcp
-           reservable_ports: 1024-1033
+           reservable_ports: 40000-40099

Step 4 - Set router groups via cf curl

Post deployment however CAPI still has the old ports:

$ cf curl /routing/v1/router_groups
[
   {
      "guid": "abe622af-2246-43a2-73f8-79bcb8e0cbb4",
      "name": "default-tcp",
      "type": "tcp",
      "reservable_ports": "1024-1033"
   }
]

To configure the Cloud Controller with the range of ips to use:

$ cf curl -X PUT -d '{"reservable_ports":"40000-40099"}' /routing/v1/router_groups/abe622af-2246-43a2-73f8-79bcb8e0cbb4

Step 5 - Create shared domain

The DNS is configured for tcp.apps.codex.starkandwayne.com and the name of the router group from the ops file is default-tcp. Using the cf cli Cloud Foundry can then be configured to map these two togther into a shared domain:

cf create-shared-domain tcp.apps.codex.starkandwayne.com --router-group default-tcp

If you run the cf domains command you'll see the new tcp domain added with type = tcp

$ cf domains
Getting domains in org system as admin...
name                                status   type   details
apps.codex.starkandwayne.com        shared          
tcp.apps.codex.starkandwayne.com    shared   tcp    
system.codex.starkandwayne.com      owned    

Step 6 - Push an App

To create an app using tcp, there are a few options:

  1. With the cf cli v6: Push the app with the domain specified and a random portcf push myapp -d tcp.apps.codex.starkandwayne.com --random-route
  2. Create a route for a space, push an app, then map the route to the space. $ cf create-route tcp.apps.codex.starkandwayne.com --port 40001 $ cf push myapp --no-route # see next section for example app $ cf map-route myapp tcp.apps.codex.starkandwayne.com --port 40001
  3. Create an app manifest which contains routes:, then specify the app manifest in the cf push (cf push -f manifest.yml) with the contents of manifest.yml being:applications: - name: cf-env memory: 256M routes: - route: tcp.apps.codex.starkandwayne.com

In the previous examples, swap --port with --random-routefor the app push to pick any available port instead of a bespoke one. This will help developers from having to guess which ports are still available. 

Testing an App

Once the application is pushed, for instance with cf push myapp -d tcp.apps.codex.starkandwayne.com --random-routewhich uses cf-env, you can use curl to test the access:

$ curl http://tcp.apps.codex.starkandwayne.com:40001

<html><body style="margin:0px auto; width:80%; font-family:monospace"><head><title>Cloud Foundry Environment</title><meta name="viewport" content="width=device-width"></head><h2>Cloud Foundry Environment</h2><div><table><tr><td><strong>BUNDLER_ORIG_BUNDLER_VERSION</strong></td><td>BUNDLER_ENVIRONMENT_PRESERVER_INTENTIONALLY_NIL</tr><tr><td><strong>BUNDLER_ORIG_BUNDLE_BIN_PATH</strong></td><td>BUNDLER_ENVIRONMENT_PRESERVER_INTENTIONALLY_NIL</tr><tr><td><strong>BUNDLER_ORIG_BUNDLE_GEMFILE</strong></td><td>/home/vcap/app/Gemfile</tr><tr><td><strong>BUNDLER_ORIG_GEM_HOME</strong></td><td>/home/vcap/deps/0/gem_home</tr><tr><td><strong>BUNDLER_ORIG_GEM_PATH</strong></td><td>/home/vcap/deps/0/vendor_bundle/ruby/2.7.0:/home/vcap/deps/0/gem_home:/home/vcap/deps/0/bundler</tr><tr><td><strong>BUNDLER_ORIG_MANPATH</strong></td><td>BUNDLER_ENVIRONMENT_PRESERVER_INTENTIONALLY_NIL</tr><tr><td><strong>BUNDLER_ORIG_PATH</strong></td><td>/home/vcap/deps/0/bin:/usr/local/bin:/usr/bin:/bin</tr><tr><td><strong>BUNDLER_ORIG_RB_USER_INSTALL</strong></td><td>BUNDLER_ENVIRONMENT_PRESERVER_INTENTIONALLY_NIL</tr><tr><td><strong>BUNDLER_ORIG_RUBYLIB</strong></td><td>BUNDLER_ENVIRONMENT_PRESERVER_INTENTIONALLY_NIL</tr><tr><td><strong>BUNDLER_ORIG_RUBYOPT</strong></td><td>BUNDLER_ENVIRONMENT_PRESERVER_INTENTIONALLY_NIL</tr><tr><td><strong>BUNDLER_VERSION</strong></td><td>2.2.28</tr><tr><td><strong>BUNDLE_BIN</strong></td><td>/home/vcap/deps/0/binstubs</tr><tr><td><strong>BUNDLE_BIN_PATH</strong></td><td>/home/vcap/deps/0/bundler/gems/bundler-2.2.28/exe/bundle</tr><tr><td><strong>BUNDLE_GEMFILE</strong></td><td>/home/vcap/app/Gemfile</tr><tr><td><strong>BUNDLE_PATH</strong></td><td>/home/vcap/deps/0/vendor_bundle</tr><tr><td><strong>CF_INSTANCE_ADDR</strong></td><td>10.4.23.17:61020</tr><tr><td><strong>CF_INSTANCE_CERT</strong></td><td>/etc/cf-instance-credentials/instance.crt</tr><tr><td><strong>CF_INSTANCE_GUID</strong></td><td>32064364-6709-44b9-4a91-a1f3</tr><tr><td><strong>CF_INSTANCE_INDEX</strong></td><td><pre>0</pre></tr><tr><td><strong>CF_INSTANCE_INTERNAL_IP</strong></td><td>10.255.103.15</tr><tr><td><strong>CF_INSTANCE_IP</strong></td><td>10.4.23.17</tr><tr><td><strong>CF_INSTANCE_KEY</strong></td><td>/etc/cf-instance-credentials/instance.key</tr><tr><td><strong>CF_INSTANCE_PORT</strong></td><td><pre>61020</pre></tr><tr><td><strong>CF_INSTANCE_PORTS</strong></td><td><pre>[
  {
    "external": 61020,
    "internal": 8080,
    "external_tls_proxy": 61022,
    "internal_tls_proxy": 61001
  },
  {
    "external": 61021,
    "internal": 2222,
    "external_tls_proxy": 61023,
    "internal_tls_proxy": 61002
  }
]</pre></tr><tr><td><strong>CF_SYSTEM_CERT_PATH</strong></td><td>/etc/cf-system-certificates</tr><tr><td><strong>DEPS_DIR</strong></td><td>/home/vcap/deps</tr><tr><td><strong>GEM_HOME</strong></td><td>/home/vcap/deps/0/vendor_bundle/ruby/2.7.0</tr><tr><td><strong>GEM_PATH</strong></td><td></tr><tr><td><strong>HOME</strong></td><td>/home/vcap/app</tr><tr><td><strong>INSTANCE_GUID</strong></td><td>32064364-6709-44b9-4a91-a1f3</tr><tr><td><strong>INSTANCE_INDEX</strong></td><td><pre>0</pre></tr><tr><td><strong>LANG</strong></td><td>en_US.UTF-8</tr><tr><td><strong>MEMORY_LIMIT</strong></td><td>256m</tr><tr><td><strong>OLDPWD</strong></td><td>/home/vcap</tr><tr><td><strong>PATH</strong></td><td>/home/vcap/deps/0/vendor_bundle/ruby/2.7.0/bin:/home/vcap/deps/0/bin:/usr/local/bin:/usr/bin:/bin</tr><tr><td><strong>PORT</strong></td><td><pre>8080</pre></tr><tr><td><strong>PWD</strong></td><td>/home/vcap/app</tr><tr><td><strong>RACK_ENV</strong></td><td>production</tr><tr><td><strong>RAILS_ENV</strong></td><td>production</tr><tr><td><strong>RAILS_LOG_TO_STDOUT</strong></td><td>enabled</tr><tr><td><strong>RAILS_SERVE_STATIC_FILES</strong></td><td>enabled</tr><tr><td><strong>RUBYLIB</strong></td><td>/home/vcap/deps/0/bundler/gems/bundler-2.2.28/lib</tr><tr><td><strong>RUBYOPT</strong></td><td>-r/home/vcap/deps/0/bundler/gems/bundler-2.2.28/lib/bundler/setup</tr><tr><td><strong>SHLVL</strong></td><td><pre>1</pre></tr><tr><td><strong>TMPDIR</strong></td><td>/home/vcap/tmp</tr><tr><td><strong>USER</strong></td><td>vcap</tr><tr><td><strong>VCAP_APPLICATION</strong></td><td><pre>{
  "application_id": "2d19faba-0cae-4cb7-8078-67c092cfcc33",
  "application_name": "test",
  "application_uris": [
    "tcp.apps.codex.starkandwayne.com:40001"
  ],
  "application_version": "16d2c062-932b-4902-b874-0ea519e01dd8",
  "cf_api": "https://api.system.codex.starkandwayne.com",
  "host": "0.0.0.0",
  "instance_id": "32064364-6709-44b9-4a91-a1f3",
  "instance_index": 0,
  "limits": {
    "disk": 1024,
    "fds": 16384,
    "mem": 256
  },
  "name": "test",
  "organization_id": "d396b0c6-872f-46a2-a752-bdea51819c06",
  "organization_name": "system",
  "port": 8080,
  "process_id": "2d19faba-0cae-4cb7-8078-67c092cfcc33",
  "process_type": "web",
  "space_id": "4e081328-2ac1-4509-8f51-ffcbfc012165",
  "space_name": "ops",
  "uris": [
    "tcp.apps.codex.starkandwayne.com:40001"
  ],
  "version": "16d2c062-932b-4902-b874-0ea519e01dd8"
}</pre></tr><tr><td><strong>VCAP_APP_HOST</strong></td><td>0.0.0.0</tr><tr><td><strong>VCAP_APP_PORT</strong></td><td><pre>8080</pre></tr><tr><td><strong>VCAP_SERVICES</strong></td><td><pre>{
}</pre></tr><tr><td><strong>_</strong></td><td>/home/vcap/deps/0/bin/bundle</tr></table></div><h2>HTTP Request Headers</h2><div><table><tr><td><strong>accept</strong></td><td>*/*</tr><tr><td><strong>host</strong></td><td>tcp.apps.codex.starkandwayne.com:40001</tr><tr><td><strong>user_agent</strong></td><td>curl/7.79.1</tr><tr><td><strong>version</strong></td><td>HTTP/1.1</tr></table></div></body></html>%

Additional Reading

These links are to documentation used to put this guide together

  • Primary document on how to configure deploy CF with TCP Routing here
  • Configuring routes/ports for apps after tcp routing is setup here
  • bbl terraform to create the tcp load balancer here
  • Trouble shoot tcp app issues here

Good Day!

PS: I grew up listening to Paul Harvey on the radio in my parent's station wagon. You are missed good sir!

The post Cloud Foundry TCP Routing – The Rest of the Story appeared first on Stark & Wayne.

]]>
Chris Weibel <![CDATA[A Sample Windows Cloud Foundry App]]> https://www.starkandwayne.com/?p=11534 2022-04-27T17:45:00Z 2022-04-27T17:32:36Z

Has it really been under your nose all along?

pic

Photo by sydney Rae on Unsplash

Ever try to find a really simple Windows app to test against Cloud Foundry Windows Cells? 

Sometimes the most obvious answer is right under your nose. Inside of the cf-smoke-tests are the tests used by Cloud Foundry to test for both cflinuxfs3 and windows stacks which are safe to run against production. 

In general the tests work by creating a test org, space, and quota, pushes an app, scales it, retrieve logs and finally tear it all back down. There are tests for both the cflinuxfs3 and windows however cf-deployment only includes the errand for cflinuxfs3 by default.

What all this means is there is a simple Windows Cloud Foundry app inside of the smoke tests, here is how you use it:

git clone https://github.com/cloudfoundry/cf-smoke-tests.git
cd cf-smoke-tests/assets/dotnet_simple/Published

cf push imarealwindowsapp -s windows -b hwc_buildpack

In the example above we clone the repo and push an app called imarealwindowsapp, feel free to use whatever name you'd like. To get the url of the app once it is deployed, run the following command and note the routes:

$ cf app imarealwindowsapp
Showing health and status for app imarealwindowsapp in org system / space ops as admin...

name:              imarealwindowsapp
requested state:   started
routes:            imarealwindowsapp.apps.codex.starkandwayne.com
last uploaded:     Wed 27 Apr 17:05:55 UTC 2022
stack:             windows
buildpacks:        hwc

type:           web
instances:      1/1
memory usage:   1024M
     state     since                  cpu    memory         disk          details
#0   running   2022-04-27T17:07:00Z   0.1%   100.5M of 1G   44.8M of 1G

To test whether or not it was successful, you can curl the endpoint adding https:// to the routes: value from the last command output:

$ curl https://imarealwindowsapp.apps.codex.starkandwayne.com -k

Healthy
It just needed to be restarted!
My application metadata: {"application_id":"b55b34e2-c434-4782-b44e-3f9f469dd70c","application_name":"imarealwindowsapp","application_uris":["imarealwindowsapp.apps.codex.starkandwayne.com"],"application_version":"1bd0703a-4f13-45c8-86cb-0632db5cd6bd","cf_api":"https://api.system.codex.starkandwayne.com","host":"0.0.0.0","instance_id":"f56eaa45-cad2-4ab8-6e75-1ea9","instance_index":0,"limits":{"disk":1024,"fds":16384,"mem":1024},"name":"imarealwindowsapp","organization_id":"d396b0c6-872f-46a2-a752-bdea51819c06","organization_name":"system","port":8080,"process_id":"b55b34e2-c434-4782-b44e-3f9f469dd70c","process_type":"web","space_id":"4e081328-2ac1-4509-8f51-ffcbfc012165","space_name":"ops","uris":["imarealwindowsapp.apps.codex.starkandwayne.com"],"version":"1bd0703a-4f13-45c8-86cb-0632db5cd6bd"}
My port: 8080
My instance index: 0
My custom env variable:

Finally, if you look at the logs you'll see that the app emits a timestamp tick every second, which is what the smoke tests look for to validate logging is working:

$ cf logs imarealwindowsapp
Retrieving logs for app imarealwindowsapp in org system / space ops as admin...

   2022-04-27T17:11:15.44+0000 [APP/PROC/WEB/0] OUT Tick: 1651079475
   2022-04-27T17:11:16.45+0000 [APP/PROC/WEB/0] OUT Tick: 1651079476
   2022-04-27T17:11:17.46+0000 [APP/PROC/WEB/0] OUT Tick: 1651079477
   2022-04-27T17:11:18.47+0000 [APP/PROC/WEB/0] OUT Tick: 1651079478
   2022-04-27T17:11:19.47+0000 [APP/PROC/WEB/0] OUT Tick: 1651079479

If you are curious on how to use this in a bosh errand to run the complete Cloud Foundry Windows Smoke Tests, be sure to visit https://www.starkandwayne.com/blog/adding-windows-smoke-tests-to-cloud-foundry/

Enjoy!

The post A Sample Windows Cloud Foundry App appeared first on Stark & Wayne.

]]>
Ashley Gerwitz <![CDATA[I switched from bash to PowerShell, and it’s going great!]]> https://www.starkandwayne.com/?p=11522 2022-04-11T20:18:10Z 2022-04-11T20:03:00Z

No, I'm not crazy, and no I'm not trolling you! This is for real!

No longer single-platform or closed source, Microsoft's PowerShell Core is now an open source, full-featured, cross-platform (MacOS, Linux, more) shell sporting some serious improvements over the venerable /bin/[bash|zsh] for those souls brave enough to use it as their daily driver.

I made the switch about six months ago and couldn't be happier; it's by far one of the best tooling/workflow decisions I've made in my multi-decade career. PowerShell's consistent naming conventions, built-in documentation system, and object-oriented approach have made me more productive by far, and I've had almost zero challenges integrating it with my day-to-day workflow despite using a mix of both Linux and MacOS.

At a Glance

  • Multi-Platform, Multiple Installation Options:
    • Linux: deb, rpm, AUR, or just unpack a tarball and run'
    • MacOS: Homebrew cask: brew install powershell --cask, Intel x64 and arm64 available, .pkg installers downloadable
      • Only available as a cask, and casks are unavailable on Linux, so I suggest other avenues for you linuxbrew folks out there.
  • POSIX binaries work out of the box as expected
    • ps aux | grep -i someproc works fine
    • No emulation involved whatsoever, no containers, no VMs, no "hax"
    • Could be enhanced via recently-released Crescendo
  • No trust? No problem! It's fully open source!
  • Killer feature: Real CLASSES, TYPES, OBJECTS, METHODS and PROPERTIES. No more string manipulation fragility!

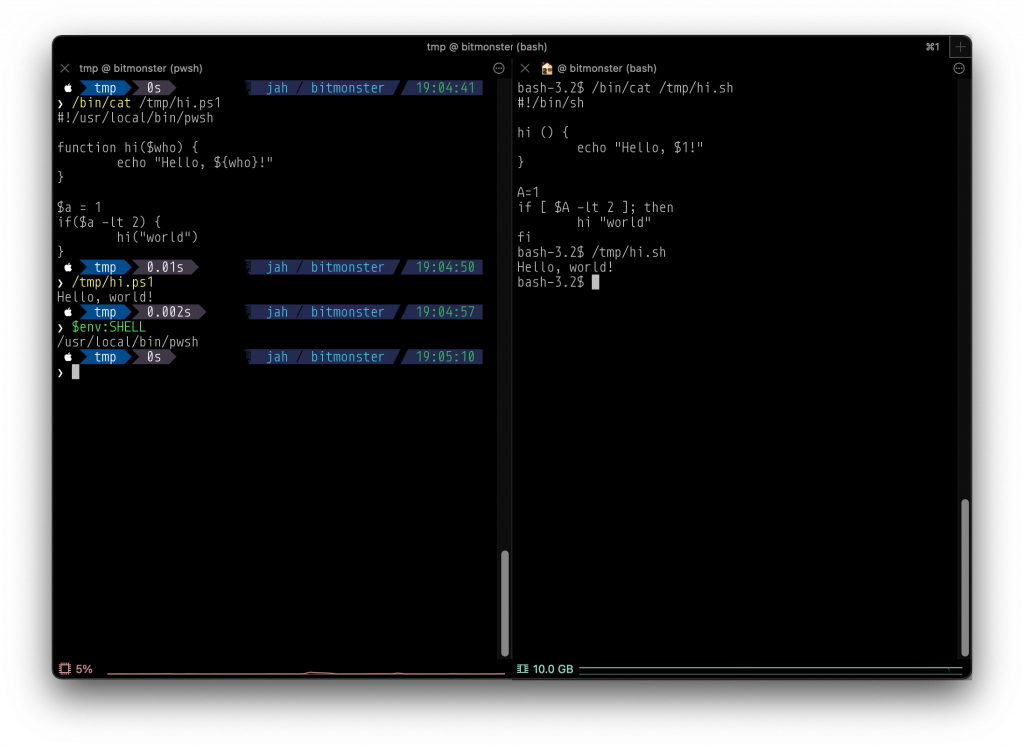
Scripting is much easier and more pleasant with PowerShell because its syntax is very similar to many other scripting languages (unlike bash). PowerShell also wins out when it comes to naming conventions for built-in commands and statements. You can invoke old-school POSIX-only commands through PowerShell and they work just like before, with no changes; so things like ps aux or sudo vim /etc/hosts work out of the box without any change in your workflow at all.

I don't have to worry about what version of bash or zsh is installed on the target operating system, nor am I worried about Apple changing that on me by sneaking it into a MacOS upgrade or dropping something entirely via a minor update.

Developer 1: Here's a shell script for that work thing.

Developer 2: It doesn't run on my computer

Developer 1: What version of bash are you using?

Developer 2: Whatever ships with my version of MacOS

Developer 1: Do echo $BASH_VERSION, what's that say?

Developer 2: Uhh, says 3.2

Developer 1: Dear god that's old!

Developer 3: You guys wouldn't have this problem with PowerShell Core

The biggest advantage PowerShell provides, by far, is that it doesn't deal in mere simplistic strings alone, but in full-fledged classes and objects, with methods, properties, and data types. No more fragile grep|sed|awk nonsense! You won't have to worry about breaking everything if you update the output of a PowerShell script! Try changing a /bin/sh script to output JSON by default and see what happens to your automation!

PowerShell works exactly as you would expect on Linux and MacOS, right out of the box. Invoking and running compiled POSIX binaries (e.g. ps|cat|vim|less, etc.) works exactly like it does with bash or zsh and you don't have to change that part of your workflow whatsoever (which is good for those of us with muscle memory built over 20+ years!). You can set up command aliases, new shell functions, a personal profile (equivalent of ~/.bashrc), custom prompts and shortcuts - whatever you want! If you can do it with bash, you can do it BETTER with PowerShell.

Taken all together, the case for trying out modern PowerShell is incredibly strong. You'll be shocked at how useful it is! The jolt it'll give your productivity is downright electrifying and it can seriously amp up your quality of life!

Okay, okay, fine: I'll stop with the electricity puns.

I promise nothing.

Nothing wrong with bash/zsh

Let me get this out of the way: There's nothing wrong with bash or zsh. They're fine. They work, they work well, they're fast as hell, and battle-tested beyond measure. I'm absolutely NOT saying they're "bad" or that you're "bad" for using them. I did too, for over 20 years! And I still do every time I hit [ENTER] after typing ssh [...]! They've been around forever, and they're well respected for good reason.

PowerShell is simply different, based on a fundamentally more complex set of paradigms than the authors of bash or zsh could have imagined at the time those projects began. In fact, pwsh couldn't exist in its current state without standing on the shoulders of giants like bash and zsh, so respect, here, is absolutely DUE.

That said, I stand by my admittedly-controversial opinion that PowerShell is just plain better in almost all cases. This post attempts to detail why I'm confident in that statement.

bash and zsh are Thomas Edison minus the evil: basic, safe, known, and respected, if a bit antiquated. PowerShell is like Nikola Tesla: a "foreigner" with a fundamentally unique perspective, providing a more advanced approach that's far ahead of its time.

A Tale of Two PowerShells

You may see references to two flavors of PowerShell out there on the interweb: "Windows PowerShell" and "PowerShell Core":

  • "Windows" PowerShell typically refers to the legacy variant of PowerShell, version 5.1 or earlier, that indeed is Windows-only. It's still the default PowerShell install on Windows 10/11 (as of this writing), but with no new development/releases for this variant since 2016, I don't advise using it.
    • Note that PowerShell ISE - "Integrated Scripting Environment" - relies on this version of PowerShell, and as such, is Windows-Only. It's essentially been replaced by VS Code with an extension.
  • PowerShell Core is what you want: cross-platform, open source, and as of this writing, at version 7.2.

Of the two, you want PowerShell Core, which refers to PowerShell version 6.0 or higher. Avoid all others.

For the remainder of this article, any references to "PowerShell" or pwsh refer exclusively to PowerShell Core. Pretend Windows PowerShell doesn't exist; it shouldn't, and while Microsoft has yet to announce its official EOL, the trend is clear: Core is the future.

PowerShell: More than a Shell

PowerShell is more than simply a shell. It's an intuitive programming environment and scripting language that's been wrapped inside a feature-packed REPL and heavily refined with an intentional focus on better user experience via consistency and patterns without loss of execution speed or efficiency.

Basically, if you can do it in bash or zsh, you can do it - and a whole lot more - in PowerShell. In most cases, you can do it faster and easier, leading to a far more maintainable and portable final result (e.g. tool, library, etc.) that, thanks to PowerShell Core's multi-platform nature, is arguably more portable than bash/zsh (which require non-trivial effort to install/update/configure on Windows).

And with modules from the PowerShell Gallery, it can be extended even further, with secrets management capabilities and even a system automation framework known as "Desired State Configuration" (DSC).

Note: DSC is, as of this writing, a Windows-Only feature. Starting in PowerShell Core 7.2 they moved it out of PowerShell itself and into a separate module to enable future portability. In DSC version 3.0, currently in "preview", it's expected to be available on Linux. Whether or not I'd trust a production Linux machine with this, however, is another topic entirely. Caveat emptor.

A Scripting Language So Good It'll Shock You

PowerShell really shines as a fully-featured scripting language with one critical improvement not available in bash or zsh: objects with methods and properties of various data types.

Say goodbye to the arcane insanity that is sed and associated madness! With PowerShell, you don't get back mere strings, you get back honest-to-goodness OBJECTS with properties and methods, each of which corresponds to a data type!

No more being afraid to modify the output of that Perl script from 1998 that's holding your entire infrastructure together because it'll crash everything if you put an extra space in the output, or - *gasp* - output JSON!

Purely for the purposes of demonstration, take a look at these two scripts for obtaining a list of currently running processes that exceed a given amount of memory. I'm no shell script whiz by any means, but even if /usr/bin/ps had a consistent, unified implementation across BSD, MacOS, Linux and other POSIX operating systems, you'd still have a much harder time using bash than you do with PowerShell:

Screenshot of two scripts, side-by-side, that show all processes using over 200mb of memory.
PowerShell (left): 3 lines. bash (right): 25. You do the math.

Rather than lengthen an article already in the running for "TL;DR of the month", I'll just link to gists for those scripts:

Disclaimer: I never claimed to be a shell script whiz, but I'd be surprised to see any bash/zsh implementation do this easier without additional tools - which PowerShell clearly doesn't need.

In the case of bash, since we have to manipulate strings directly, the output formatting is absolutely crucial; any changes, and the entire shell script falls apart. This is fundamentally fragile, which makes it error prone, which means it's high-risk. It also requires some external tooling or additional work on the part of the script author to output valid JSON. And if you look at that syntax, you might go blind!

By contrast, what took approximately 25-ish lines in bash takes only three with PowerShell, and you could even shorten that if readability wasn't a concern. Additionally, PowerShell allows you to write data to multiple output "channels", such as "Verbose" and "Debug", in addition to STDOUT. This way I can run the above PowerShell script, redirect its output to a file, and still get that diagnostic information on my screen, but NOT in the file, thus separating the two. Put simply, I can output additional information without STDERR on a per-run basis whenever I want, without any chance of corrupting the final output result, which may be relied upon by other programs (redirection to file, another process, etc.)

Plug In to (optional) Naming Conventions

Unlike the haphazard naming conventions mess that is the *nix shell scripting and command world, the PowerShell community has established a well-designed, explicit, and consistent set of naming conventions for commands issued in the shell, be they available as modules installed by default, obtained elsewhere, or even stuff you write yourself. You're not forced into these naming conventions of course, but once you've seen properly-named commands in action, you'll never want to go back. The benefits become self-evident almost immediately:

*nix shell command or utility PowerShell equivalent Description
cd Set-Location Change directories
pushd / popd Push-Location / Pop-Location push/pop location stack
pwd Get-Location What directory am I in?
cat Get-Content Display contents of a file (generally plain text) on STDOUT
which Get-Command Find out where a binary or command is, or see which one gets picked up from $PATH first
pbcopy / pbpaste on MacOS (Linux or BSD, varies) Get-Clipboard / Set-Clipboard Retrieve or Modify the contents of the clipboard/paste buffer on your local computer
echo -e "\e[31mRed Text\e[0m Write-Host -ForegroundColor Red "Red Text" Write some text to the console in color (red in this example)

No, you don't literally have to type Set-Location every single time you want to change directories. Good 'ol cd still works just fine, as do dozens of common *nix commands. Basically just use it like you would bash and it "Just Works™".

To see all aliases at runtime, try Get-Alias. To discover commands, try Get-Command *whatever*. Tab-completion is also available out-of-the-box.

See the pattern? All these commands are in the form of Verb-Noun. They all start with what you want to do, then end with what you want to do it TO. Want to WRITE stuff to the HOST's screen? Write-Host. Want to GET what LOCATION (directory) you're currently in? Get-Location. You could also run $PWD | Write-Host to take the automatic variable $PWD - present working directory - and pipe that to the aforementioned echo equivalent. (To simplify it even further, the pipe and everything after it aren't technically required unless in a script!)

Most modules for PowerShell follow these conventions as well, so command discoverability becomes nearly automatic. With known, established, consistent conventions, you'll never wonder what some command is called ever again because it'll be easily predictable.

And if not, there's a real easy way to find out what's what:

Get-Verb
  # Shows established verbs with descriptions of each
Get-Command -Verb *convert*
  # Shows all commands w/ "convert" in the name
  # For example, ConvertFrom-Json, ConvertTo-Csv, etc.
Get-Command -Noun File
  # What's the command to write stuff to a file? 
  # Well, look up all the $VERB-File commands to start!
  # See also: Get-Command *file* for all commands with "file" in the name

Note that cAsE sEnSiTiViTy is a little odd with PowerShell on *nix:

If the command/file is from... Is it cAsE sEnSiTiVe? Are its args cAsE sEnSiTiVe?
$PATH or the underlying OS/filesystem YES Generally Yes
Depends on the implementation
PowerShell Itself (cmdlet) No Generally No
Possible, but not common
Are commands case-sensitive in PowerShell? It depends.

Note that there are always exceptions to every rule, so there are times the above may fail you. Snowflakes happen. My general rule of thumb, which has never steered me wrong in these cases, is this:

Assume EVERYTHING is cAsE sEnSiTiVe.

If you're wrong, it works. If you're right, it works. Either way, you win!

Documentation: The Path of Least Resistance

Ever tried to write a formatted man page? It's painful:

.PP
The \fB\fCcontainers.conf\fR file should be placed under \fB\fC$HOME/.config/containers/containers.conf\fR on Linux and Mac and \fB\fC%APPDATA%\\containers\\containers.conf\fR on Windows.

.PP
\fBpodman [GLOBAL OPTIONS]\fP

.SH GLOBAL OPTIONS
.SS \fB--connection\fP=\fIname\fP, \fB-c\fP
.PP
Remote connection name

.SS \fB--help\fP, \fB-h\fP
.PP
Print usage statement

This is a small excerpt from a portion of the podman manual page. Note the syntax complexity and ambiguity.

By contrast, you can document your PowerShell functions with plain-text comments right inside the same file:

#!/usr/bin/env pwsh

# /home/myuser/.config/powershell/profile.ps1

<#
.SYNOPSIS
  A short one-liner describing your function
.DESCRIPTION
  You can write a longer description (any length) for display when the user asks for extended help documentation.
  Give all the overview data you like here.
.NOTES
  Miscellaneous notes section for tips, tricks, caveats, warnings, one-offs...
.EXAMPLE
  Get-MyIP # Runs the command, no arguments, default settings
.EXAMPLE
  Get-MyIP -From ipinfo.io -CURL # Runs `curl ipinfo.io` and gives results
#>

function Get-MyIP { ... }

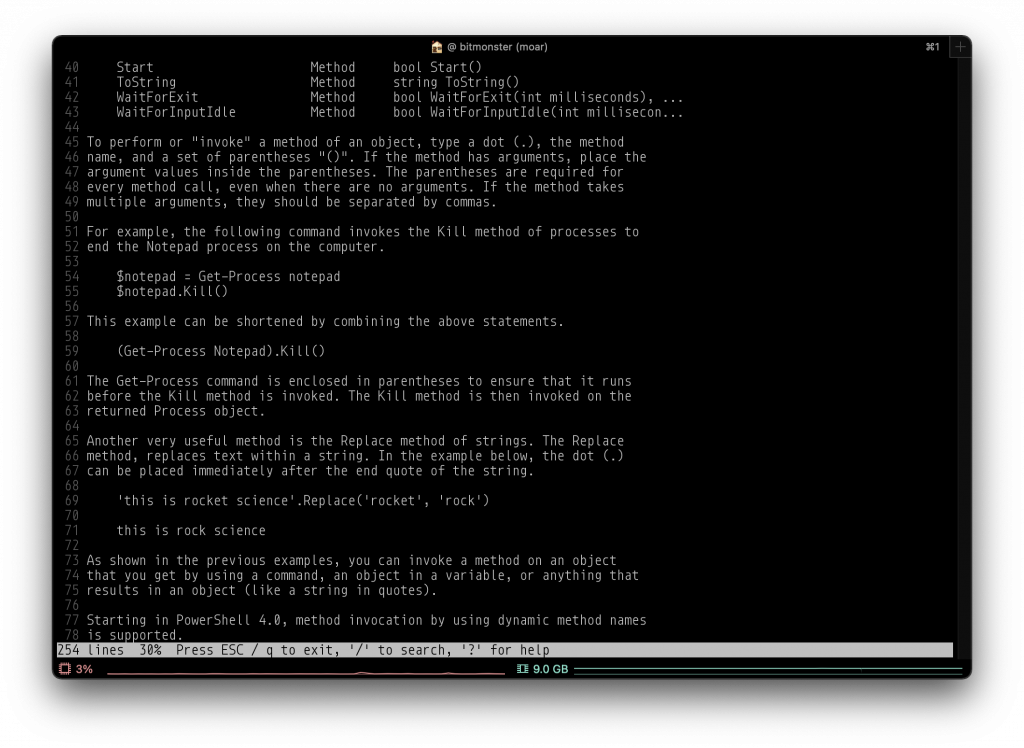
Given the above example, an end-user could simply type help Get-MyIP in PowerShell and be presented with comprehensive help documentation including examples within their specified $PAGER (e.g. less or my current favorite, moar). You can even just jump straight to the examples if you want, too:

> Get-Help -Examples Get-History

NAME
    Get-History

SYNOPSIS
    Gets a list of the commands entered during the current session.

    [...]

    --------- Example 2: Get entries that include a string ---------

    Get-History | Where-Object {$_.CommandLine -like "*Service*"}

    [...]

I've long said that if a developer can't be bothered to write at least something useful about how to use their product or tool, it ain't worth much. Usually nothing. Because nobody has time to go spelunking through your code to figure out how to use your tool - if we did, we'd write our own.

That's why anything that makes documentation easier and more portable is a win in my book, and in this category, PowerShell delivers. The syntax summaries and supported arguments list are even generated dynamically by PowerShell! You don't have to write that part at all!

The One Caveat: Tooling

Most tooling for *nix workflows is stuck pretty hard in sh land. Such tools have been developed, in some cases, over multiple decades, with conventions unintentionally becoming established in a somewhat haphazard manner, though without much (if any) thought whatsoever toward the portability of those tools to non-UNIX shells.

And let's face it, that's 100% Microsoft's fault. No getting around the fact that they kept PowerShell a Windows-only, closed-source feature for a very long time, and that being the case, why should developers on non-Windows platforms have bothered? Ignoring it was - note the past tense here - entirely justified.

But now that's all changed. Modern PowerShell isn't at all Windows-only anymore, and it's fully open source now, too. It works on Linux, MacOS, and other UNIX-flavored systems, too (though you likely have to compile from source) along with Windows, of course. bash, while ubiquitous on *nix platforms, is wildly inconsistent in which version is deployed or installed, has no built-in update notification ability, and often requires significant manual work to implement a smooth and stable upgrade path. It's also non-trivial to install on Windows.

PowerShell, by contrast, is available on almost as many platforms (though how well tested it is outside the most popular non-Windows platforms is certainly up for debate), is available to end-users via "click some buttons and you're done" MSI installers for Windows or PKG installers on MacOS, and is just as easy to install on *nix systems as bash is on Windows machines (if not easier in some cases; e.g. WSL).

Additionally, PowerShell has a ton of utilities available out-of-the box that bash has to rely on external tooling to provide. This means that any bash script that relies on that external tooling can break if said tooling has unaccounted for implementation differences. If this sounds purely academic, consider the curious case of ps on Linux:

$ man ps
[...]

This version of ps accepts several kinds of options:

       1   UNIX options, which may be grouped and must be preceded by a dash.
       2   BSD options, which may be grouped and must not be used with a dash.
       3   GNU long options, which are preceded by two dashes.

       Options of different types may be freely mixed, but conflicts can appear.
       [...] due to the many standards and ps implementations that this ps is
       compatible with.

       Note that ps -aux is distinct from ps aux. [...]

Source: ps manual from Fedora Linux 35

By contrast, PowerShell implements its own Get-Process cmdlet (a type of shell function, basically) so that you don't even need ps or anything like it at all. The internal implementation of how that function works varies by platform, but the end result is the same on every single one. You don't have to worry about the way it handles arguments snowflaking from Linux to MacOS, because using it is designed to be 100% consistent across all platforms when relying purely on PowerShell's built-in commands.

And, if you really do need an external tool that is entirely unaware of PowerShell's existence? No problem: you can absolutely (maybe even easily?) integrate existing tools with PowerShell, if you, or the authors of that tool, so desire.

But, IS there such a desire? Does it presently exist?

Probably not.

Open source developers already work for free, on their own time, to solve very complex problems. They do this on top of their normal "day job," not instead of it (well, most, anyway).

Shout-out to FOSS contributors: THANK YOU all, so much, for what you do! Without you, millions of jobs and livelihoods would not exist, so have no doubt that your efforts matter!

It's beyond ridiculous to expect that these unsung heroes would, without even being paid in hugs, let alone real money, add to their already superhuman workload by committing to support a shell they've long thought of as "yet another snowflake" with very limited adoption or potential, from a company they've likely derided for decades, sometimes rightly so. You can't blame these folks for saying "nope" to PowerShell, especially given its origin story as a product from a company that famously "refuses to play well with others."

And therein lies the problem: many sh-flavored tools just don't have any good PowerShell integrations or analogs (yet). That may change over time as more people become aware of just how awesome modern pwsh can be (why do you think I wrote this article!?). But for the time being, tools that developers like myself have used for years, such as rvm, rbenv, asdf, and so on, just don't have any officially supported way to be used within PowerShell.

The good news is that this is a solvable problem, and in more ways than one!

Overload Limitations With Your Own PowerShell Profile

The most actionable of these potential solutions is the development of your own pwsh profile code that will sort of fake a given command, within PowerShell only, to allow you to use the same command/workflow you would have in bash or zsh, implemented as a compatibility proxy under the hood within PowerShell.

For a real-world example, here's a very simplistic implementation of a compatibility layer to enable rbenv and bundle commands (Ruby development) in PowerShell (according to my own personal preferences) by delegating to the real such commands under the hood:

#
# Notes:
#   1. My $env:PATH has already been modified to find rbenv in this example
#   2. See `help about_Splatting`, or the following article (same thing), to understand @Args
#          https://docs.microsoft.com/en-us/powershell/module/microsoft.powershell.core/about/about_splatting?view=powershell-7.2
#          Oversimplification: @Args = "grab whatever got passed to this thing, then throw 'em at this other thing VERBATIM"
#

function Invoke-rbenv {
  rbenv exec @Args
}

function irb {
  Invoke-rbenv irb @Args
}

function gem {
  Invoke-rbenv gem @Args
}

function ruby {
  Invoke-rbenv ruby @Args
}

function bundle {
  Invoke-rbenv bundle @Args
}

function be {
  Invoke-rbenv bundle exec @Args
}

With this in place, I can type out commands like be puma while working on a Rails app, and have that delegated to rbenv's managed version of bundler, which then execs that command for me. And it's all entirely transparent to me!

This is just one example and an admittedly simplistic one at that. Nonetheless, it proves that using PowerShell as your daily driver is not only possible but feasible, even when you need to integrate with other tools that are entirely unaware of PowerShell's existence.

But, we can go a step further with the recently-released PowerShell Crescendo. While I have yet to look into this all that much, essentially it provides a way for standard *nix tools to have their output automatically transformed from basic strings into real PowerShell objects at runtime. You have to write some parsing directives to tell PowerShell how to interpret the strings generated by some program, but once that's done you're set: you'll have non-PowerShell tools generating real PowerShell objects without any change to the tools themselves at all.

Jump on the Voltswagon!

If you're not convinced by now, something's wrong with you.

For the rest of you out there, you've got some options for installation:

  1. Use the packages provided by Microsoft (deb, rpm) (sudo required)
  2. Grab a precompiled Linux tarball then unpack it somewhere and run: /path/to/powershell/7.2/pwsh (no sudo required)
  3. Mac users can brew install powershell --cask. (sudo required for .pkg installer)

Antipattern: Do NOT change your default login shell

Don't do this: chsh -s $(which pwsh)

Modify your terminal emulator profile instead.

Just a quick tip: while PowerShell works fine as a default login shell and you can certainly use it this way, other software may break if you do this because it may assume your default login shell is always bash-like and not bother to check. This could cause some minor breakage here and there.

But the real reason I advise against this is more to protect yourself from yourself. If you shoot yourself in the foot with your pwsh configuration and totally bork something, you won't have to worry too much about getting back to a working bash or zsh configuration so you can get work done again, especially if you're in an emergency support role or environment.

When you're first learning, fixing things isn't always a quick or easy process, and sometimes you just don't have time to fiddle with all that, so it's good to have a "backup environment" available just in case you have to act fast to save the day.

Don't interpret this as "PowerShell is easy to shoot yourself in the foot with" - far from it. Its remarkable level of clarity and consistency make it very unlikely that you'll do this, but it's still possible. And rather than just nuking your entire PowerShell config directory and starting from scratch, it's far better to pick it apart and make yourself fix it, because you learn the most when you force yourself through the hard problems. But you won't always have time to do that, especially during your day job, so having a fallback option is always a good idea.

First Steps

Once installed, I recommend you create a new profile specifically for PowerShell in your terminal emulator of choice, then make that the default profile (don't remove or change the existing one if you can help it; again, have a fallback position just in case you screw things up and don't have time to fix it).

Specifically, you want your terminal emulator to run the program pwsh, located wherever you unpacked your tarball. If you installed it via the package manager, it should already be in your system's default $PATH so you probably won't need to specify the location (just pwsh is fine in that case). No arguments necessary.

With that done, run these commands first:

PS > Update-Help
PS > help about_Telemetry

The first will download help documentation from the internet so you can view help files in the terminal instead of having to go to a browser and get a bunch of outdated, irrelevant results from Google (I recommend feeding The Duck instead).

The second will tell you how to disable telemetry from being sent to Microsoft. It's not a crucial thing, and I don't think Microsoft is doing anything shady here at all, but I always advise disabling telemetry in every product you can, every time you can, everywhere you can, just as a default rule.

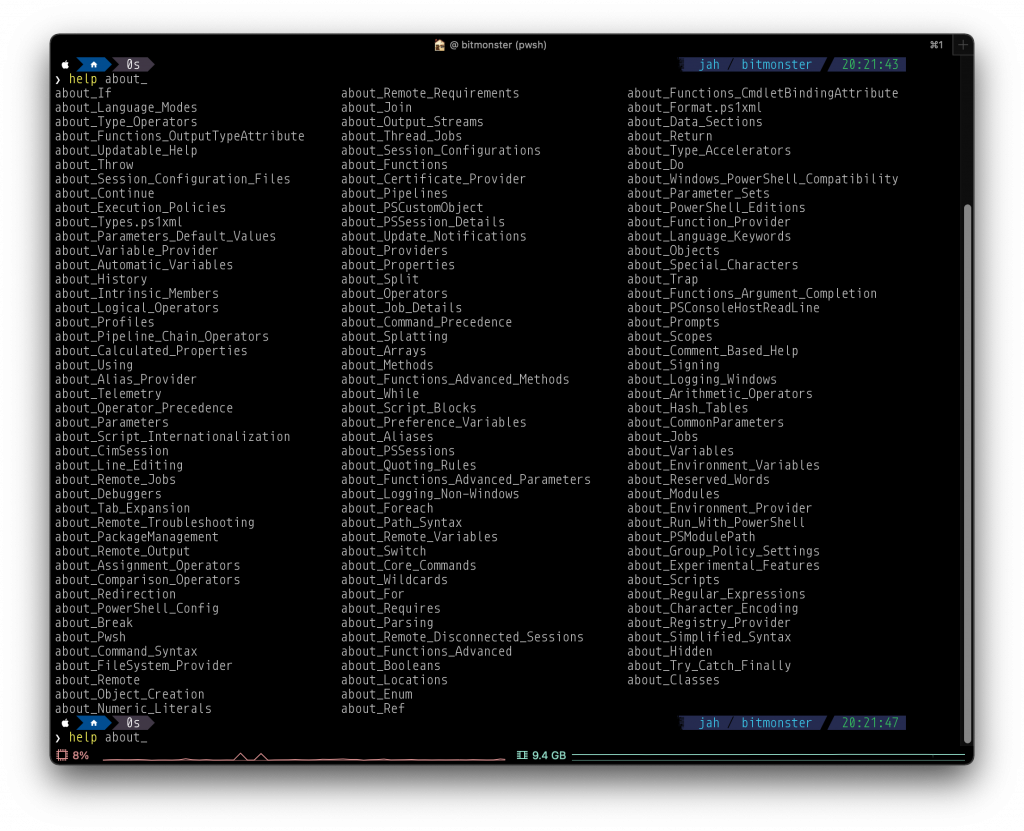
More importantly, however, this will introduce you to the help about_* documents, which are longer-form help docs that explain a series of related topics, instead of just one command. Seeing a list of what's available is nice and easy: just type help about_ then mash the TAB key a few times. It'll ask if you want to display all hundred-some-odd options; say Y. Find something that sounds interesting, then enter the entire article name, e.g. help about_Profiles or help about_Help, for example.

Next, check out my other article on this blog about customizing your PowerShell prompt!

Roll the Dice

bash and zsh are great tools: they're wicked fast, incredibly stable, and have decades of battle-tested, hard-won "tribal knowledge" built around them that's readily available via your favorite search engine.

But they're also antiquated. They're based on a simpler series of ideas that were right for their time, but fundamentally primitive when compared to the same considerations in mind when PowerShell was designed.

Sooner or later you just have to admit that something more capable exists, and that's when you get to make a choice: stick with what you know, safe in your comfort zone, or roll the dice on something that could potentially revolutionize your daily workflow.

Once I understood just a fraction of the value provided by pwsh, that choice became a no-brainer for me. It's been roughly six months since I switched full-time, and while I still occasionally have a few frustrations here and there, those cases are very few and far between (it's been at least two months since the last time something made me scratch my head and wonder).

But those frustrations are all part of the learning process. I see even more "WTF?" things with bash or zsh than I do with pwsh, by far! Those things are rarely easy to work out, and I struggle with outdated documentation from search results in nearly every case!

But with PowerShell, figuring out how to work around the problem - if indeed it is a problem, and not my own ignorance - is much easier because I'm not dealing with an arcane, arbitrary syntax from hell. Instead, I have a predictable, standardized, consistent set of commands and utilities available to me that are mostly self-documenting and available offline (not some archived forum post from 2006). On top of that, I have real classes and objects available to me, and a built-in debugger (with breakpoints!) that I can use to dig in and figure things out!

So, why are we still using system shells that are based on paradigms from the 1980's? Are you still rocking a mullet and a slap bracelet, too?

Just because "that's the way it's always been" DOESN'T mean that's the way it's always gotta be.

PowerShell is the first real innovation I've seen in our field in a long time. Generally replete with "social" networks, surveillance profiteering, user-generated "content" and any excuse to coerce people into subscriptions, our industry repackages decades-old innovations ad infinitum, even when new approaches are within reach, desperately needed, and certain to be profitable.

So in the rare case that something original that is actually useful, widely-available and open source finally does see the light of day, I get very intrigued. I get excited. And in this case, I "jumped on the Voltswagon!"

And you should, too!

The author would like to thank Chris Weibel for his help with some of those electricity puns, and Norm Abramovitz for his editorial assistance in refining this article.

The post I switched from bash to PowerShell, and it’s going great! appeared first on Stark & Wayne.

]]>

No, I'm not crazy, and no I'm not trolling you! This is for real!

No longer single-platform or closed source, Microsoft's PowerShell Core is now an open source, full-featured, cross-platform (MacOS, Linux, more) shell sporting some serious improvements over the venerable /bin/[bash|zsh] for those souls brave enough to use it as their daily driver.

I made the switch about six months ago and couldn't be happier; it's by far one of the best tooling/workflow decisions I've made in my multi-decade career. PowerShell's consistent naming conventions, built-in documentation system, and object-oriented approach have made me more productive by far, and I've had almost zero challenges integrating it with my day-to-day workflow despite using a mix of both Linux and MacOS.

At a Glance

  • Multi-Platform, Multiple Installation Options:
    • Linux: deb, rpm, AUR, or just unpack a tarball and run'
    • MacOS: Homebrew cask: brew install powershell --cask, Intel x64 and arm64 available, .pkg installers downloadable
      • Only available as a cask, and casks are unavailable on Linux, so I suggest other avenues for you linuxbrew folks out there.
  • POSIX binaries work out of the box as expected
    • ps aux | grep -i someproc works fine
    • No emulation involved whatsoever, no containers, no VMs, no "hax"
    • Could be enhanced via recently-released Crescendo
  • No trust? No problem! It's fully open source!
  • Killer feature: Real CLASSES, TYPES, OBJECTS, METHODS and PROPERTIES. No more string manipulation fragility!

Scripting is much easier and more pleasant with PowerShell because its syntax is very similar to many other scripting languages (unlike bash). PowerShell also wins out when it comes to naming conventions for built-in commands and statements. You can invoke old-school POSIX-only commands through PowerShell and they work just like before, with no changes; so things like ps aux or sudo vim /etc/hosts work out of the box without any change in your workflow at all.

I don't have to worry about what version of bash or zsh is installed on the target operating system, nor am I worried about Apple changing that on me by sneaking it into a MacOS upgrade or dropping something entirely via a minor update.

Developer 1: Here's a shell script for that work thing.

Developer 2: It doesn't run on my computer

Developer 1: What version of bash are you using?

Developer 2: Whatever ships with my version of MacOS

Developer 1: Do echo $BASH_VERSION, what's that say?

Developer 2: Uhh, says 3.2

Developer 1: Dear god that's old!

Developer 3: You guys wouldn't have this problem with PowerShell Core

The biggest advantage PowerShell provides, by far, is that it doesn't deal in mere simplistic strings alone, but in full-fledged classes and objects, with methods, properties, and data types. No more fragile grep|sed|awk nonsense! You won't have to worry about breaking everything if you update the output of a PowerShell script! Try changing a /bin/sh script to output JSON by default and see what happens to your automation!

PowerShell works exactly as you would expect on Linux and MacOS, right out of the box. Invoking and running compiled POSIX binaries (e.g. ps|cat|vim|less, etc.) works exactly like it does with bash or zsh and you don't have to change that part of your workflow whatsoever (which is good for those of us with muscle memory built over 20+ years!). You can set up command aliases, new shell functions, a personal profile (equivalent of ~/.bashrc), custom prompts and shortcuts - whatever you want! If you can do it with bash, you can do it BETTER with PowerShell.

Taken all together, the case for trying out modern PowerShell is incredibly strong. You'll be shocked at how useful it is! The jolt it'll give your productivity is downright electrifying and it can seriously amp up your quality of life!

Okay, okay, fine: I'll stop with the electricity puns.

I promise nothing.

Nothing wrong with bash/zsh

Let me get this out of the way: There's nothing wrong with bash or zsh. They're fine. They work, they work well, they're fast as hell, and battle-tested beyond measure. I'm absolutely NOT saying they're "bad" or that you're "bad" for using them. I did too, for over 20 years! And I still do every time I hit [ENTER] after typing ssh [...]! They've been around forever, and they're well respected for good reason.

PowerShell is simply different, based on a fundamentally more complex set of paradigms than the authors of bash or zsh could have imagined at the time those projects began. In fact, pwsh couldn't exist in its current state without standing on the shoulders of giants like bash and zsh, so respect, here, is absolutely DUE.

That said, I stand by my admittedly-controversial opinion that PowerShell is just plain better in almost all cases. This post attempts to detail why I'm confident in that statement.

bash and zsh are Thomas Edison minus the evil: basic, safe, known, and respected, if a bit antiquated. PowerShell is like Nikola Tesla: a "foreigner" with a fundamentally unique perspective, providing a more advanced approach that's far ahead of its time.

A Tale of Two PowerShells

You may see references to two flavors of PowerShell out there on the interweb: "Windows PowerShell" and "PowerShell Core":

  • "Windows" PowerShell typically refers to the legacy variant of PowerShell, version 5.1 or earlier, that indeed is Windows-only. It's still the default PowerShell install on Windows 10/11 (as of this writing), but with no new development/releases for this variant since 2016, I don't advise using it.
    • Note that PowerShell ISE - "Integrated Scripting Environment" - relies on this version of PowerShell, and as such, is Windows-Only. It's essentially been replaced by VS Code with an extension.
  • PowerShell Core is what you want: cross-platform, open source, and as of this writing, at version 7.2.

Of the two, you want PowerShell Core, which refers to PowerShell version 6.0 or higher. Avoid all others.

For the remainder of this article, any references to "PowerShell" or pwsh refer exclusively to PowerShell Core. Pretend Windows PowerShell doesn't exist; it shouldn't, and while Microsoft has yet to announce its official EOL, the trend is clear: Core is the future.

PowerShell: More than a Shell

PowerShell is more than simply a shell. It's an intuitive programming environment and scripting language that's been wrapped inside a feature-packed REPL and heavily refined with an intentional focus on better user experience via consistency and patterns without loss of execution speed or efficiency.

Basically, if you can do it in bash or zsh, you can do it - and a whole lot more - in PowerShell. In most cases, you can do it faster and easier, leading to a far more maintainable and portable final result (e.g. tool, library, etc.) that, thanks to PowerShell Core's multi-platform nature, is arguably more portable than bash/zsh (which require non-trivial effort to install/update/configure on Windows).

And with modules from the PowerShell Gallery, it can be extended even further, with secrets management capabilities and even a system automation framework known as "Desired State Configuration" (DSC).

Note: DSC is, as of this writing, a Windows-Only feature. Starting in PowerShell Core 7.2 they moved it out of PowerShell itself and into a separate module to enable future portability. In DSC version 3.0, currently in "preview", it's expected to be available on Linux. Whether or not I'd trust a production Linux machine with this, however, is another topic entirely. Caveat emptor.

A Scripting Language So Good It'll Shock You

PowerShell really shines as a fully-featured scripting language with one critical improvement not available in bash or zsh: objects with methods and properties of various data types.

Say goodbye to the arcane insanity that is sed and associated madness! With PowerShell, you don't get back mere strings, you get back honest-to-goodness OBJECTS with properties and methods, each of which corresponds to a data type!

No more being afraid to modify the output of that Perl script from 1998 that's holding your entire infrastructure together because it'll crash everything if you put an extra space in the output, or - *gasp* - output JSON!

Purely for the purposes of demonstration, take a look at these two scripts for obtaining a list of currently running processes that exceed a given amount of memory. I'm no shell script whiz by any means, but even if /usr/bin/ps had a consistent, unified implementation across BSD, MacOS, Linux and other POSIX operating systems, you'd still have a much harder time using bash than you do with PowerShell:

Screenshot of two scripts, side-by-side, that show all processes using over 200mb of memory.
PowerShell (left): 3 lines. bash (right): 25. You do the math.

Rather than lengthen an article already in the running for "TL;DR of the month", I'll just link to gists for those scripts:

Disclaimer: I never claimed to be a shell script whiz, but I'd be surprised to see any bash/zsh implementation do this easier without additional tools - which PowerShell clearly doesn't need.

In the case of bash, since we have to manipulate strings directly, the output formatting is absolutely crucial; any changes, and the entire shell script falls apart. This is fundamentally fragile, which makes it error prone, which means it's high-risk. It also requires some external tooling or additional work on the part of the script author to output valid JSON. And if you look at that syntax, you might go blind!

By contrast, what took approximately 25-ish lines in bash takes only three with PowerShell, and you could even shorten that if readability wasn't a concern. Additionally, PowerShell allows you to write data to multiple output "channels", such as "Verbose" and "Debug", in addition to STDOUT. This way I can run the above PowerShell script, redirect its output to a file, and still get that diagnostic information on my screen, but NOT in the file, thus separating the two. Put simply, I can output additional information without STDERR on a per-run basis whenever I want, without any chance of corrupting the final output result, which may be relied upon by other programs (redirection to file, another process, etc.)

Plug In to (optional) Naming Conventions

Unlike the haphazard naming conventions mess that is the *nix shell scripting and command world, the PowerShell community has established a well-designed, explicit, and consistent set of naming conventions for commands issued in the shell, be they available as modules installed by default, obtained elsewhere, or even stuff you write yourself. You're not forced into these naming conventions of course, but once you've seen properly-named commands in action, you'll never want to go back. The benefits become self-evident almost immediately:

*nix shell command or utilityPowerShell equivalentDescription
cdSet-LocationChange directories
pushd / popdPush-Location / Pop-Locationpush/pop location stack
pwdGet-LocationWhat directory am I in?
catGet-ContentDisplay contents of a file (generally plain text) on STDOUT
whichGet-CommandFind out where a binary or command is, or see which one gets picked up from $PATH first
pbcopy / pbpaste on MacOS (Linux or BSD, varies)Get-Clipboard / Set-ClipboardRetrieve or Modify the contents of the clipboard/paste buffer on your local computer
echo -e "\e[31mRed Text\e[0mWrite-Host -ForegroundColor Red "Red Text"Write some text to the console in color (red in this example)

No, you don't literally have to type Set-Location every single time you want to change directories. Good 'ol cd still works just fine, as do dozens of common *nix commands. Basically just use it like you would bash and it "Just Works™".

To see all aliases at runtime, try Get-Alias. To discover commands, try Get-Command *whatever*. Tab-completion is also available out-of-the-box.

See the pattern? All these commands are in the form of Verb-Noun. They all start with what you want to do, then end with what you want to do it TO. Want to WRITE stuff to the HOST's screen? Write-Host. Want to GET what LOCATION (directory) you're currently in? Get-Location. You could also run $PWD | Write-Host to take the automatic variable $PWD - present working directory - and pipe that to the aforementioned echo equivalent. (To simplify it even further, the pipe and everything after it aren't technically required unless in a script!)

Most modules for PowerShell follow these conventions as well, so command discoverability becomes nearly automatic. With known, established, consistent conventions, you'll never wonder what some command is called ever again because it'll be easily predictable.

And if not, there's a real easy way to find out what's what:

Get-Verb
  # Shows established verbs with descriptions of each
Get-Command -Verb *convert*
  # Shows all commands w/ "convert" in the name
  # For example, ConvertFrom-Json, ConvertTo-Csv, etc.
Get-Command -Noun File
  # What's the command to write stuff to a file? 
  # Well, look up all the $VERB-File commands to start!
  # See also: Get-Command *file* for all commands with "file" in the name

Note that cAsE sEnSiTiViTy is a little odd with PowerShell on *nix:

If the command/file is from...Is it cAsE sEnSiTiVe?Are its args cAsE sEnSiTiVe?
$PATH or the underlying OS/filesystemYESGenerally Yes
Depends on the implementation
PowerShell Itself (cmdlet)NoGenerally No
Possible, but not common
Are commands case-sensitive in PowerShell? It depends.

Note that there are always exceptions to every rule, so there are times the above may fail you. Snowflakes happen. My general rule of thumb, which has never steered me wrong in these cases, is this:

Assume EVERYTHING is cAsE sEnSiTiVe.

If you're wrong, it works. If you're right, it works. Either way, you win!

Documentation: The Path of Least Resistance

Ever tried to write a formatted man page? It's painful:

.PP
The \fB\fCcontainers.conf\fR file should be placed under \fB\fC$HOME/.config/containers/containers.conf\fR on Linux and Mac and \fB\fC%APPDATA%\\containers\\containers.conf\fR on Windows.

.PP
\fBpodman [GLOBAL OPTIONS]\fP

.SH GLOBAL OPTIONS
.SS \fB--connection\fP=\fIname\fP, \fB-c\fP
.PP
Remote connection name

.SS \fB--help\fP, \fB-h\fP
.PP
Print usage statement

This is a small excerpt from a portion of the podman manual page. Note the syntax complexity and ambiguity.

By contrast, you can document your PowerShell functions with plain-text comments right inside the same file:

#!/usr/bin/env pwsh

# /home/myuser/.config/powershell/profile.ps1

<#
.SYNOPSIS
  A short one-liner describing your function
.DESCRIPTION
  You can write a longer description (any length) for display when the user asks for extended help documentation.
  Give all the overview data you like here.
.NOTES
  Miscellaneous notes section for tips, tricks, caveats, warnings, one-offs...
.EXAMPLE
  Get-MyIP # Runs the command, no arguments, default settings
.EXAMPLE
  Get-MyIP -From ipinfo.io -CURL # Runs `curl ipinfo.io` and gives results
#>

function Get-MyIP { ... }

Given the above example, an end-user could simply type help Get-MyIP in PowerShell and be presented with comprehensive help documentation including examples within their specified $PAGER (e.g. less or my current favorite, moar). You can even just jump straight to the examples if you want, too:

> Get-Help -Examples Get-History

NAME
    Get-History

SYNOPSIS
    Gets a list of the commands entered during the current session.

    [...]

    --------- Example 2: Get entries that include a string ---------

    Get-History | Where-Object {$_.CommandLine -like "*Service*"}

    [...]

I've long said that if a developer can't be bothered to write at least something useful about how to use their product or tool, it ain't worth much. Usually nothing. Because nobody has time to go spelunking through your code to figure out how to use your tool - if we did, we'd write our own.

That's why anything that makes documentation easier and more portable is a win in my book, and in this category, PowerShell delivers. The syntax summaries and supported arguments list are even generated dynamically by PowerShell! You don't have to write that part at all!

The One Caveat: Tooling

Most tooling for *nix workflows is stuck pretty hard in sh land. Such tools have been developed, in some cases, over multiple decades, with conventions unintentionally becoming established in a somewhat haphazard manner, though without much (if any) thought whatsoever toward the portability of those tools to non-UNIX shells.

And let's face it, that's 100% Microsoft's fault. No getting around the fact that they kept PowerShell a Windows-only, closed-source feature for a very long time, and that being the case, why should developers on non-Windows platforms have bothered? Ignoring it was - note the past tense here - entirely justified.

But now that's all changed. Modern PowerShell isn't at all Windows-only anymore, and it's fully open source now, too. It works on Linux, MacOS, and other UNIX-flavored systems, too (though you likely have to compile from source) along with Windows, of course. bash, while ubiquitous on *nix platforms, is wildly inconsistent in which version is deployed or installed, has no built-in update notification ability, and often requires significant manual work to implement a smooth and stable upgrade path. It's also non-trivial to install on Windows.

PowerShell, by contrast, is available on almost as many platforms (though how well tested it is outside the most popular non-Windows platforms is certainly up for debate), is available to end-users via "click some buttons and you're done" MSI installers for Windows or PKG installers on MacOS, and is just as easy to install on *nix systems as bash is on Windows machines (if not easier in some cases; e.g. WSL).

Additionally, PowerShell has a ton of utilities available out-of-the box that bash has to rely on external tooling to provide. This means that any bash script that relies on that external tooling can break if said tooling has unaccounted for implementation differences. If this sounds purely academic, consider the curious case of ps on Linux:

$ man ps
[...]

This version of ps accepts several kinds of options:

       1   UNIX options, which may be grouped and must be preceded by a dash.
       2   BSD options, which may be grouped and must not be used with a dash.
       3   GNU long options, which are preceded by two dashes.

       Options of different types may be freely mixed, but conflicts can appear.
       [...] due to the many standards and ps implementations that this ps is
       compatible with.

       Note that ps -aux is distinct from ps aux. [...]

Source: ps manual from Fedora Linux 35

By contrast, PowerShell implements its own Get-Process cmdlet (a type of shell function, basically) so that you don't even need ps or anything like it at all. The internal implementation of how that function works varies by platform, but the end result is the same on every single one. You don't have to worry about the way it handles arguments snowflaking from Linux to MacOS, because using it is designed to be 100% consistent across all platforms when relying purely on PowerShell's built-in commands.

And, if you really do need an external tool that is entirely unaware of PowerShell's existence? No problem: you can absolutely (maybe even easily?) integrate existing tools with PowerShell, if you, or the authors of that tool, so desire.

But, IS there such a desire? Does it presently exist?

Probably not.

Open source developers already work for free, on their own time, to solve very complex problems. They do this on top of their normal "day job," not instead of it (well, most, anyway).

Shout-out to FOSS contributors: THANK YOU all, so much, for what you do! Without you, millions of jobs and livelihoods would not exist, so have no doubt that your efforts matter!

It's beyond ridiculous to expect that these unsung heroes would, without even being paid in hugs, let alone real money, add to their already superhuman workload by committing to support a shell they've long thought of as "yet another snowflake" with very limited adoption or potential, from a company they've likely derided for decades, sometimes rightly so. You can't blame these folks for saying "nope" to PowerShell, especially given its origin story as a product from a company that famously "refuses to play well with others."

And therein lies the problem: many sh-flavored tools just don't have any good PowerShell integrations or analogs (yet). That may change over time as more people become aware of just how awesome modern pwsh can be (why do you think I wrote this article!?). But for the time being, tools that developers like myself have used for years, such as rvm, rbenv, asdf, and so on, just don't have any officially supported way to be used within PowerShell.

The good news is that this is a solvable problem, and in more ways than one!

Overload Limitations With Your Own PowerShell Profile

The most actionable of these potential solutions is the development of your own pwsh profile code that will sort of fake a given command, within PowerShell only, to allow you to use the same command/workflow you would have in bash or zsh, implemented as a compatibility proxy under the hood within PowerShell.

For a real-world example, here's a very simplistic implementation of a compatibility layer to enable rbenv and bundle commands (Ruby development) in PowerShell (according to my own personal preferences) by delegating to the real such commands under the hood:

#
# Notes:
#   1. My $env:PATH has already been modified to find rbenv in this example
#   2. See `help about_Splatting`, or the following article (same thing), to understand @Args
#          https://docs.microsoft.com/en-us/powershell/module/microsoft.powershell.core/about/about_splatting?view=powershell-7.2
#          Oversimplification: @Args = "grab whatever got passed to this thing, then throw 'em at this other thing VERBATIM"
#

function Invoke-rbenv {
  rbenv exec @Args
}

function irb {
  Invoke-rbenv irb @Args
}

function gem {
  Invoke-rbenv gem @Args
}

function ruby {
  Invoke-rbenv ruby @Args
}

function bundle {
  Invoke-rbenv bundle @Args
}

function be {
  Invoke-rbenv bundle exec @Args
}

With this in place, I can type out commands like be puma while working on a Rails app, and have that delegated to rbenv's managed version of bundler, which then execs that command for me. And it's all entirely transparent to me!

This is just one example and an admittedly simplistic one at that. Nonetheless, it proves that using PowerShell as your daily driver is not only possible but feasible, even when you need to integrate with other tools that are entirely unaware of PowerShell's existence.

But, we can go a step further with the recently-released PowerShell Crescendo. While I have yet to look into this all that much, essentially it provides a way for standard *nix tools to have their output automatically transformed from basic strings into real PowerShell objects at runtime. You have to write some parsing directives to tell PowerShell how to interpret the strings generated by some program, but once that's done you're set: you'll have non-PowerShell tools generating real PowerShell objects without any change to the tools themselves at all.

Jump on the Voltswagon!

If you're not convinced by now, something's wrong with you.

For the rest of you out there, you've got some options for installation:

  1. Use the packages provided by Microsoft (deb, rpm) (sudo required)
  2. Grab a precompiled Linux tarball then unpack it somewhere and run: /path/to/powershell/7.2/pwsh (no sudo required)
  3. Mac users can brew install powershell --cask. (sudo required for .pkg installer)

Antipattern: Do NOT change your default login shell

Don't do this: chsh -s $(which pwsh)

Modify your terminal emulator profile instead.

Just a quick tip: while PowerShell works fine as a default login shell and you can certainly use it this way, other software may break if you do this because it may assume your default login shell is always bash-like and not bother to check. This could cause some minor breakage here and there.

But the real reason I advise against this is more to protect yourself from yourself. If you shoot yourself in the foot with your pwsh configuration and totally bork something, you won't have to worry too much about getting back to a working bash or zsh configuration so you can get work done again, especially if you're in an emergency support role or environment.

When you're first learning, fixing things isn't always a quick or easy process, and sometimes you just don't have time to fiddle with all that, so it's good to have a "backup environment" available just in case you have to act fast to save the day.

Don't interpret this as "PowerShell is easy to shoot yourself in the foot with" - far from it. Its remarkable level of clarity and consistency make it very unlikely that you'll do this, but it's still possible. And rather than just nuking your entire PowerShell config directory and starting from scratch, it's far better to pick it apart and make yourself fix it, because you learn the most when you force yourself through the hard problems. But you won't always have time to do that, especially during your day job, so having a fallback option is always a good idea.

First Steps

Once installed, I recommend you create a new profile specifically for PowerShell in your terminal emulator of choice, then make that the default profile (don't remove or change the existing one if you can help it; again, have a fallback position just in case you screw things up and don't have time to fix it).

Specifically, you want your terminal emulator to run the program pwsh, located wherever you unpacked your tarball. If you installed it via the package manager, it should already be in your system's default $PATH so you probably won't need to specify the location (just pwsh is fine in that case). No arguments necessary.

With that done, run these commands first:

PS > Update-Help
PS > help about_Telemetry

The first will download help documentation from the internet so you can view help files in the terminal instead of having to go to a browser and get a bunch of outdated, irrelevant results from Google (I recommend feeding The Duck instead).

The second will tell you how to disable telemetry from being sent to Microsoft. It's not a crucial thing, and I don't think Microsoft is doing anything shady here at all, but I always advise disabling telemetry in every product you can, every time you can, everywhere you can, just as a default rule.

More importantly, however, this will introduce you to the help about_* documents, which are longer-form help docs that explain a series of related topics, instead of just one command. Seeing a list of what's available is nice and easy: just type help about_ then mash the TAB key a few times. It'll ask if you want to display all hundred-some-odd options; say Y. Find something that sounds interesting, then enter the entire article name, e.g. help about_Profiles or help about_Help, for example.

Next, check out my other article on this blog about customizing your PowerShell prompt!

Roll the Dice

bash and zsh are great tools: they're wicked fast, incredibly stable, and have decades of battle-tested, hard-won "tribal knowledge" built around them that's readily available via your favorite search engine.

But they're also antiquated. They're based on a simpler series of ideas that were right for their time, but fundamentally primitive when compared to the same considerations in mind when PowerShell was designed.

Sooner or later you just have to admit that something more capable exists, and that's when you get to make a choice: stick with what you know, safe in your comfort zone, or roll the dice on something that could potentially revolutionize your daily workflow.

Once I understood just a fraction of the value provided by pwsh, that choice became a no-brainer for me. It's been roughly six months since I switched full-time, and while I still occasionally have a few frustrations here and there, those cases are very few and far between (it's been at least two months since the last time something made me scratch my head and wonder).

But those frustrations are all part of the learning process. I see even more "WTF?" things with bash or zsh than I do with pwsh, by far! Those things are rarely easy to work out, and I struggle with outdated documentation from search results in nearly every case!

But with PowerShell, figuring out how to work around the problem - if indeed it is a problem, and not my own ignorance - is much easier because I'm not dealing with an arcane, arbitrary syntax from hell. Instead, I have a predictable, standardized, consistent set of commands and utilities available to me that are mostly self-documenting and available offline (not some archived forum post from 2006). On top of that, I have real classes and objects available to me, and a built-in debugger (with breakpoints!) that I can use to dig in and figure things out!

So, why are we still using system shells that are based on paradigms from the 1980's? Are you still rocking a mullet and a slap bracelet, too?

Just because "that's the way it's always been" DOESN'T mean that's the way it's always gotta be.

PowerShell is the first real innovation I've seen in our field in a long time. Generally replete with "social" networks, surveillance profiteering, user-generated "content" and any excuse to coerce people into subscriptions, our industry repackages decades-old innovations ad infinitum, even when new approaches are within reach, desperately needed, and certain to be profitable.

So in the rare case that something original that is actually useful, widely-available and open source finally does see the light of day, I get very intrigued. I get excited. And in this case, I "jumped on the Voltswagon!"

And you should, too!

The author would like to thank Chris Weibel for his help with some of those electricity puns, and Norm Abramovitz for his editorial assistance in refining this article.

The post I switched from bash to PowerShell, and it’s going great! appeared first on Stark & Wayne.

]]>
Jason Gambino <![CDATA[Setting up and testing Cloud Foundry App Autoscaler using Genesis]]> https://www.starkandwayne.com/?p=11466 2022-04-07T16:22:57Z 2022-04-05T18:44:04Z

Photo by Samuel Ramos on Unsplash

Autoscaling is a cloud computing feature that enables organizations to scale cloud services such as server capacities or virtual machines up or down automatically, based on defined situations. Autoscaler in cloud foundry provides the capability to adjust the computation resources by Dynamic scaling based on application performance metrics and Scheduled scaling based on time.

Adding the Autoscaler feature to the Cloud Foundry Genesis kit is pretty simple. Deploy the autoscaler kit, add autoscaler integration in CF deployment for credentials to register the service broker in CF.  Start by adding the feature flag, register the  autoscaler service broker, deploy autoscaler, create a service instance and bind it then add a policy to your app. Below we will run through the steps of adding and configuring the various components than how to test and change settings.  We will end with testing of an application.

Deploy Autoscaler

App Autoscaler is an add-on to Cloud Foundry to automatically scale the number of application instances based on CPU, memory, throughput, response time, and several other metrics. You can also add your own custom metrics. You decide which metrics you want to scale your app up and down by in a policy and then apply the policy to your application.

We start by deploying the autoscaler

Download the App Autoscaler kit from here

Once downloaded locally, change into that folder.

Do a 

Genesis New [autoscaler_env_file_name]

This will generate the manifest for the file.

Now Deploy the manifest

Genesis deploy [autoscaler_env_file_name]

Add Autoscaler feature to CF

To add support for Autoscaler in CF you need to set the feature flag for Autoscaler and deploy autoscaler itself.  In this tutorial We assume that you have vault as the credentials storage and safe is being used to target and auth the vault.

In the env file for you cf deployment add the feature flag

kit:
 name: cf
 version: 2.1.3
 features:
    - partitioned-network
    ...
    - app-autoscaler-integration # <<<< This is the addition

Deploy the env file from above **genesis deploy env.file**, once completed autoscaler will be added to your CF.

Configure the service broker

There are two ways to configure the service broker the genesis way and the manual way.

Genesis Way

The Genesis way will do a lot of work for you, go to the folder we deployed autoscaler in and run the following.

To see what genesis can do run

genesis do my_deployment_File list

you should get something like

The following addons are defined:

  bind-autoscaler Binds the Autoscaler service broker to your deployed CF.`
  setup-cf-plugin Adds the ‘autoscaler’ plugin to the cf cli. Use -f option to bypass confirmation prompt.

I recommend running both commands but for this example we will “do” the bind-autoscaler command

genesis do my_deployment_File bind-autoscaler

Congratulations, you’ve setup the service broker in the next section we will make a policy and apply it to the application.

Manual Way

The Manual way does the same things as the genesis way but the genesis way does all the following steps for you automatically.

 First we setup a service broker for autoscaler, Service brokers publish a catalog of services and service plans, manage the provisioning and de-provisioning of service instances, and provide connection details and credentials for an application to consume the resource.

To configure a service broker we start by getting the credentials generated when we deployed the autoscaler feature.

safe tree

Find path to cf-app-autoscaler

safe get path/to/cf-app-autoscaler

This will retrieve the credentials for the service broker from safe: 

Write down the following:

  • Service_broker_domain
  • Service_broker_password
  • Service_broker_username

These are the credentials needed to register the broker with CF

cf create-service-broker autoscaler service_broker_username service_broker_password service_broker_username

With this we have made a Service broker for Autoscaler but we still need to enable the broker to be used in the cf environment.

This command will enable the broker for all orgs

cf enable-service-access autoscaler

Congratulations, you’ve setup the service broker in the next section we will make a policy and apply it to the application.

Creation and Application of Policies

In this step we assume you have already deployed an app and want to make a policy/apply a policy to the application.

Check what plans are available to use for Autoscaler

cf marketplace

it will say a plan name in the plan column for Autoscaler, write that down.

We create a **service instance**

cf create-service autoscaler plan service_instance_name

Now we can make a policy, policies are in json format. An example for CPU is given below

{
  "instance_min_count": 1,
  "instance_max_count": 4,
  "scaling_rules":
  [
   {
    "metric_type":"cpu",
    "breach_duration_secs":60,
    "threshold": 10,
    "operator":"<=",
    "cool_down_secs":60,
    “adjustment”: “-1”
   },
   {
    “metric_type”: “cpu”,
    “breach_duration_secs”: 60,
    “threshold”: 50,
    “operator”: “>”,
    “cool_down_secs”: 60,
    “adjustment”: “+1”
   }   
  ]
}

This policy shows limiting the amount of instances and scaling rules. The goal of a policy is to scale based on need within the instance rules. This example will max out at 4 and min out at 1. It will either be at one of the 2 extremes or at its sweet spot of between 10% and 50% threshold. When between the two it will maintain.

Bind the service and policy to the app you want to use autoscaler on.

cf bind-service cf-env service-instance -c policy

Restart the plugin, until it is restarted or reinitiated the metrics won’t be available

Setting up the CF app autoscaler CLI plugin

App-AutoScaler plug-in provides the command line interface to manage  app autoscaler policies, retrieve metrics and scaling event history.

The commands for CF App Autoscaler CLI are as follows

Command Description
autoscaling-api, asa Set or view AutoScaler service API endpoint
autoscaling-policy, asp Retrieve the scaling policy of an application
attach-autoscaling-policy, aasp Attach a scaling policy to an application
detach-autoscaling-policy, dasp Detach the scaling policy from an application
create-autoscaling-credential, casc Create custom metric credential for an application
delete-autoscaling-credential, dasc Delete the custom metric credential of an application
autoscaling-metrics, asm Retrieve the metrics of an application
autoscaling-history, ash Retrieve the scaling history of an application

You can install the CLI two ways

The Genesis way

genesis do my_deployment_File setup-cf-plugin

The CF plugin way

cf install-plugin -r CF-Community app-autoscaler-plugin

Viewing Metrics and History

To see the metrics Autoscaler is using for your application or what is happening according to policy there are two commands. Note that you will only see metrics AFTER your application is bound with a policy to a service instance of the Autoscaler service. You will also only see metrics referenced in `metric_type` of the policy for an application being enforced.

To see the metrics of a app (example below shows cpu)

cf autoscaling-metrics cf-env cpu

results of running auto-scaling-metrics for throughput

To see the history and what triggered events you look at the history of the app.

cf autoscaling-history cf-env

Testing Metrics

It is important to test a policy once it has been implemented. A simple way to do so is using scales. Using the policy from the last example…

Scale the app to 10 instances

cf scale -i 10 cf-env

Once this successfully scales up to 10 instances it will scale down to 4 because of the policy above having a max instance of 4. It will scale down to a single instance because it will be below 10 requests per second for 60 seconds.

Congratulations, you now know the basics of setting up and running Autoscaler.

The post Setting up and testing Cloud Foundry App Autoscaler using Genesis appeared first on Stark & Wayne.

]]>

Photo by Samuel Ramos on Unsplash

Autoscaling is a cloud computing feature that enables organizations to scale cloud services such as server capacities or virtual machines up or down automatically, based on defined situations. Autoscaler in cloud foundry provides the capability to adjust the computation resources by Dynamic scaling based on application performance metrics and Scheduled scaling based on time.

Adding the Autoscaler feature to the Cloud Foundry Genesis kit is pretty simple. Deploy the autoscaler kit, add autoscaler integration in CF deployment for credentials to register the service broker in CF.  Start by adding the feature flag, register the  autoscaler service broker, deploy autoscaler, create a service instance and bind it then add a policy to your app. Below we will run through the steps of adding and configuring the various components than how to test and change settings.  We will end with testing of an application.

Deploy Autoscaler

App Autoscaler is an add-on to Cloud Foundry to automatically scale the number of application instances based on CPU, memory, throughput, response time, and several other metrics. You can also add your own custom metrics. You decide which metrics you want to scale your app up and down by in a policy and then apply the policy to your application.

We start by deploying the autoscaler

Download the App Autoscaler kit from here

Once downloaded locally, change into that folder.

Do a 

Genesis New [autoscaler_env_file_name]

This will generate the manifest for the file.

Now Deploy the manifest

Genesis deploy [autoscaler_env_file_name]

Add Autoscaler feature to CF

To add support for Autoscaler in CF you need to set the feature flag for Autoscaler and deploy autoscaler itself.  In this tutorial We assume that you have vault as the credentials storage and safe is being used to target and auth the vault.

In the env file for you cf deployment add the feature flag

kit:
 name: cf
 version: 2.1.3
 features:
    - partitioned-network
    ...
    - app-autoscaler-integration # <<<< This is the addition

Deploy the env file from above **genesis deploy env.file**, once completed autoscaler will be added to your CF.

Configure the service broker

There are two ways to configure the service broker the genesis way and the manual way.

Genesis Way

The Genesis way will do a lot of work for you, go to the folder we deployed autoscaler in and run the following.

To see what genesis can do run

genesis do my_deployment_File list

you should get something like

The following addons are defined:

  bind-autoscaler Binds the Autoscaler service broker to your deployed CF.`
  setup-cf-plugin Adds the ‘autoscaler’ plugin to the cf cli. Use -f option to bypass confirmation prompt.

I recommend running both commands but for this example we will “do” the bind-autoscaler command

genesis do my_deployment_File bind-autoscaler

Congratulations, you’ve setup the service broker in the next section we will make a policy and apply it to the application.

Manual Way

The Manual way does the same things as the genesis way but the genesis way does all the following steps for you automatically.

 First we setup a service broker for autoscaler, Service brokers publish a catalog of services and service plans, manage the provisioning and de-provisioning of service instances, and provide connection details and credentials for an application to consume the resource.

To configure a service broker we start by getting the credentials generated when we deployed the autoscaler feature.

safe tree

Find path to cf-app-autoscaler

safe get path/to/cf-app-autoscaler

This will retrieve the credentials for the service broker from safe: 

Write down the following:

  • Service_broker_domain
  • Service_broker_password
  • Service_broker_username

These are the credentials needed to register the broker with CF

cf create-service-broker autoscaler service_broker_username service_broker_password service_broker_username

With this we have made a Service broker for Autoscaler but we still need to enable the broker to be used in the cf environment.

This command will enable the broker for all orgs

cf enable-service-access autoscaler

Congratulations, you’ve setup the service broker in the next section we will make a policy and apply it to the application.

Creation and Application of Policies

In this step we assume you have already deployed an app and want to make a policy/apply a policy to the application.

Check what plans are available to use for Autoscaler

cf marketplace

it will say a plan name in the plan column for Autoscaler, write that down.

We create a **service instance**

cf create-service autoscaler plan service_instance_name

Now we can make a policy, policies are in json format. An example for CPU is given below

{
  "instance_min_count": 1,
  "instance_max_count": 4,
  "scaling_rules":
  [
   {
    "metric_type":"cpu",
    "breach_duration_secs":60,
    "threshold": 10,
    "operator":"<=",
    "cool_down_secs":60,
    “adjustment”: “-1”
   },
   {
    “metric_type”: “cpu”,
    “breach_duration_secs”: 60,
    “threshold”: 50,
    “operator”: “>”,
    “cool_down_secs”: 60,
    “adjustment”: “+1”
   }   
  ]
}

This policy shows limiting the amount of instances and scaling rules. The goal of a policy is to scale based on need within the instance rules. This example will max out at 4 and min out at 1. It will either be at one of the 2 extremes or at its sweet spot of between 10% and 50% threshold. When between the two it will maintain.

Bind the service and policy to the app you want to use autoscaler on.

cf bind-service cf-env service-instance -c policy

Restart the plugin, until it is restarted or reinitiated the metrics won’t be available

Setting up the CF app autoscaler CLI plugin

App-AutoScaler plug-in provides the command line interface to manage  app autoscaler policies, retrieve metrics and scaling event history.

The commands for CF App Autoscaler CLI are as follows

CommandDescription
autoscaling-api, asaSet or view AutoScaler service API endpoint
autoscaling-policy, aspRetrieve the scaling policy of an application
attach-autoscaling-policy, aaspAttach a scaling policy to an application
detach-autoscaling-policy, daspDetach the scaling policy from an application
create-autoscaling-credential, cascCreate custom metric credential for an application
delete-autoscaling-credential, dascDelete the custom metric credential of an application
autoscaling-metrics, asmRetrieve the metrics of an application
autoscaling-history, ashRetrieve the scaling history of an application

You can install the CLI two ways

The Genesis way

genesis do my_deployment_File setup-cf-plugin

The CF plugin way

cf install-plugin -r CF-Community app-autoscaler-plugin

Viewing Metrics and History

To see the metrics Autoscaler is using for your application or what is happening according to policy there are two commands. Note that you will only see metrics AFTER your application is bound with a policy to a service instance of the Autoscaler service. You will also only see metrics referenced in `metric_type` of the policy for an application being enforced.

To see the metrics of a app (example below shows cpu)

cf autoscaling-metrics cf-env cpu

results of running auto-scaling-metrics for throughput

To see the history and what triggered events you look at the history of the app.

cf autoscaling-history cf-env

Testing Metrics

It is important to test a policy once it has been implemented. A simple way to do so is using scales. Using the policy from the last example…

Scale the app to 10 instances

cf scale -i 10 cf-env

Once this successfully scales up to 10 instances it will scale down to 4 because of the policy above having a max instance of 4. It will scale down to a single instance because it will be below 10 requests per second for 60 seconds.

Congratulations, you now know the basics of setting up and running Autoscaler.

The post Setting up and testing Cloud Foundry App Autoscaler using Genesis appeared first on Stark & Wayne.

]]>
Chris Weibel <![CDATA[Adding Windows Smoke Tests to Cloud Foundry]]> https://www.starkandwayne.com/?p=11490 2022-04-05T16:01:33Z 2022-04-05T16:01:31Z

Opening A Window To Clear the Smoke (Tests)

Photo by Ahmed Zayan on Unsplash

Cloud Foundry has supported running Windows Diego Cells for a few years now but until recently I had not had a reason to use them. 

The instructions for modifying cf-deployment is fairly straight forward for adding ops files to enable Windows:

What was missing? I couldn't find a way to run smoke tests against the Windows Diego Cells. The support for Windows exists in the cf-smoke-tests bosh release, so a quick copy of the existing smoke_tests job from cf-deployment.yml, adding enable_windows_tests: true and windows_stack: windows2016 and a whiff of smoke, here is the ops file that can be included with cf-deployment:

- path: /instance_groups/-
  type: replace
  value:
    azs:
    - z1
    instances: 1
    jobs:
    - name: smoke_tests_windows
      properties:
        bpm:
          enabled: true
        smoke_tests:
          enable_windows_tests: true
          windows_stack: windows2016
          api: "https://api.((system_domain))"
          apps_domain: "((system_domain))"
          client: cf_smoke_tests
          client_secret: "((uaa_clients_cf_smoke_tests_secret))"
          org: cf_smoke_tests_org
          space: cf_smoke_tests_space
          cf_dial_timeout_in_seconds: 300
          skip_ssl_validation: true
      release: cf-smoke-tests
    - name: cf-cli-7-linux
      release: cf-cli
    lifecycle: errand
    name: smoke-tests-windows
    networks:
    - name: default
    stemcell: windows2019
    vm_type: minimal

Once this is deployed, to run the errand:

$ bosh -d cf run-errand smoke_tests_windows

Using environment 'https://192.168.5.56:255555' as user 'admin'
Using deployment 'cf'
Task 134
...
shortened for the sake of scrolling...
...
#############################################################################
      Running smoke tests
      C:\var\vcap\packages\goland-1.13-windows\go\bin\go.exe
      c:\var\vcap\packages\smoke_tests_windows\bin\ginkgo.exe
      [1648831644] - CF-Isolation-Segment-Smoke-Tests - 4/4 specs SSSS SUCESS! 10.8756455s PASS
      [1648831644] - CF-Logging-Smoke-Tests - 2/2 specs ++ SUCESS! 1m5.5649573s PASS
      [1648831644] - CF-Runtime-Smoke-Tests - 2/2 specs ++ SUCESS! 1m9.5844699s PASS
      Ginkgo run 3 suites in 3m9.6523124s
      Tests Suite Passed
      Smoke Tests Complete, exit status 0
Stderr   - 
1 errand(s)
Succedded

Something which doesn't work

If you add the --keep-alive to the bosh run-errand command, you'll need to rerun the run-errand command without the keep-alive option to get subsequent runs of the smoke tests to pass. Part of the scripting moves (instead of copies) some of the files around, so you only get a single attempt to run the tests for a particular vm instance.

Enjoy!

The post Adding Windows Smoke Tests to Cloud Foundry appeared first on Stark & Wayne.

]]>
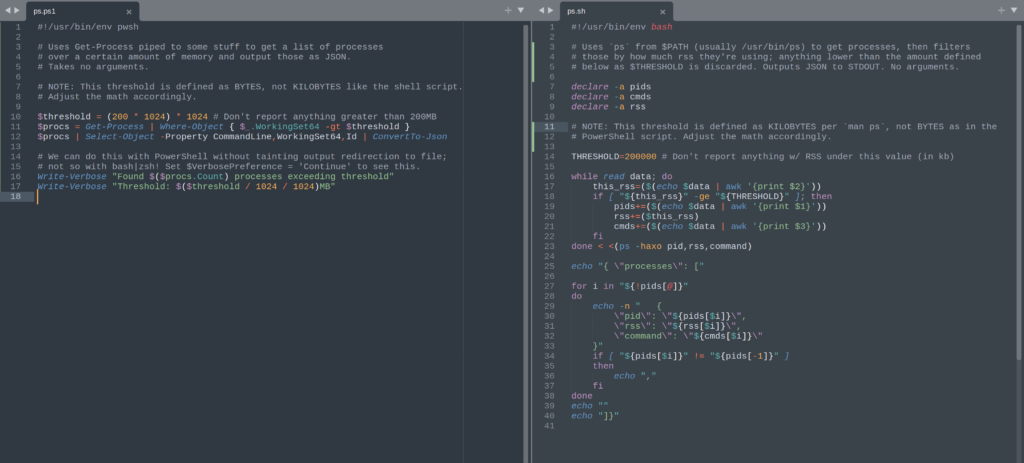
Chris Weibel <![CDATA[Enabling SSL for Stratos PostgreSQL Connections]]> https://www.starkandwayne.com/?p=11485 2022-04-04T20:23:20Z 2022-04-04T20:23:18Z

Photo by Ricardo Gomez Angel on Unsplash

Adding the requirement for SSL to Stratos is a fairly easy process. This configuration is highly recommended for production deployments of Stratos on Cloud Foundry.

In the example manifest below, this option is enabled by adding DB_SSL_MODE: "verify-ca" to the bottom of the environment variables:

applications:
  - name: console
    memory: 1512M
    disk_quota: 1024M
    host: console
    timeout: 180
    buildpack: https://github.com/cloudfoundry-incubator/stratos-buildpack#v4.0
    health-check-type: port
    services:
    - console_db
    env:
      CF_API_URL: https://api.bosh-lite.com
      CF_CLIENT: stratos_client
      CF_CLIENT_SECRET: sssshhhitsasecret
      SSO_OPTIONS: "logout, nosplash"
      SSO_WHITELIST: "https://console.bosh-lite.com"
      SSO_LOGIN: true
      DB_SSL_MODE: "verify-ca"

Why this works

The example above relies on a CUPS service instance called console_db which points to a RDS PostgreSQL instance created manually. Creating the CUPS service is as easy as:

cf cups console_db -p '{"uri": "postgres://", "username":"myuser", "password":"mypass", "hostname":"something.xyx.us-west-2.rds.amazon.com", "port":"5432", "dbname":"console_db"}'

Once executed, you can use the console_db as the name of the service in manifest.yml for Stratos.

Also take note that I'm using a RDS instance which means I need the RDS CA in the trusted store of the CF app container which Stratos is running in. This is done by configuring the following ops file to be deployed against Cloud Foundry:

- type: replace
  path: /instance_groups/name=diego-cell/jobs/name=rep/properties/containers/trusted_ca_certificates/-
  value: &rds-uswest2-ca |-
    -----BEGIN CERTIFICATE-----
    MIIEBjCCAu6gAwIBAgIJAMc0ZzaSUK51MA0GCSqGSIb3DQEBCwUAMIGPMQswCQYD
    VQQGEwJVUzEQMA4GA1UEBwwHU2VhdHRsZTETMBEGA1UECAwKV2FzaGluZ3RvbjEi
    MCAGA1UECgwZQW1hem9uIFdlYiBTZXJ2aWNlcywgSW5jLjETMBEGA1UECwwKQW1h
    em9uIFJEUzEgMB4GA1UEAwwXQW1hem9uIFJEUyBSb290IDIwMTkgQ0EwHhcNMTkw
    ODIyMTcwODUwWhcNMjQwODIyMTcwODUwWjCBjzELMAkGA1UEBhMCVVMxEDAOBgNV
    BAcMB1NlYXR0bGUxEzARBgNVBAgMCldhc2hpbmd0b24xIjAgBgNVBAoMGUFtYXpv
    biBXZWIgU2VydmljZXMsIEluYy4xEzARBgNVBAsMCkFtYXpvbiBSRFMxIDAeBgNV
    BAMMF0FtYXpvbiBSRFMgUm9vdCAyMDE5IENBMIIBIjANBgkqhkiG9w0BAQEFAAOC
    AQ8AMIIBCgKCAQEArXnF/E6/Qh+ku3hQTSKPMhQQlCpoWvnIthzX6MK3p5a0eXKZ
    oWIjYcNNG6UwJjp4fUXl6glp53Jobn+tWNX88dNH2n8DVbppSwScVE2LpuL+94vY
    0EYE/XxN7svKea8YvlrqkUBKyxLxTjh+U/KrGOaHxz9v0l6ZNlDbuaZw3qIWdD/I
    6aNbGeRUVtpM6P+bWIoxVl/caQylQS6CEYUk+CpVyJSkopwJlzXT07tMoDL5WgX9
    O08KVgDNz9qP/IGtAcRduRcNioH3E9v981QO1zt/Gpb2f8NqAjUUCUZzOnij6mx9
    McZ+9cWX88CRzR0vQODWuZscgI08NvM69Fn2SQIDAQABo2MwYTAOBgNVHQ8BAf8E
    BAMCAQYwDwYDVR0TAQH/BAUwAwEB/zAdBgNVHQ4EFgQUc19g2LzLA5j0Kxc0LjZa
    pmD/vB8wHwYDVR0jBBgwFoAUc19g2LzLA5j0Kxc0LjZapmD/vB8wDQYJKoZIhvcN
    AQELBQADggEBAHAG7WTmyjzPRIM85rVj+fWHsLIvqpw6DObIjMWokpliCeMINZFV
    ynfgBKsf1ExwbvJNzYFXW6dihnguDG9VMPpi2up/ctQTN8tm9nDKOy08uNZoofMc
    NUZxKCEkVKZv+IL4oHoeayt8egtv3ujJM6V14AstMQ6SwvwvA93EP/Ug2e4WAXHu
    cbI1NAbUgVDqp+DRdfvZkgYKryjTWd/0+1fS8X1bBZVWzl7eirNVnHbSH2ZDpNuY
    0SBd8dj5F6ld3t58ydZbrTHze7JJOd8ijySAp4/kiu9UfZWuTPABzDa/DSdz9Dk/
    zPW4CXXvhLmE02TA9/HeCw3KEHIwicNuEfw=
    -----END CERTIFICATE-----
- type: replace
  path: /instance_groups/name=diego-cell/jobs/name=cflinuxfs3-rootfs-setup/properties/cflinuxfs3-rootfs/trusted_certs/-
  value: *rds-uswest2-ca

The RDS certs for other AWS regions are documented at https://docs.aws.amazon.com/AmazonRDS/latest/UserGuide/UsingWithRDS.SSL.html

Verifying that Database Connections is using SSL

Trust but verify. By making a psql connection to the RDS instance you can verify the connections from Stratos are indeed leveraging SSL. Run the following:

SELECT 
  datid.datname,
  pg_stat_ssl.pid,
  usesysid,
  usename,
  application_name,
  client_addr,
  client_hostname,
  client_port,
  ssl,
  cipher,
  bits,
  compression
FROM
  pg_stat_activity,
  pg_stat_ssl
WHERE
  pg_stat_activity.pid = pg_stat_ssl.pid
  AND pg_stat_activity.usename = 'myuser';  # Name of the user you configured in CUPS


 dataid |  datname   |  pid  | usesysid | username | application_name | client_addr  | client_hostname | client_port | ssl |           cipher            | bits | compression
 -------+------------+-------+----------+----------+------------------+--------------+-----------------+-------------+-----+-----------------------------+------+------------
  16104 | console_db |  3518 |    16939 | myuser   |                  | 10.244.0.20  |                 |       43104 | t   | ECDHE-RSA-AES256-GCM-SHA384 |  256 | f
  16104 | console_db | 22334 |    16939 | myuser   |                  | 10.244.0.20  |                 |       56321 | t   | ECDHE-RSA-AES256-GCM-SHA384 |  256 | f
  16104 | console_db | 25259 |    16939 | myuser   | psql             | 10.244.0.99  |                 |       58990 | t   | ECDHE-RSA-AES256-GCM-SHA384 |  256 | f

In the example above, the third connection is the psql client we are running this query from, the other two connections are coming from the Stratos app on the Diego cell.

What doesn't work

If you are attempting to set the SSL Mode via the URI, while a valid assumption, configuring the CUPS connection will be ignored:

cf cups console_db -p '{"uri": "postgres://", "username":"myuser", "password":"mypass", "hostname":"something.xyx.us-west-2.rds.amazon.com", "port":"5432", "dbname":"console_db", "sslmode":"verify-ca" }'

This is because the Stratos configuration is specifically looking for an environment variable:

db.SSLMode = env.String("DBSSLMODE", "disable")

From https://github.com/cloudfoundry/stratos/blob/master/src/jetstream/datastore/databasecfconfig.go#L81

Enjoy!

The post Enabling SSL for Stratos PostgreSQL Connections appeared first on Stark & Wayne.

]]>
Ashley Gerwitz <![CDATA[Power Up Your PowerShell Prompt]]> https://www.starkandwayne.com//?p=9432 2022-01-13T16:17:56Z 2022-01-13T16:17:54Z So, you’ve heard great and wonderful things about PowerShell and now you’re seriously considering it for your day-to-day, eh? Well, good! You should! But before you drink the Kool-Aid, you’ve probably got some doubts, concerns, and questions. I’m sure one of those, lurking in the back of your mind, is something along the lines of:

The post Power Up Your PowerShell Prompt appeared first on Stark & Wayne.

]]>
So, you’ve heard great and wonderful things about PowerShell and now you’re seriously considering it for your day-to-day, eh?

Well, good!

You should!

But before you drink the Kool-Aid, you’ve probably got some doubts, concerns, and questions. I’m sure one of those, lurking in the back of your mind, is something along the lines of:

“Can I customize my PowerShell prompt?”

Allow me to answer you with a meme:

Clip originally from 1999 comedy “Big Daddy”. Film subject to copyright. Not an endorsement. Displayed for educational, non-commercial purposes only under 17 U.S.C. § 107.

With that doubt soundly purged from your mind, you may now find yourself wondering if you can get your PowerShell prompt looking like all those fancy “powerline” prompts you’ve probably seen in screenshots out there. You’re wondering…

“How far could I take this?”

Answer: About 4.3 lightyears (give or take).

Traveling at the speed of light, it would take more than four years to reach Earth’s closest neighboring star system, Alpha Centauri. And that’s without stopping to use the restroom! (Image credit: NASA)

Okay, so maybe putting a number on it, measured at a hypothetical relative velocity, wasn’t technically correct, but it makes a heck of a point: you can take PowerShell customization way, WAY beyond what anyone would dare consider sane!

Now that you know just about anything’s possible, how do you do it? The short version is this:

  1. Find your $PROFILE on disk.
  2. Override the default prompt function with your own.
  3. Profit!

The $PROFILE and the prompt

Upon startup, PowerShell looks for a special file for the user executing the process called a profile. This is a plain-text file, written in PowerShell’s own scripting language, that allows the user to set a great many things like environment variables, aliases, custom functions, and yes, even their shell prompt.

To get started you need to find where your specific user profile (file) is located on disk.

Locating Your $PROFILE

The location of this file may vary based on platform and configuration, so the easiest way to find where pwsh wants yours to be is just to ask it!

$ pwsh
PowerShell 7.1.5
Copyright (c) Microsoft Corporation.

https://aka.ms/powershell
Type 'help' to get help.

PS > $PROFILE
/Users/jah/.config/powershell/Microsoft.PowerShell_profile.ps1

In this example, since I’m on MacOS and my $HOME is under /Users/jah, we can see that PowerShell is looking for the file in its default location on my platform. Linux users will likely see almost the same thing, with /home in place of /Users.

Be aware that the string output you get from $PROFILE doesn’t necessarily prove that the file itself actually exists; this is just the setting that PowerShell has internally. This is just where it’s going to look. It’s still UP TO YOU to create that file.

If this file doesn’t yet exist in the location PowerShell expects, just create it yourself. A quick touch $PROFILE from within PowerShell should do the trick rather easily. (You might need to create the $HOME/.config directory if it doesn’t already exist.)

Your $PROFILE file is nothing more than a plain-text UTF-8 encoded file with LF line endings (on *nix systems). You can put as much code, comments, and such in here as you want over the course of time that you use PowerShell. Consider making it part of your “dotfiles” configuration backup/persistence strategy. (Lots of folks find success using personal, private GitHub repositories for that. Just be sure not to commit secrets to history!)

The prompt function

Every time PowerShell needs to show you a prompt, it runs a specially-named function simply called prompt. If you don’t define this yourself, PowerShell uses a built-in default function that is extremely plain and minimal. This is the function we’re going to overwrite.

Let’s kick things off by overriding prompt with our own function: a very simple tweak to change the prompt’s output text color.

Before we proceed, a quick note on terminal emulators. I’m using iTerm2 (which is also what renders the stats bar at the bottom) on MacOS with the SF Mono font (which is, I think, Apple proprietary). It doesn’t contain emoji unicode symbols, so I’ve supplemented that with a Nerd Font, ligatures enabled. You Windows folks should try the new Windows Terminal from Microsoft, and you Linux users out there have more choice in this department than you could shake a stick at. Point is, your choice of terminal, and its configuration, are your responsibility.

Open your $PROFILE file in your favorite text editor and write your own prompt function. Start with this, just to get your feet wet:

function prompt {
  Write-Host ("$env:USER@$(hostname) [$(Get-Location)] >") -NoNewLine -ForegroundColor $(Get-Random -Min 1 -Max 16)
  return " "
}

This code was originally from Microsoft’s docs; I’ve made only minor tweaks to it, nothing more.

Here’s a screenshot of what this looks like in my case using iTerm2 on MacOS:

Now, this isn’t very exciting, but notice something: we’ve told PowerShell to choose a NEW COLOR at random every time it draws the prompt. So hit enter a few times and you get proof that this function runs every time PowerShell is ready for input:

Sure, pretty colors are nice, but this isn’t all that useful yet. Let’s power this up.

A Powerline Prompt With Oh-My-Posh

Give your terminal a good jolt by setting up a nice powerline prompt with a utility called oh-my-posh.
Here’s a sample of what that might look like:

Here I’ve gone into the /System directory on my Mac workstation. My ls command is actually a function I’ve defined
in my PowerShell $PROFILE that delegates to the awesome exa utility under-the-hood as a pseudo-replacement for /bin/ls.
This way I can “replace” ls for personal use without the consequences of altering the original and its behavior/output (scripts, etc.).

Install Oh-My-Posh

As the oh-my-posh website explains, OMP is a shell agnostic tool that allows you to configure your prompt not just for bash, zsh or even just PowerShell, but any shell that works roughly the same way. This means you can have one configuration to define your prompt, then switch between all three aforementioned shells as you like and get the same prompt with all of them!

So visit the oh-my-posh docs and install OMP for your platform. In my case, this was a series of simple Homebrew commands (brew tap and brew install) that can be copy-pasta’d from the documentation (as of this writing).

BE ADVISED: Ignore Install-Module; Outdated

You may find outdated documentation elsewhere on the web referring to oh-my-posh as a PowerShell-only utility, or telling you to install it directly through PowerShell via Install-Module. DO NOT DO IT THIS WAY. That’s an old, outdated approach back from the days when Oh-My-Posh used to be only for PowerShell. That is no longer the case and installing it this way may be unsupported at any point in the future, so you’re better off avoiding this method entirely, even if you never intend to use anything other than PowerShell.

Just because you can doesn’t mean you should. As with life in general, going down “easy street” will usually bite you in the posterior later on. Same here; don’t fall for it!

Themes

Oh-My-Posh itself provides the ability to make your shell pretty, but for the actual “pretty stuff” itself, you need
a compatible theme. Thankfully, OMP distributes a number of very nice, useful themes along with its install that you can re-use or copy-and-tweak to your liking.

If you’re following the brew installation route, you can see those themes in their original, distributed state by asking brew where that is:

brew --prefix oh-my-posh

Now, just tack /themes on the end of whatever that command gives you, and boom! There’s the plethora of themes you can choose from to get started.

In my case, I started with the theme blue-owl.omp.json, but with one tweak: I changed the value for osc99 from true to false. Why? Because that’s telling iTerm2 to sound an audible bell noise every time the theme gets loaded. So in my workflow, that meant that every time I opened a new terminal tab I’d hear that annoying beep noise! Not cool! So I just flipped the bit to remove that annoyance! I wish all life’s annoyances could be so easily eradicated…

You can do the same thing I did, starting with an existing theme, then making small tweaks, or you could go much further with your customizations. However you decide to do things, just make sure you COPY the existing theme file to a new location, instead of overwriting the original! This is because your installation method of choice – Homebrew, in this example – will likely overwrite your changes when it next updates OMP. Then you’d have to restore from backup, or do this all over again! Not what I typically want to be doing on a Saturday afternoon, ya know?

PowerShell Integration

With your theme selected, that JSON file is copied and tweaked to your liking, then saved elsewhere on disk (I chose $HOME/.config), now you can modify the previously mentioned $PROFILE file on disk to tie these things together.

Open up a new PowerShell session and ask it for the path to your $PROFILE on disk again:

> $PROFILE
/Users/jah/.config/powershell/Microsoft.PowerShell_profile.ps1

Sample output only. Your path/response will vary.

Open that file in your text editor of choice. Now, assuming you have NOT already altered your $PATH environment variable to tell PowerShell where to find stuff installed via Homebrew (or other package manager), you can do something like this to construct an array for that value:

# Set Paths
$pth = (
  "$Home/.bin",
  "$Home/.brew/bin",
  "$Home/.brew/sbin",
  "$env:PATH"
)
$env:PATH = ($pth -Join ':')

This is an example only, taken from my personal configuration. I keep one-off scripts/code in ~/.bin as symlinks to other things so I can rename commands, etc. (e.g. nvim -> vim) without actually renaming the files themselves or having to create aliases by modifying code (just a convenience). And I install Homebrew in $HOME/.brew so that
it won’t need full disk access. It’s more secure, and in something like 10 years it’s never once actually broken anything for me, even though the Homebrew authors explicitly advise against doing it this way. But that’s just me – you do you!

Be sure you do this BEFORE invoking any call to oh-my-posh. Otherwise, the shell will have no idea what you’re talking about and you’re gonna have a bad time.

With that in place, add the following line just below that snippet, before doing any further customization:

oh-my-posh --init --shell pwsh --config ~/.config/omp.theme.json | Invoke-Expression

Of course, substitute the path provided to the --config argument with the right path to YOUR configuration file.

With that done, save the file and open up a new PowerShell terminal session (new terminal tab).
You’ve now got a fancy new shell prompt in PowerShell!

What’s going on under the hood?

What the above command does is use the oh-my-posh binary, provided with arguments, to generate some PowerShell code. Then, that output is piped from within PowerShell to the Invoke-Expression function. This is essentially an eval() function for pwsh. It’s like saying, “Here’s some string data, now treat it as source code and run it.”

For that reason, an astute observer might find this approach a little uncomfortable, which is pretty understandable. If that’s you, I commend your security awareness and eagle-eyed nature. As a purely academic exercise, here’s the first piece of what that generated code looks like (I had to cut the screenshot because what it generates is kinda long, but you’ll see where I’m going with this):

Sample of generated code that is “eval”‘d by PowerShell

If you find the Invoke-Expression implementation uncomfortable, you could copy-and-paste that output into another
file somewhere, or even put it directly into your $PROFILE, to render attacks against that specific vector impossible. But the cost of doing that is convenient; you’d have to regenerate it every time OMP or the theme is updated, and possibly with some future PowerShell update as well if backward compatibility gets broken at some point. You’d also have to maintain the generated source code itself by backing up yet another file somehow/somewhere.

But that’s up to you. Personally, as long as I’m aware of the oh-my-posh binary on disk gets changed, I’m “comfortable enough” to run it this way. But it’s quite understandable if you don’t share my opinion on this matter. You wouldn’t be “wrong” whatsoever; perhaps “impractical”, but certainly not “wrong”.

Now What?

You’ve got your fancy prompt, so now what? I recommend taking a look at the built-in help documentation from within PowerShell itself to get started. At your (now snazzy!) prompt, do this:

  1. Type help about_
  2. Now STOP. Do NOT press enter.
  3. Instead, whack that TAB key a few times and see what happens!

If you answer y, you’ll get a list of all the about_* files that ship with PowerShell. Each of these contains a very well-written overview of multiple features, settings, and other very useful bits of info on how to better use PowerShell to get stuff done.

Now all you need to do is figure out which file to view. If like me, you’re a privacy-conscious person, you might want to start with the entry on telemetry:

help about_Telemetry

Next, perhaps you’d like to know more about how to configure PowerShell to your liking:

help about_Profiles

But if you want to see where PowerShell really shines, check out the entry on Methods:

help about_Methods
PowerShell: it’s not just a shell, it’s a fully-baked object-oriented programming environment, too!

Variables, types, classes, methods – PowerShell has it all. The syntax is very approachable and will feel familiar to anyone with even the smallest amount of non-negligible programming experience. While there are a few variations in that syntax some consider odd, they’re very unobtrusive and in truth, it’s far easier to build shell scripts in PowerShell that are distributable and work consistently across implementation versions (and platforms!) than it ever would be using the esoteric vagaries of /bin/sh and friends, especially for those of us who haven’t been writing shell scripts since the days of UNIX System-V.

Opinion: PowerShell seems less “snowflake-y” than sh; note the brackets [ ], use of the then keyword, and instead of curly braces like dozens of other programming languages, sh uses a new line and fi – “if”, backwards – to end a conditional logic block. How is this in any way easy or approachable? By contrast, PowerShell draws on ubiquitous conventions and patterns you already know!

While PowerShell isn’t as popular, especially outside of the Windows ecosystem, as its storied counterparts of UNIX legend, it’s more capable and has a much shorter learning curve. There’s certainly nothing wrong with using those shells of old, but why settle for a 9-volt battery when you can have a nuclear reactor?

The post Power Up Your PowerShell Prompt appeared first on Stark & Wayne.

]]>
Inesh Jupudy <![CDATA[My Stark & Wayne SWE Intern Journey]]> https://www.starkandwayne.com//?p=8523 2022-02-24T22:01:34Z 2022-01-06T18:23:33Z

As a growing professional in the tech industry, I strongly believe, and personally pursue quality mentorship. I have invested time in both seeking and delivering mentorship from and to a number of intellectual people over years. At Stark & Wayne this Fall 2021 semester, I successfully found and climbed a very needed learning curve. 

Starting from the beginning, when I first learned about my work here, I was quite aware of the challenges and the rewards that came along with such a high learning environment. The cloud industry is one that is always in progress and being able to work in one of the best ones and learn the cutting edge technologies was quite intriguing. As time passed I was quite satisfied with the project goal and our primary focus as a team. Getting to work on something practical with potential clients was really an eye-opening experience. Genesis was one of the coolest projects I had ever worked with. 

Genesis (a BOSH deployment paradigm), a project that was built by S&W to simplify BOSH usage, was a really technical and practical approach to a project that hooked me immediately. I worked on building a user interface for Genesis which included a lot of advanced concepts and meant working with leading cloud technologies like Golang, React.JS, and understanding the BOSH architecture among others. The goal of the project was quite realistic and useful which made me invest effort with a clear vision in mind. 

Overall, I believe the organization of the internship is a clean and professional one, which also helped me develop my communication skills, professional ethics, and other important skills. I received valuable mentoring in 1:1’s with a number of the employees and leading professionals in the industry. 

A very helpful and important aspect was also the number of live coding sessions that helped not only correct my coding practices but also learn directly by interacting with them in real-time. 

Finally, I believe my experience as a Software Engineering Intern at S&W is invaluable and contributes heavily to the uplifting of my professional ethics and practices. 

The post My Stark & Wayne SWE Intern Journey appeared first on Stark & Wayne.

]]>
Ashley Gerwitz <![CDATA[Internship blog – Tanvie Kirane]]> https://www.starkandwayne.com//?p=8239 2022-01-31T13:36:07Z 2021-12-17T19:44:31Z Tanvie-Internship

This Fall, I am interning at Stark & Wayne, LLC in Buffalo, NY. Although this is my second internship, it is a lot more than I thought it would be — in the best way possible! I got the opportunity to develop skills in utilizing different UI design tools, as well as overcoming my fear of command line. I have been working a lot with the CTO (Wayne Seguin), our supervisors (Dr. Xiujiao Gao and Tyler Poland), and three other interns.

This internship has been by far the most challenging yet exciting work I have done in my college career. What I loved most about it is the weekly meetings and 1:1’s where we get the opportunity to present our work and gauge perspectives from our supervisors and guest attendees. We also discuss mentorship and career development tips which I think are very important at this stage in my career. The overall work culture is very open and friendly which makes it easier for us interns to gel with the team! 

I classify myself as a calculated risk-taker and have always tried to avoid making mistakes. At the beginning of this internship, I was scared of using the terminal because it’s one (unintentional) move and game over. I mentioned this during a conversation with my supervisors and they helped me realize that it was okay to make mistakes, provided you learn from them. They motivated me to try new things and reach out if anything comes up and, slowly & steadily, I have overcome my fear of using the terminal! Besides this, I learned the benefits of version control, active discussions, and reverse engineering.

As for expectations for the rest of my internship, I am thrilled to be learning more every day! This internship has given me a taste of the real-world industry and also given me a chance to explore problem-solving and designing a product based on client needs and how I can use my expertise and skills in a team to help deliver the best results.

The post Internship blog – Tanvie Kirane appeared first on Stark & Wayne.

]]>
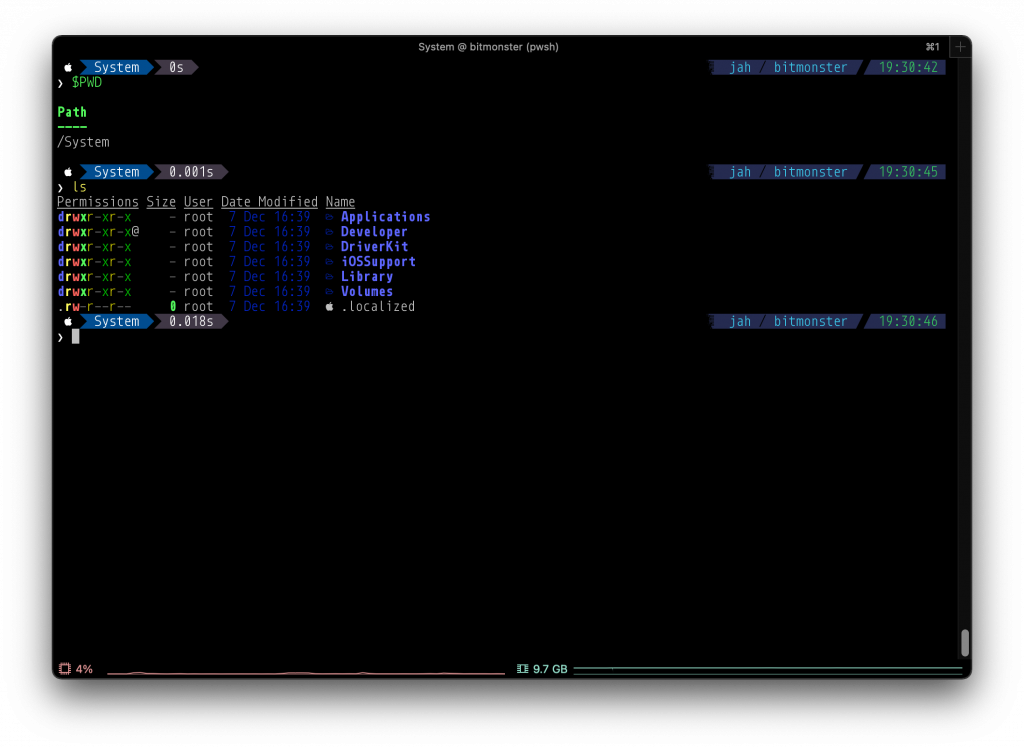
Tanvie-Internship

This Fall, I am interning at Stark & Wayne, LLC in Buffalo, NY. Although this is my second internship, it is a lot more than I thought it would be — in the best way possible! I got the opportunity to develop skills in utilizing different UI design tools, as well as overcoming my fear of command line. I have been working a lot with the CTO (Wayne Seguin), our supervisors (Dr. Xiujiao Gao and Tyler Poland), and three other interns.

This internship has been by far the most challenging yet exciting work I have done in my college career. What I loved most about it is the weekly meetings and 1:1’s where we get the opportunity to present our work and gauge perspectives from our supervisors and guest attendees. We also discuss mentorship and career development tips which I think are very important at this stage in my career. The overall work culture is very open and friendly which makes it easier for us interns to gel with the team! 

I classify myself as a calculated risk-taker and have always tried to avoid making mistakes. At the beginning of this internship, I was scared of using the terminal because it’s one (unintentional) move and game over. I mentioned this during a conversation with my supervisors and they helped me realize that it was okay to make mistakes, provided you learn from them. They motivated me to try new things and reach out if anything comes up and, slowly & steadily, I have overcome my fear of using the terminal! Besides this, I learned the benefits of version control, active discussions, and reverse engineering.

As for expectations for the rest of my internship, I am thrilled to be learning more every day! This internship has given me a taste of the real-world industry and also given me a chance to explore problem-solving and designing a product based on client needs and how I can use my expertise and skills in a team to help deliver the best results.

The post Internship blog – Tanvie Kirane appeared first on Stark & Wayne.

]]>