You want to automate the deployment of your Azure infrastructure. Great! But now you need to create an account for your automation to access Azure’s API. Azure implements these in the form of what they call App Registrations. In order to create one, you will need access to create accounts in Azure Active Directory. If you don’t have that access, yell at somebody until they give you that access.
Luckily, most tools that interact with Azure require the same specific set of credentials which Azure refers to as a Service Principal. This is a combination of the following:
- Application ID
- Application Client Secret
- Tenant ID
- Subscription ID
Below is a guide for how to do this with the Azure Portal. If you’re more of a CLI sort of person, skip to the bottom.
When we cross these pieces of information during the creation process, I will point them out so that you may take note of them and put them in the secure place of your choosing.
Using the Web Portal
Making the App Registration
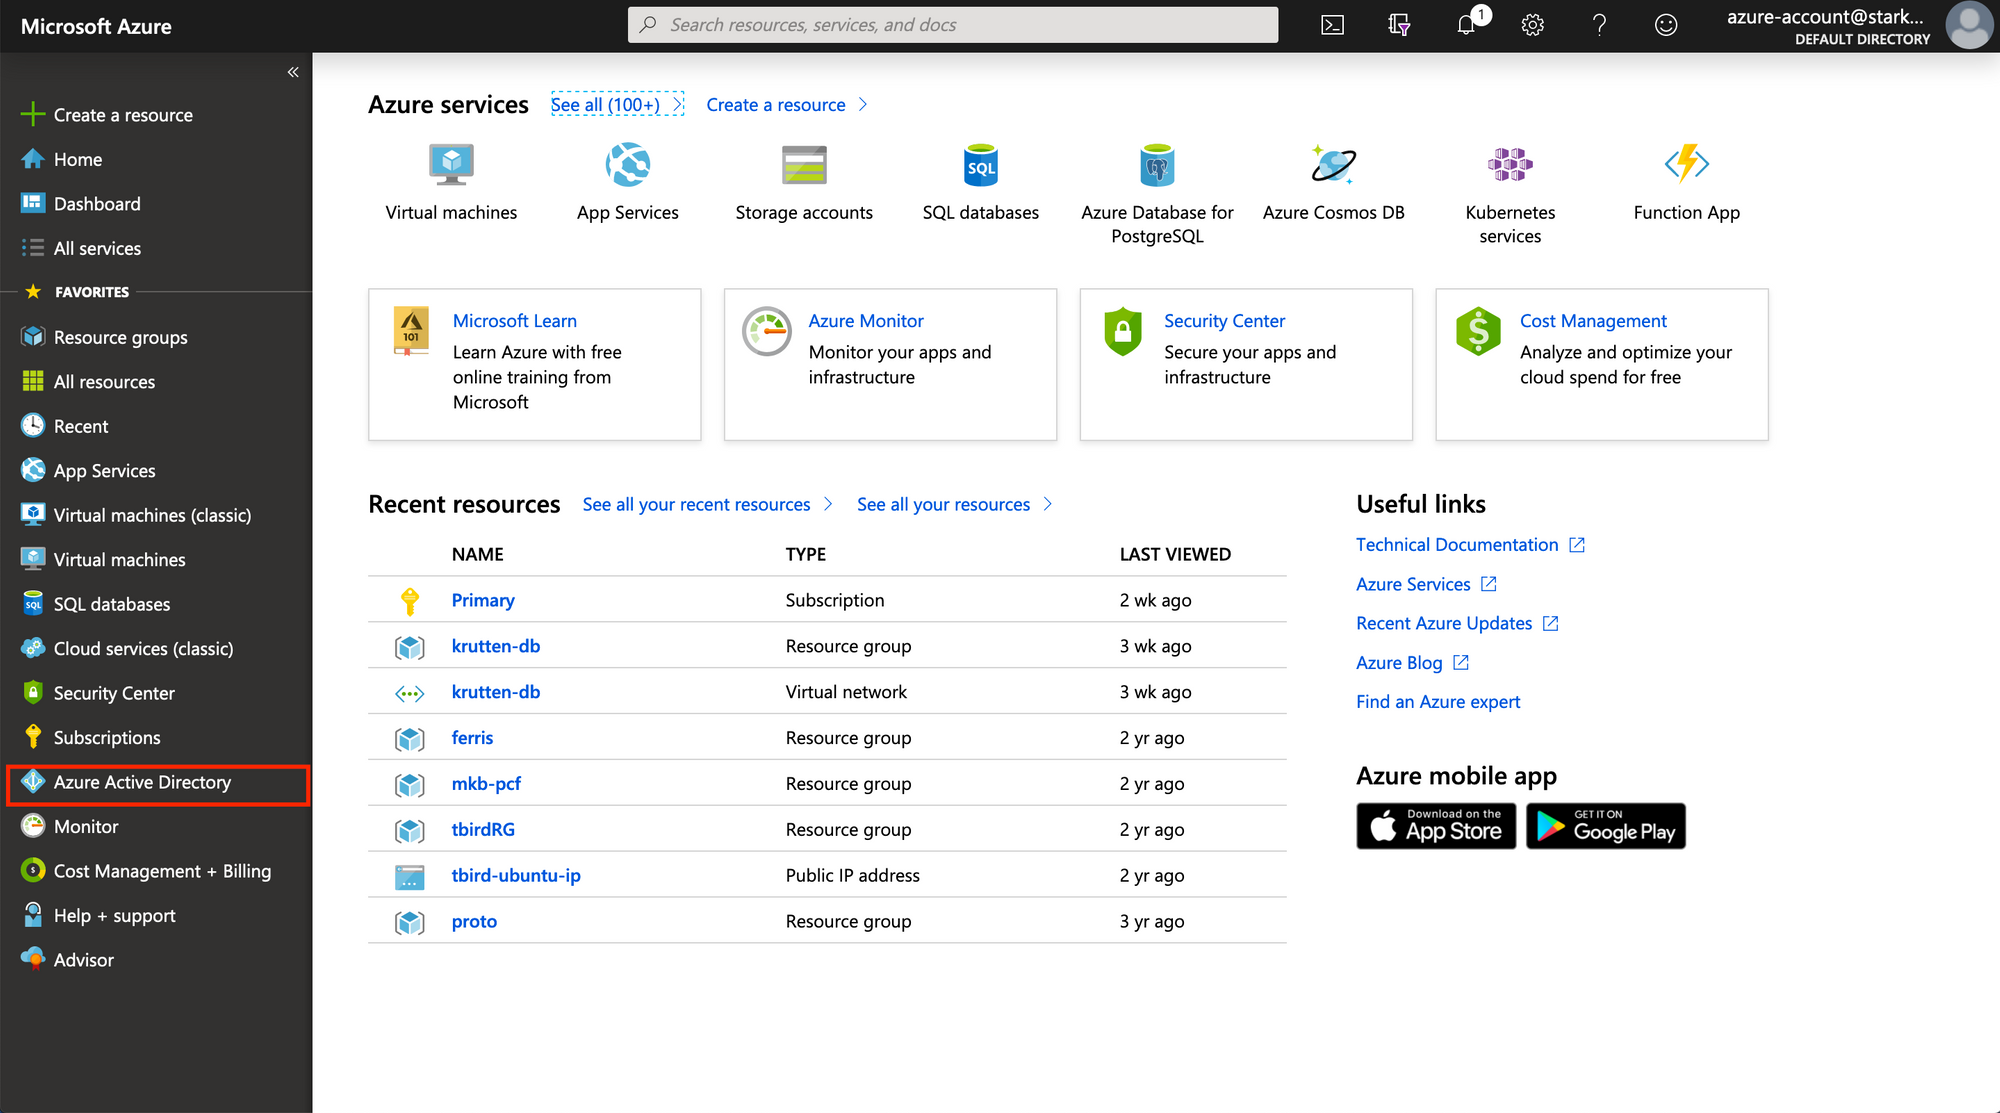
Log into the Azure Portal with your account. Once logged in, navigate to Azure Active Directory on your sidebar.
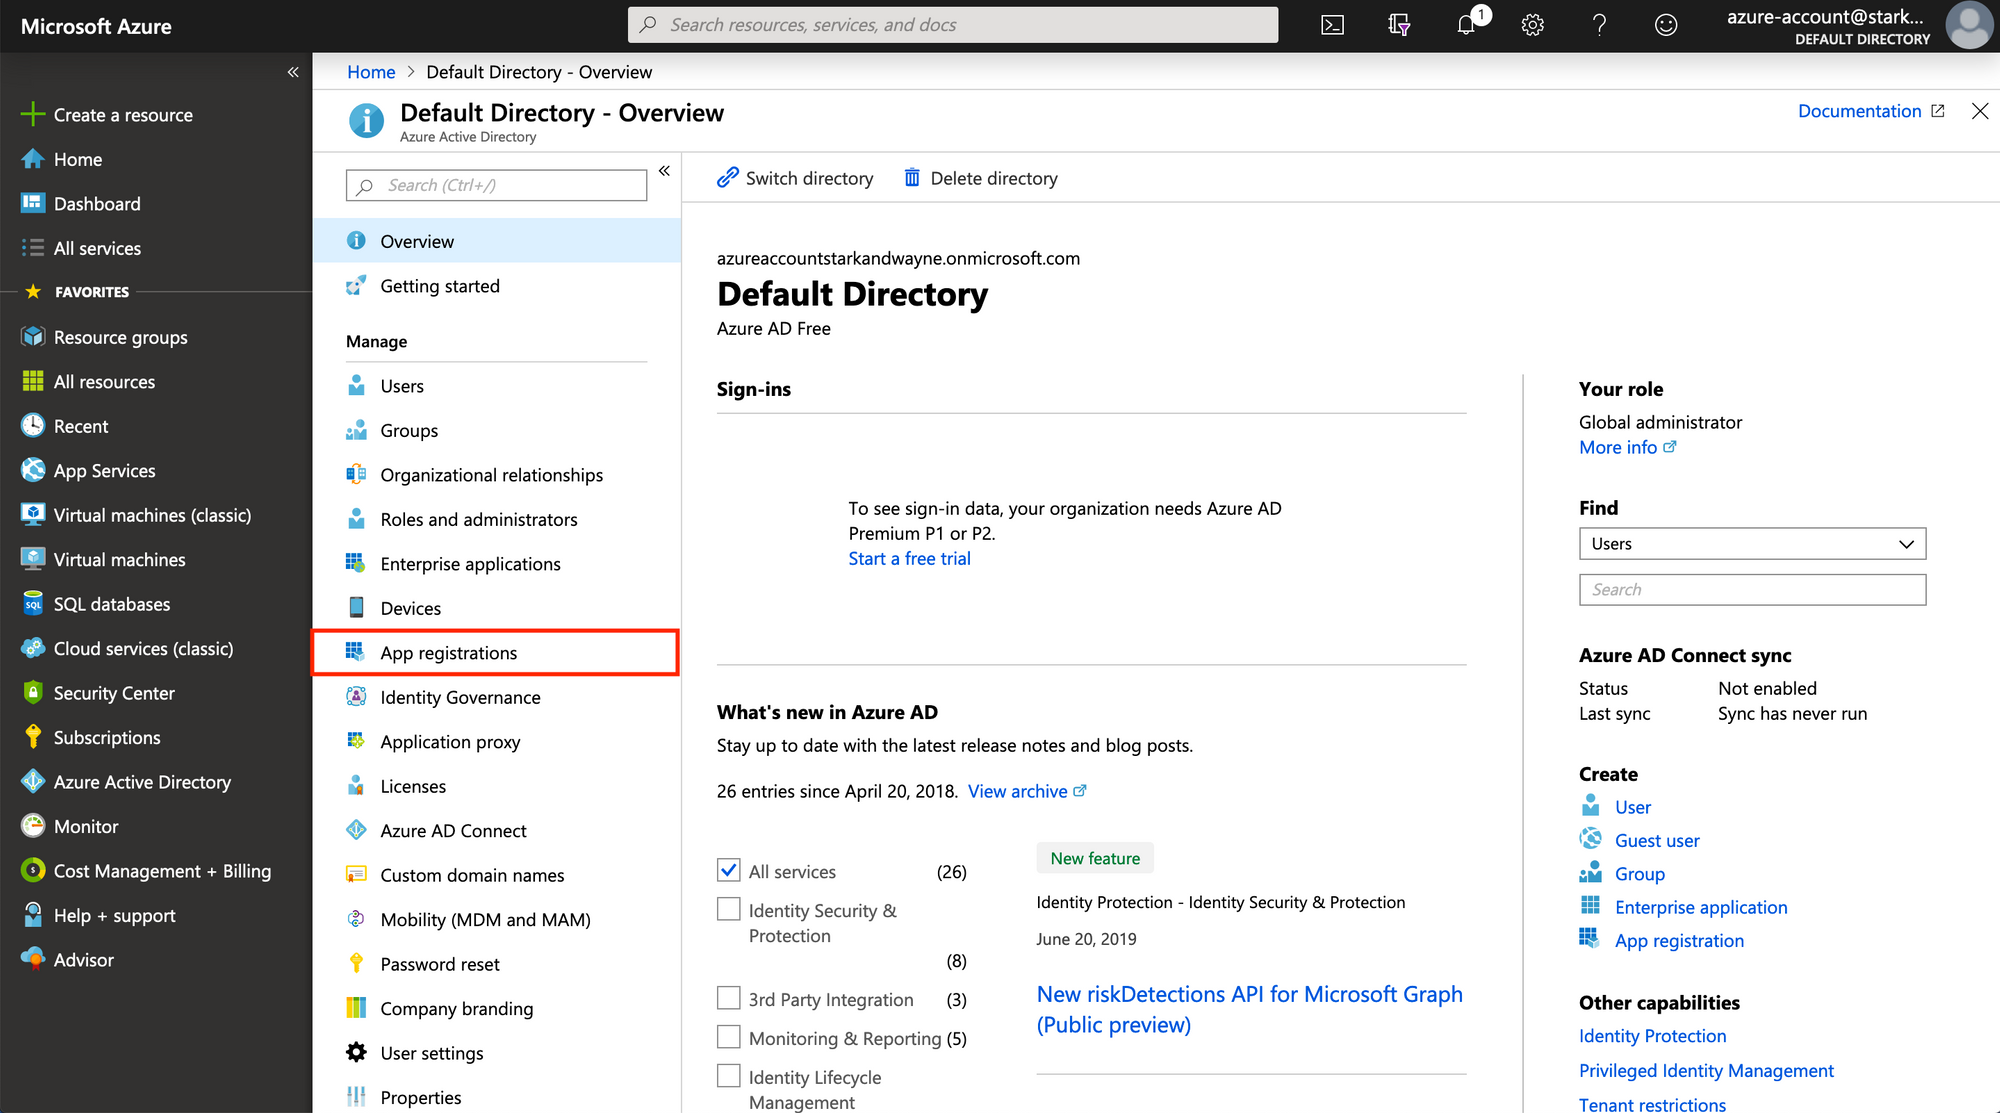
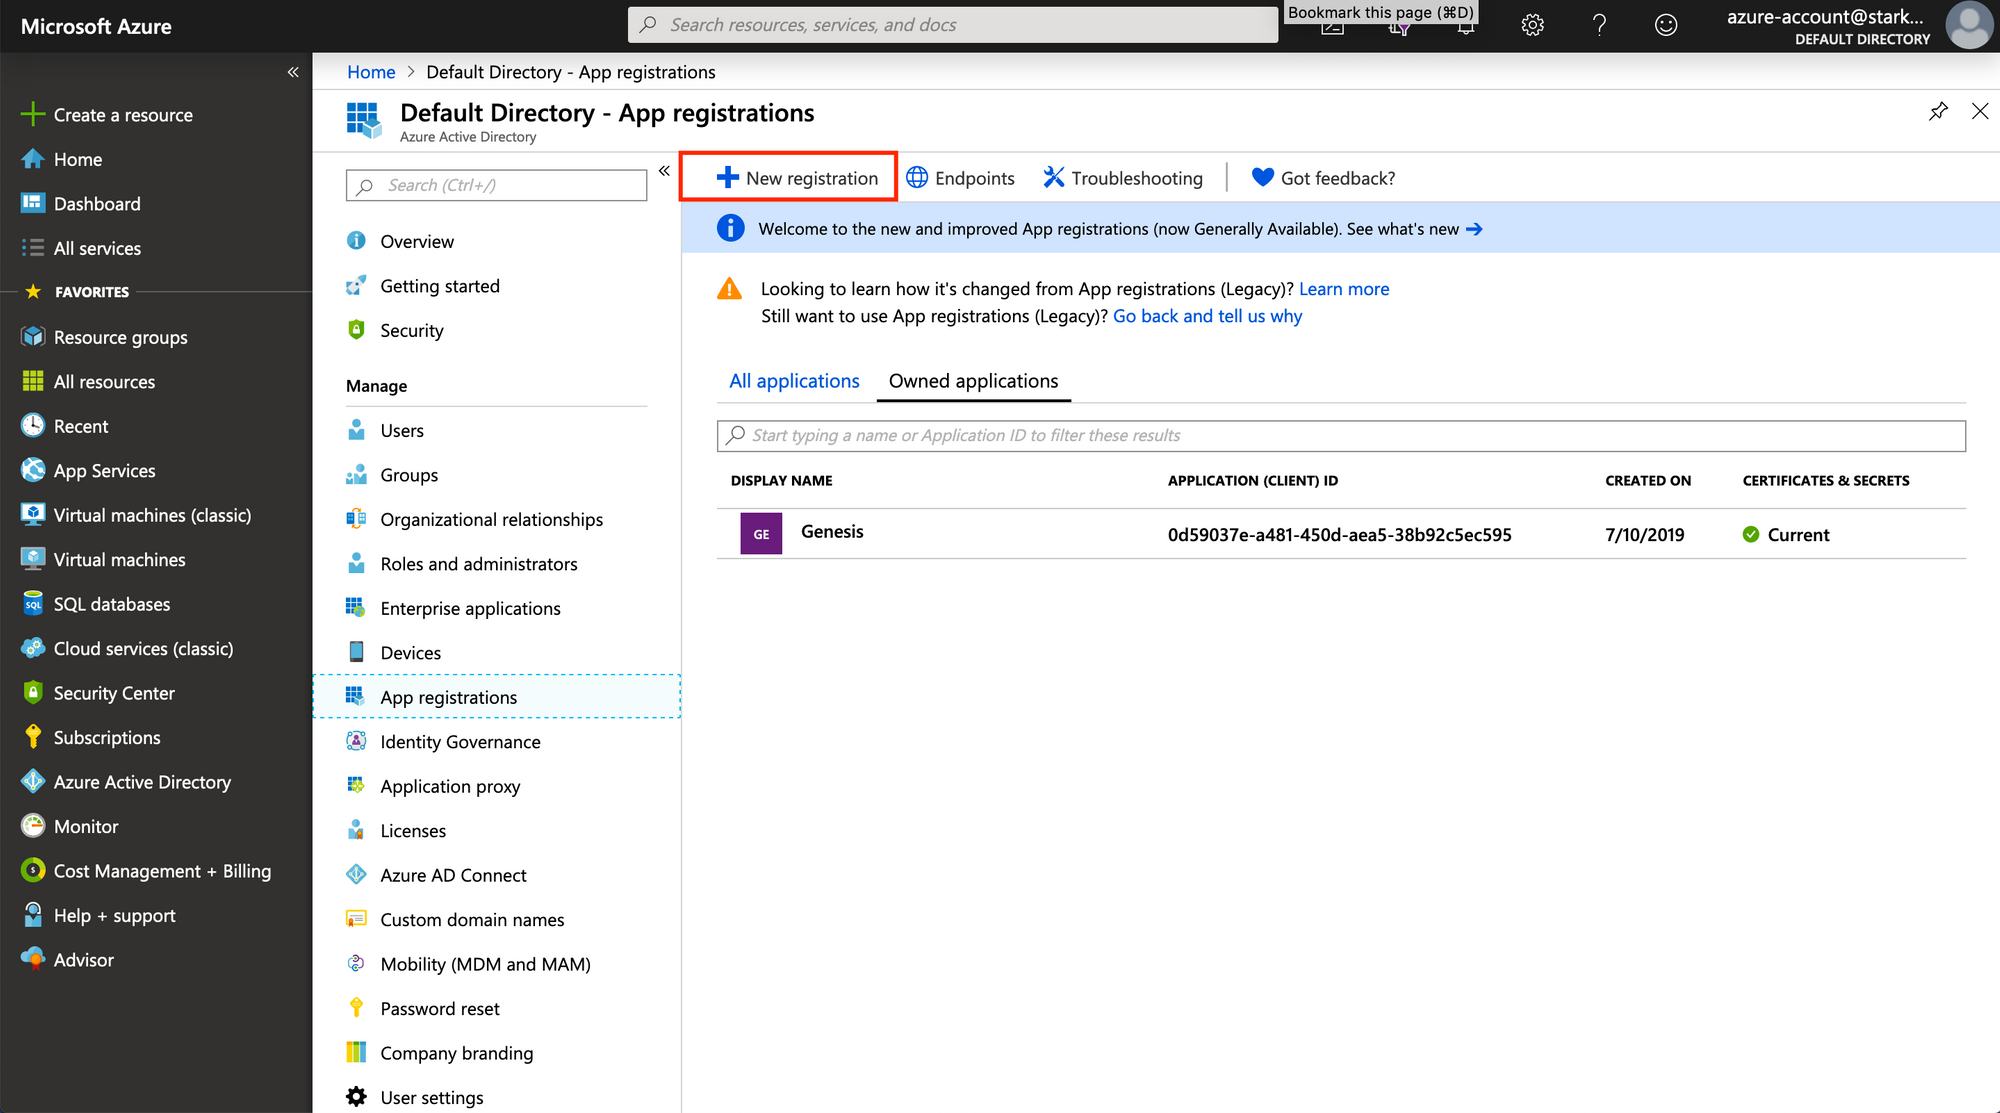
You need to get to the New Registration page from the App registrations section of the Azure Active Directory page.
Azure will ask you to provide a display name for the application, the
account type, and a redirect URI. The display name can be whatever you want
it to be. The account type will almost always be set to Accounts in this organizational directory only, and the redirect URI can be left blank.
Getting the Application ID and Tenant ID
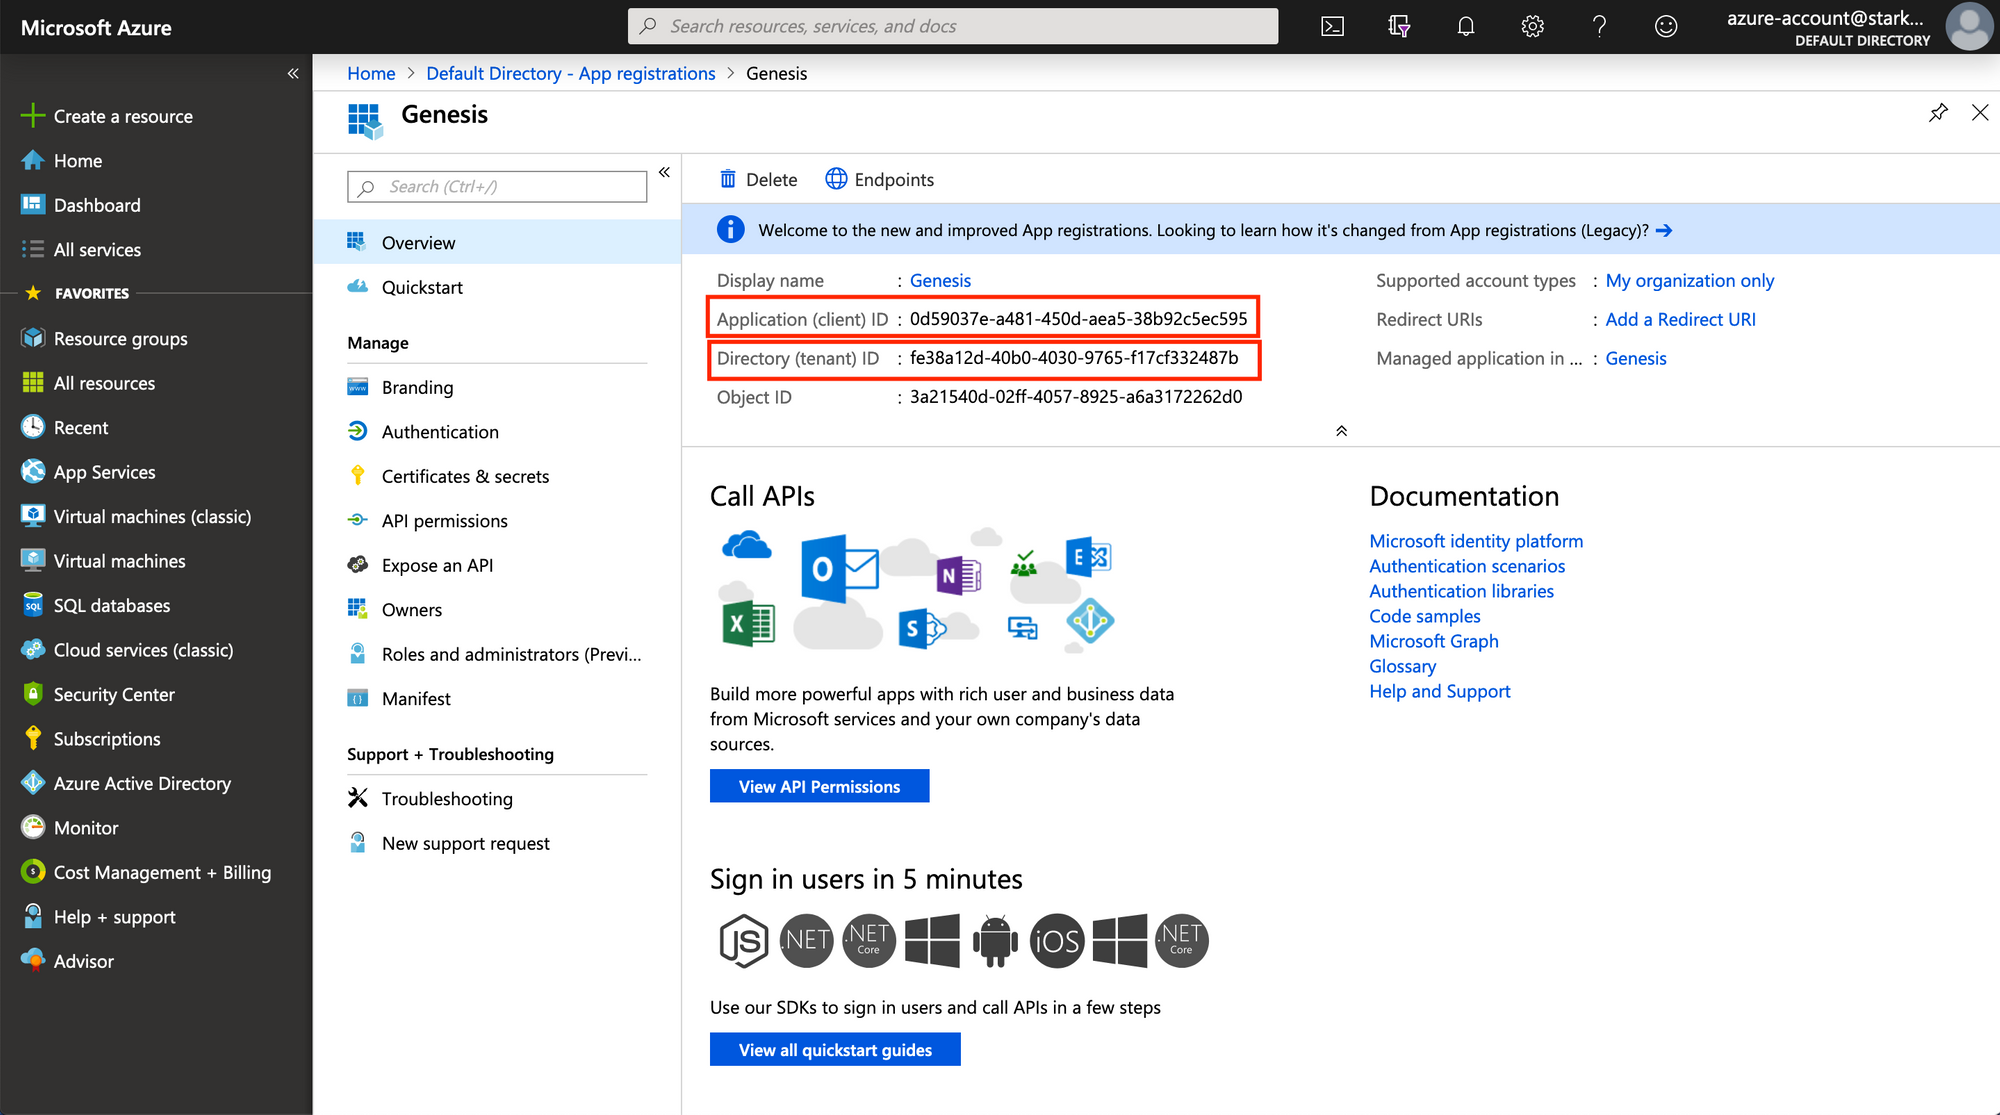
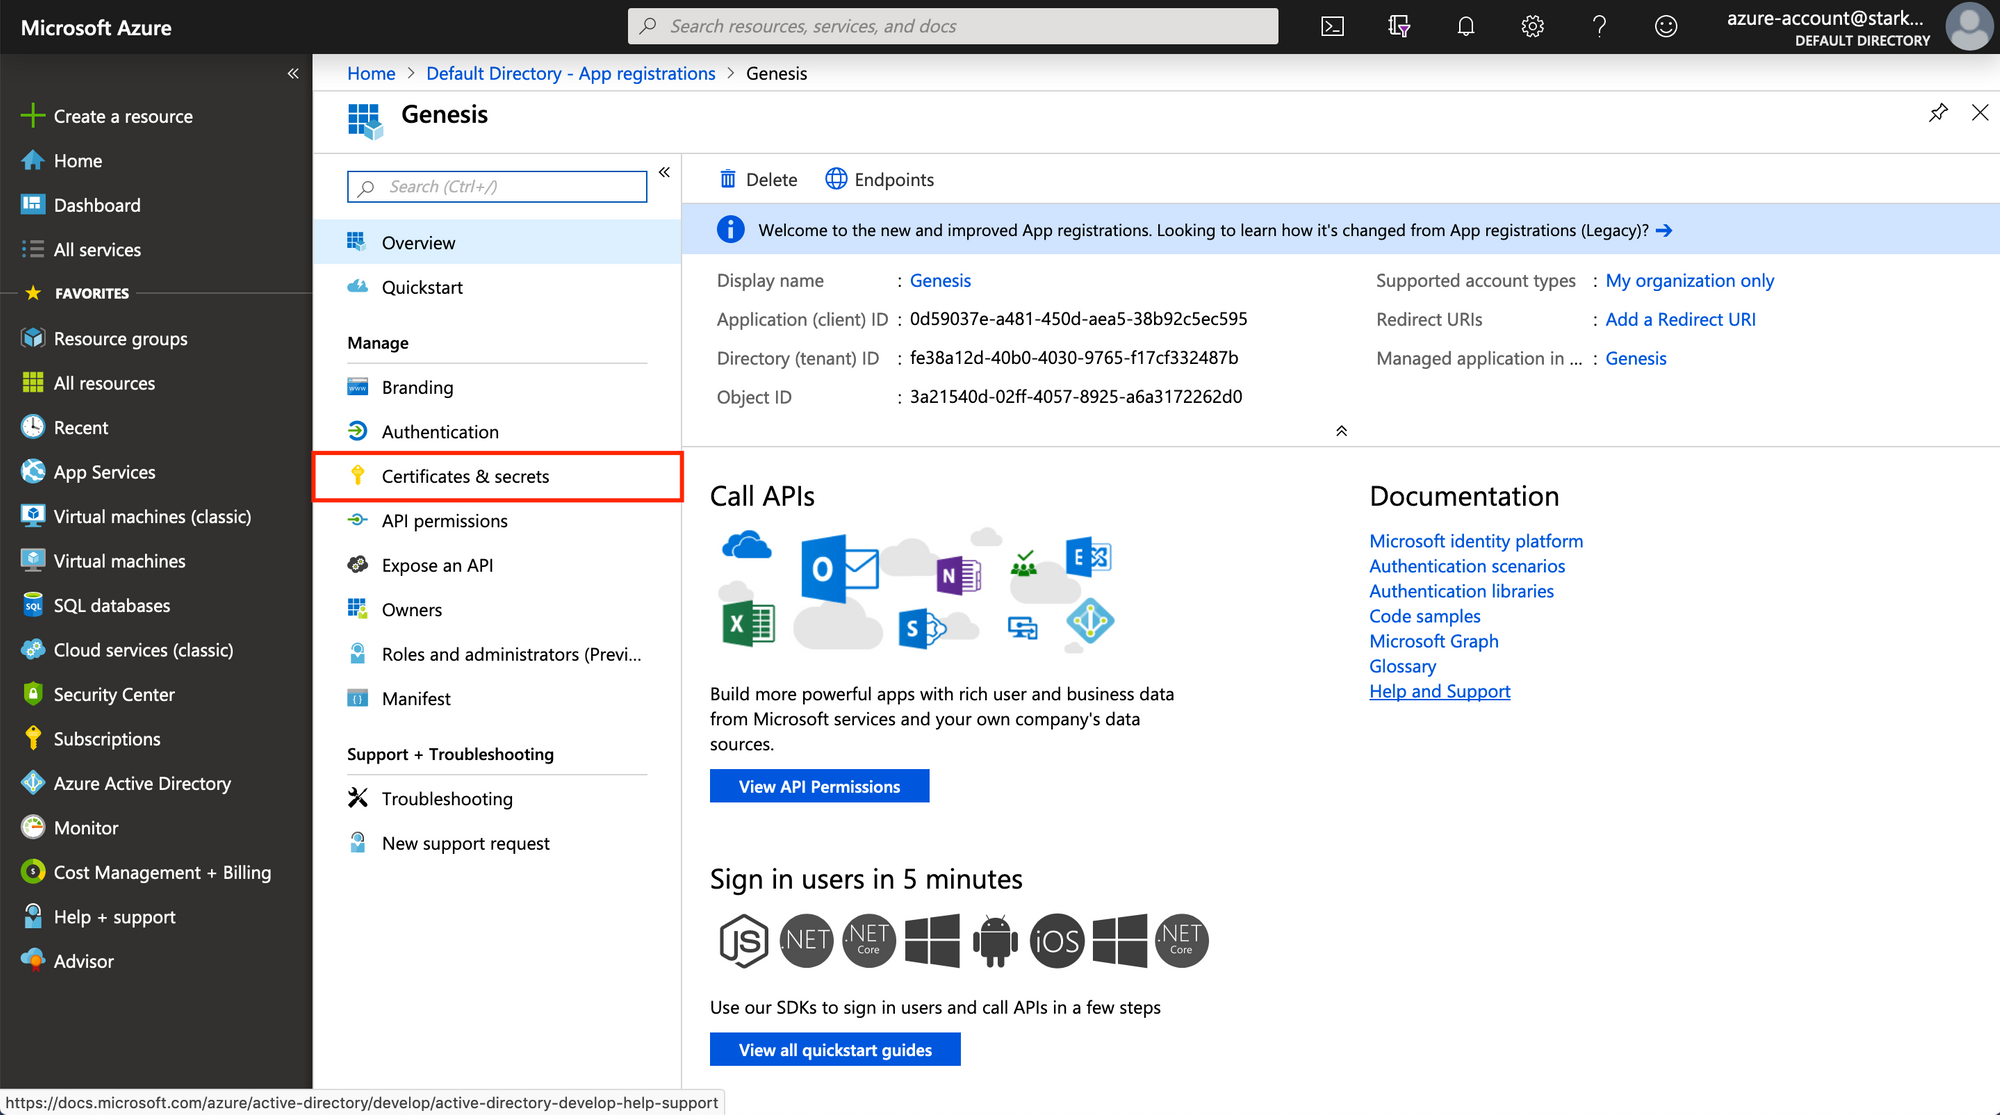
If you created the app registration in the steps above, you should be
brought to the app’s overview page. Should you find yourself not on this
page, you can click on your new app in the list of App Registrations in the
Azure Active Directory panel to go there.
On this overview page, you can find the Application ID and Tenant ID. Note them down for later use.
Creating a Client Secret
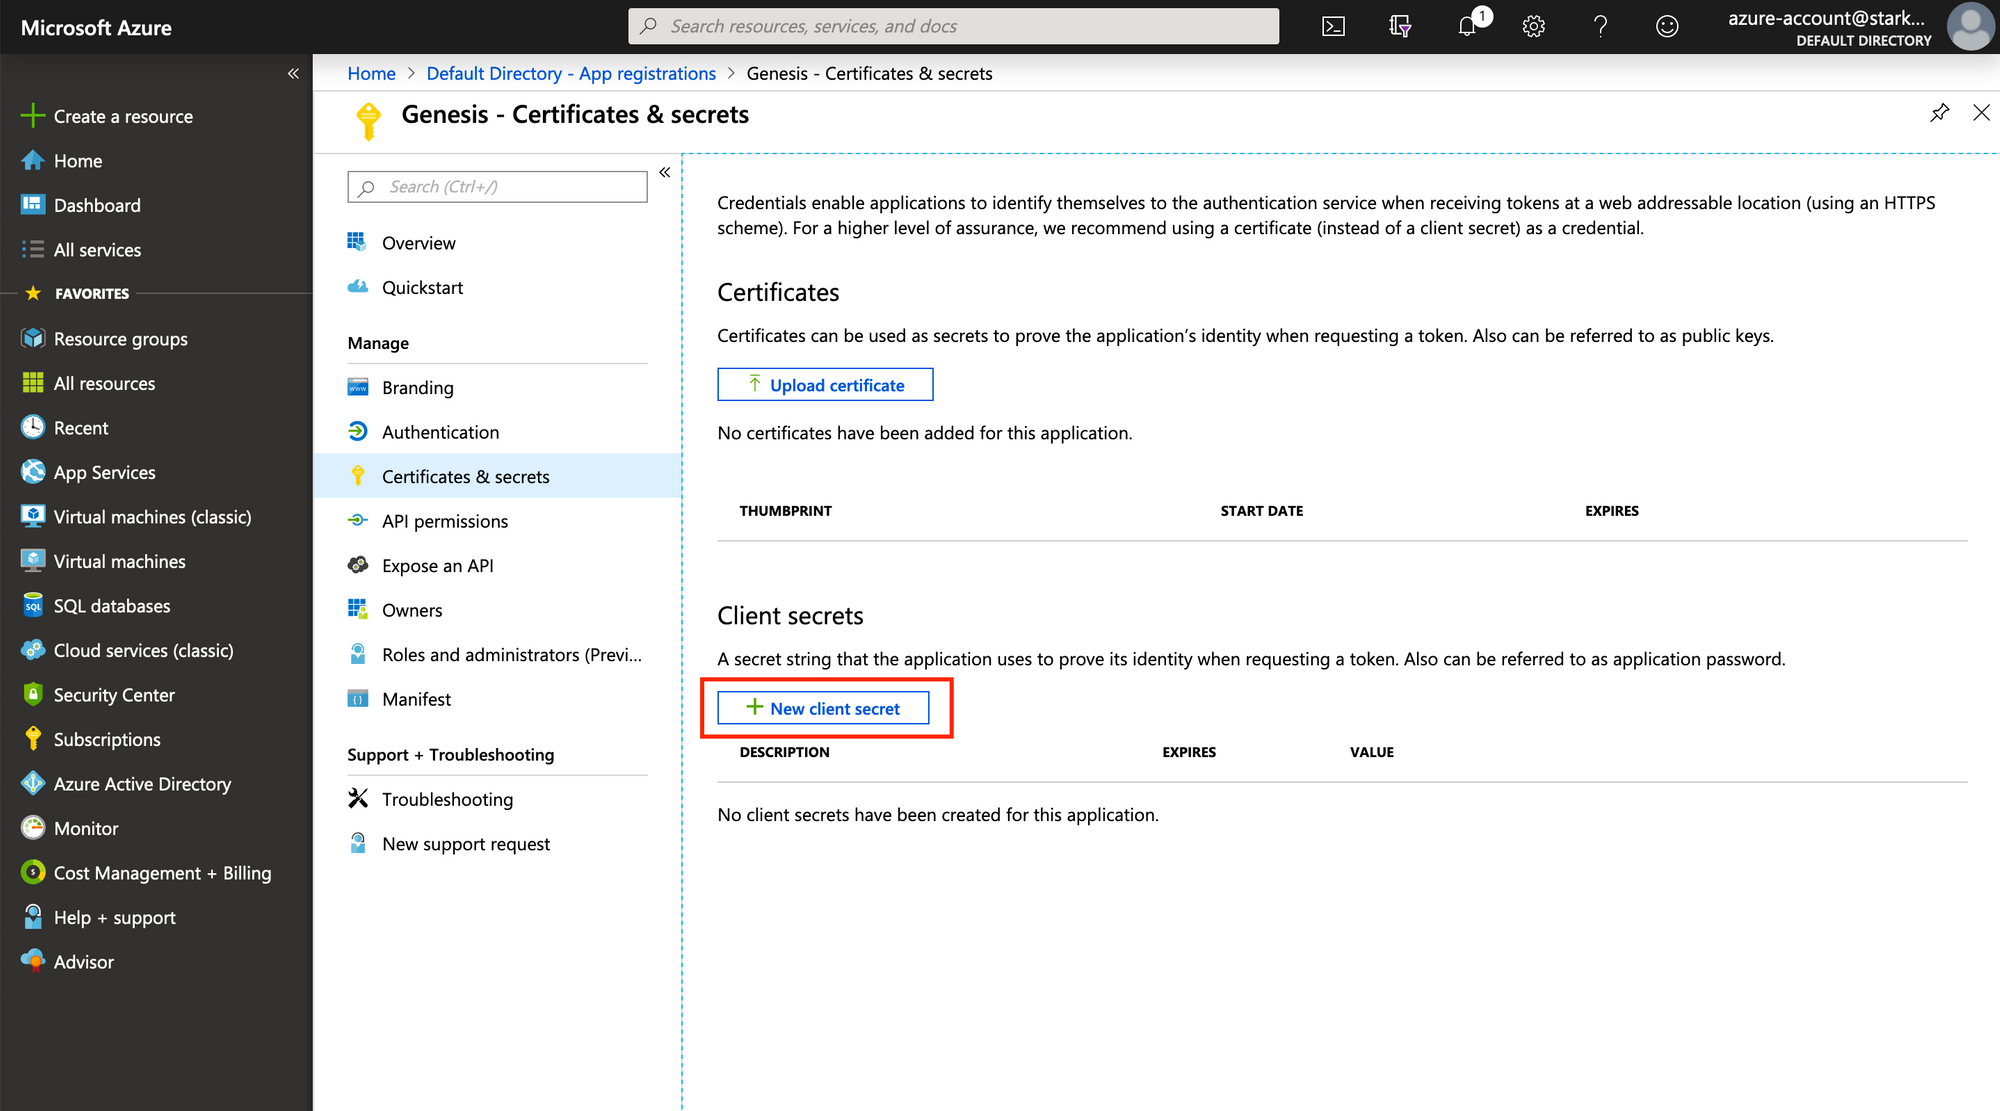
When an app registration is first created, it does not have any client
secrets, so we’ll need to create one. Navigate to Certificates & secrets
on this pages sidebar, and then open up the creation form by clicking on
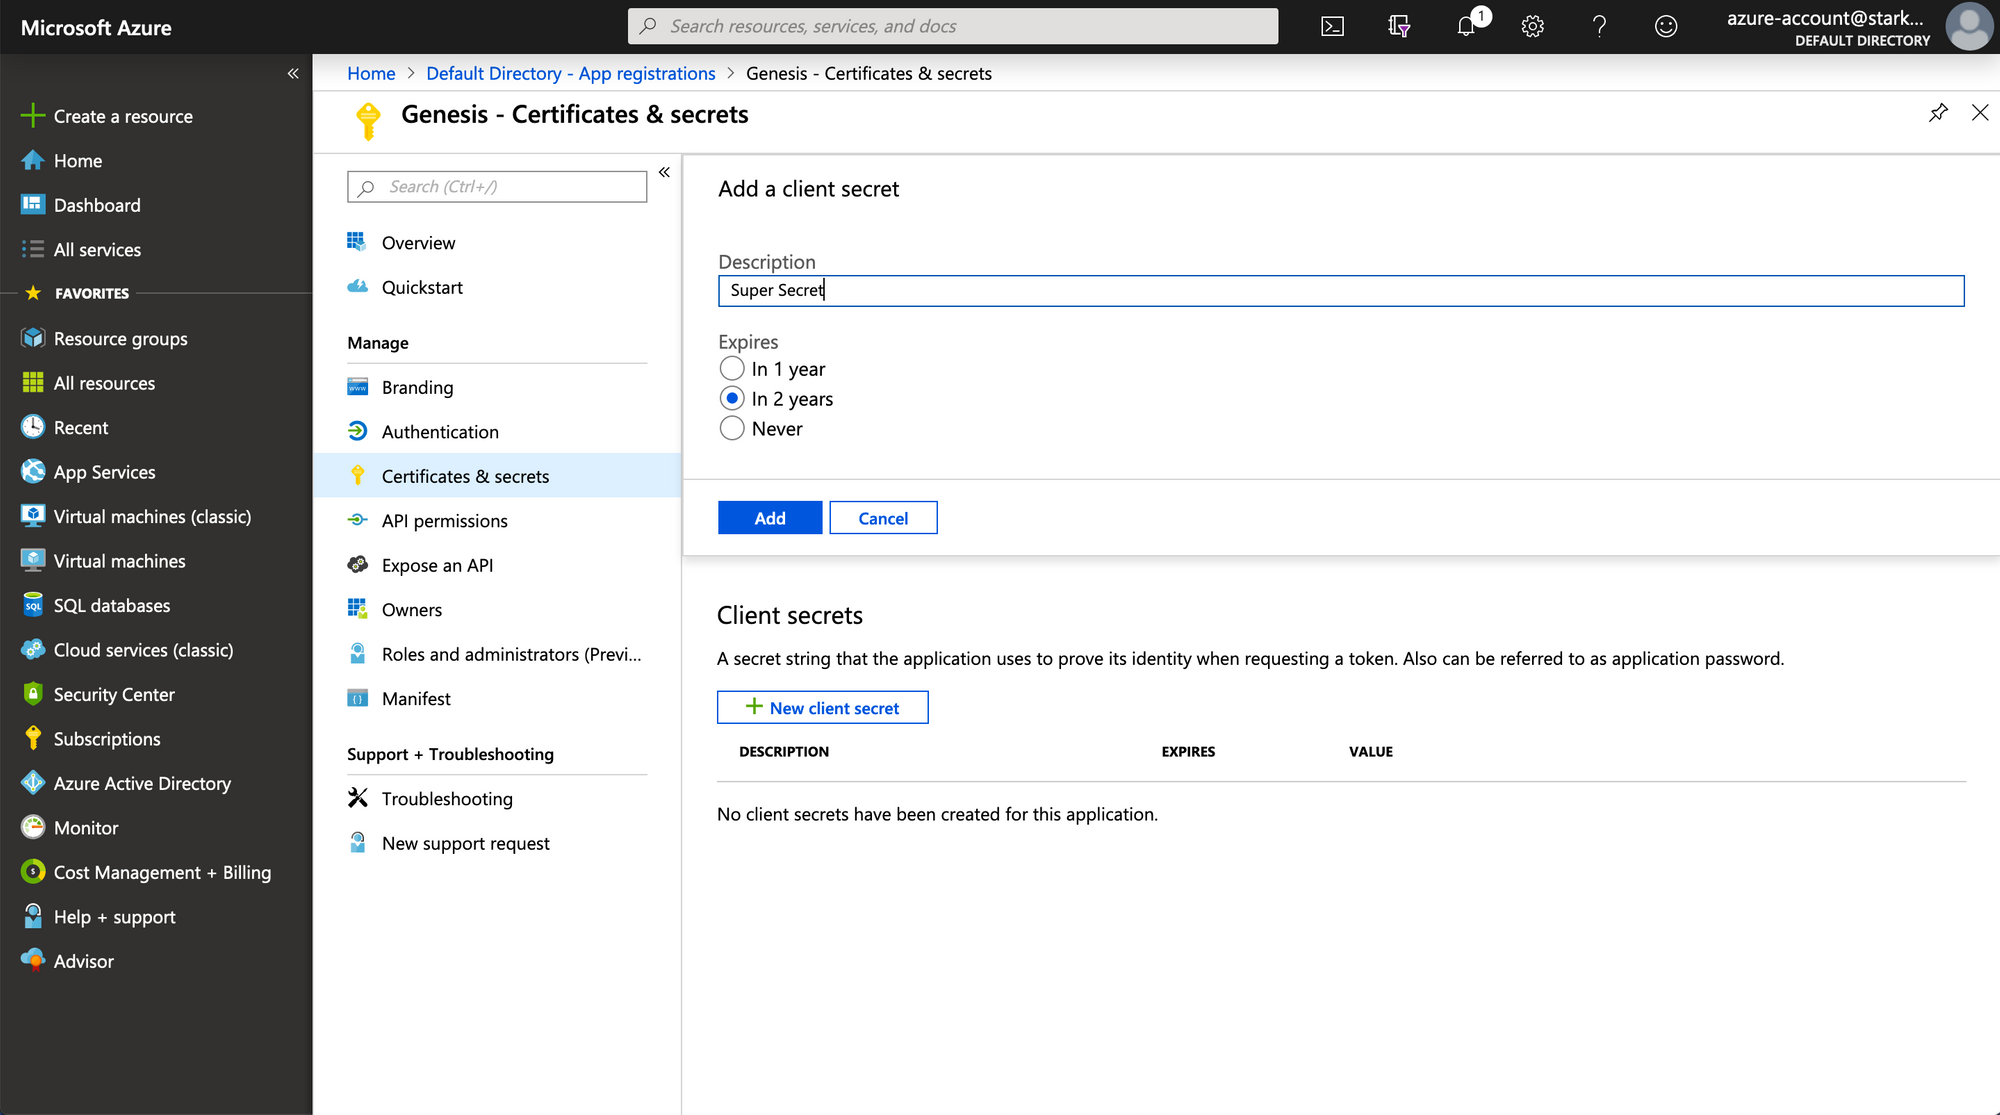
“New Client Secret”. Fill in the form by setting the expiry to something
you’re comfortable with. Once the form is submitted, take the client secret
that gets generated and output and note that down alongside your application
ID and Tenant ID.
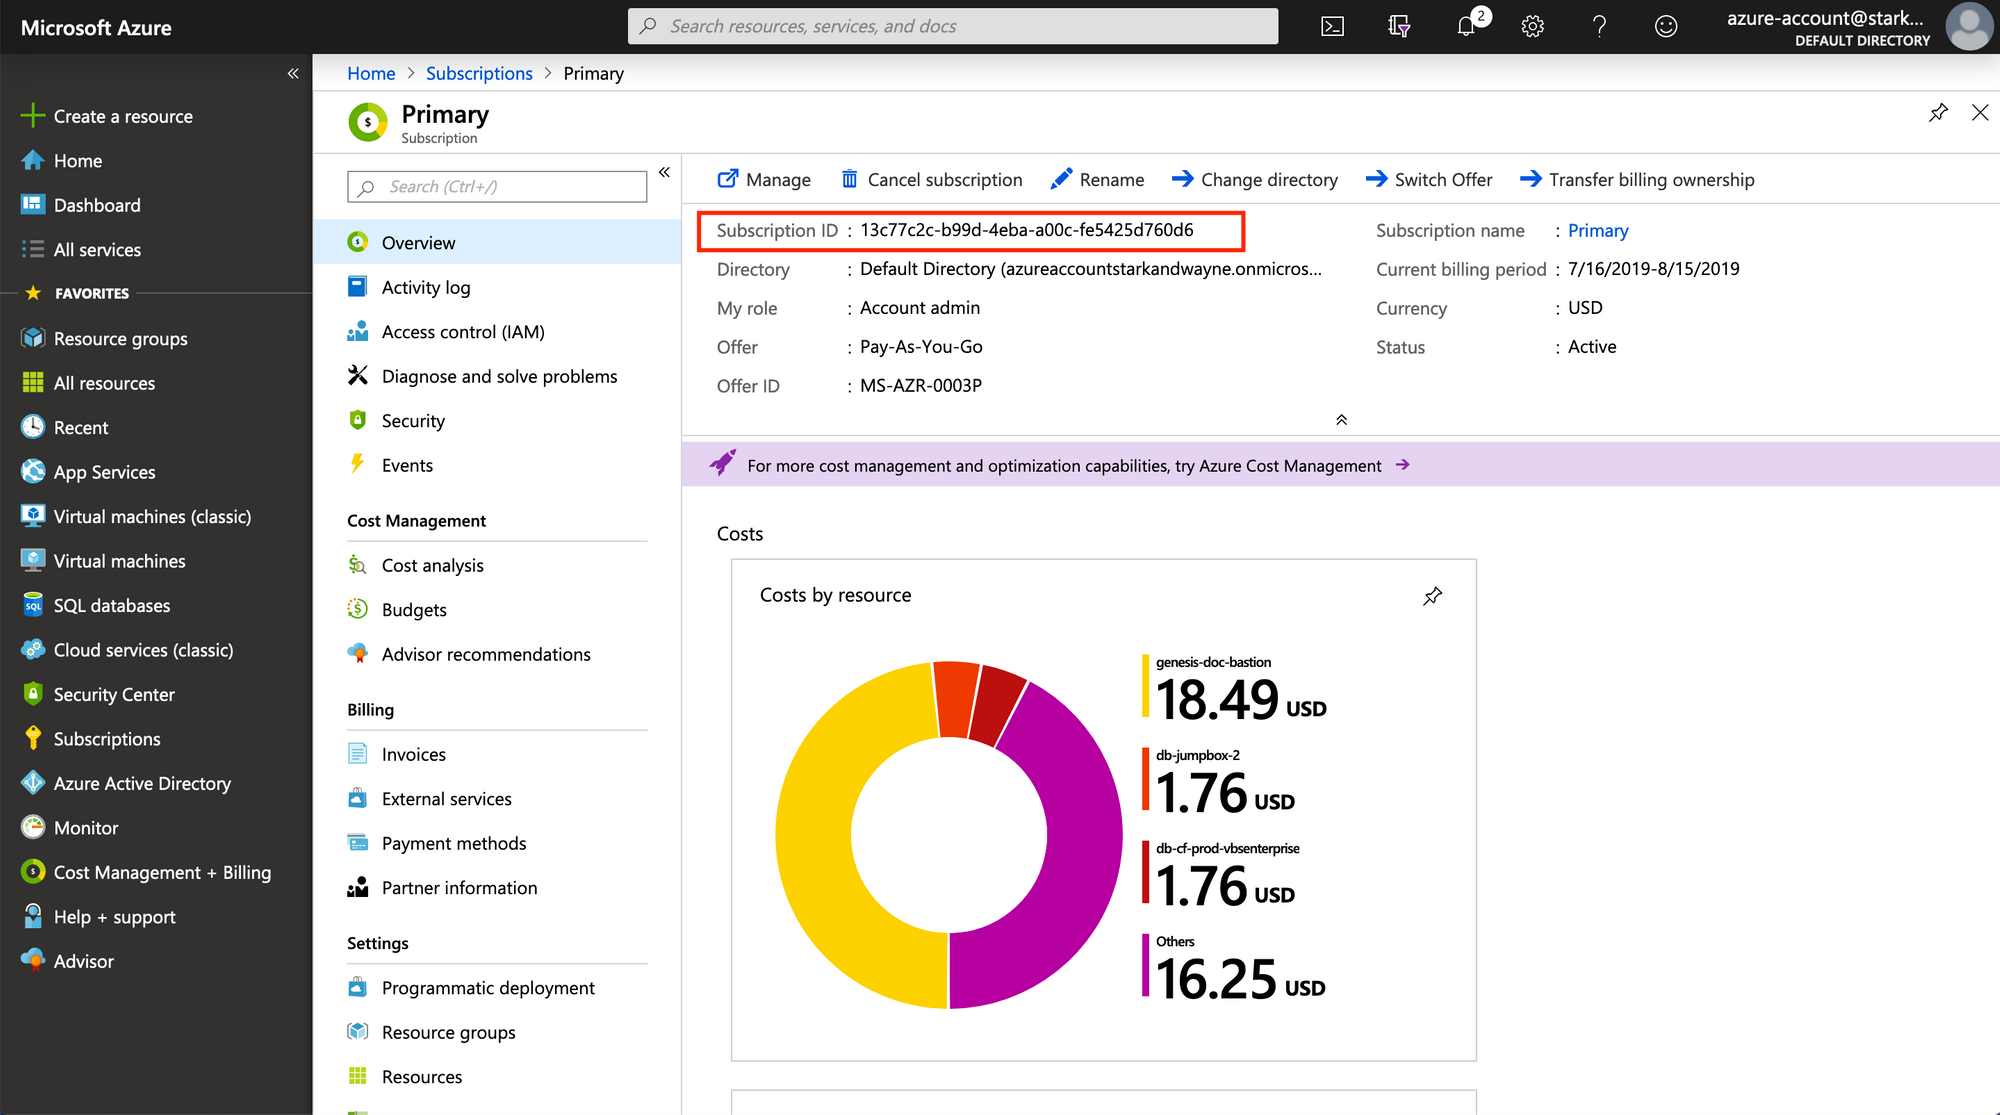
Getting Your Subscription ID
Now that we have the pieces required to authenticate as this application, we will also need the ID of the subscription (billing account) that we are authenticating against. To find the ID, search Subscriptions in the top bar, go to
the list of subscriptions and select the desired subscription from the list.
Copy the ID and note it down.
Granting Your App Registration Access to the Subscription
Before you can actually do anything with the subscription as this App Registration, you’ll need to grant it a role that has access to the resources you need. While you can give it more fine-grained control at your discretion, this guide will give it the role of “Contributor”, which gives it access to create, update, and delete resources, but not grant further access to resources.
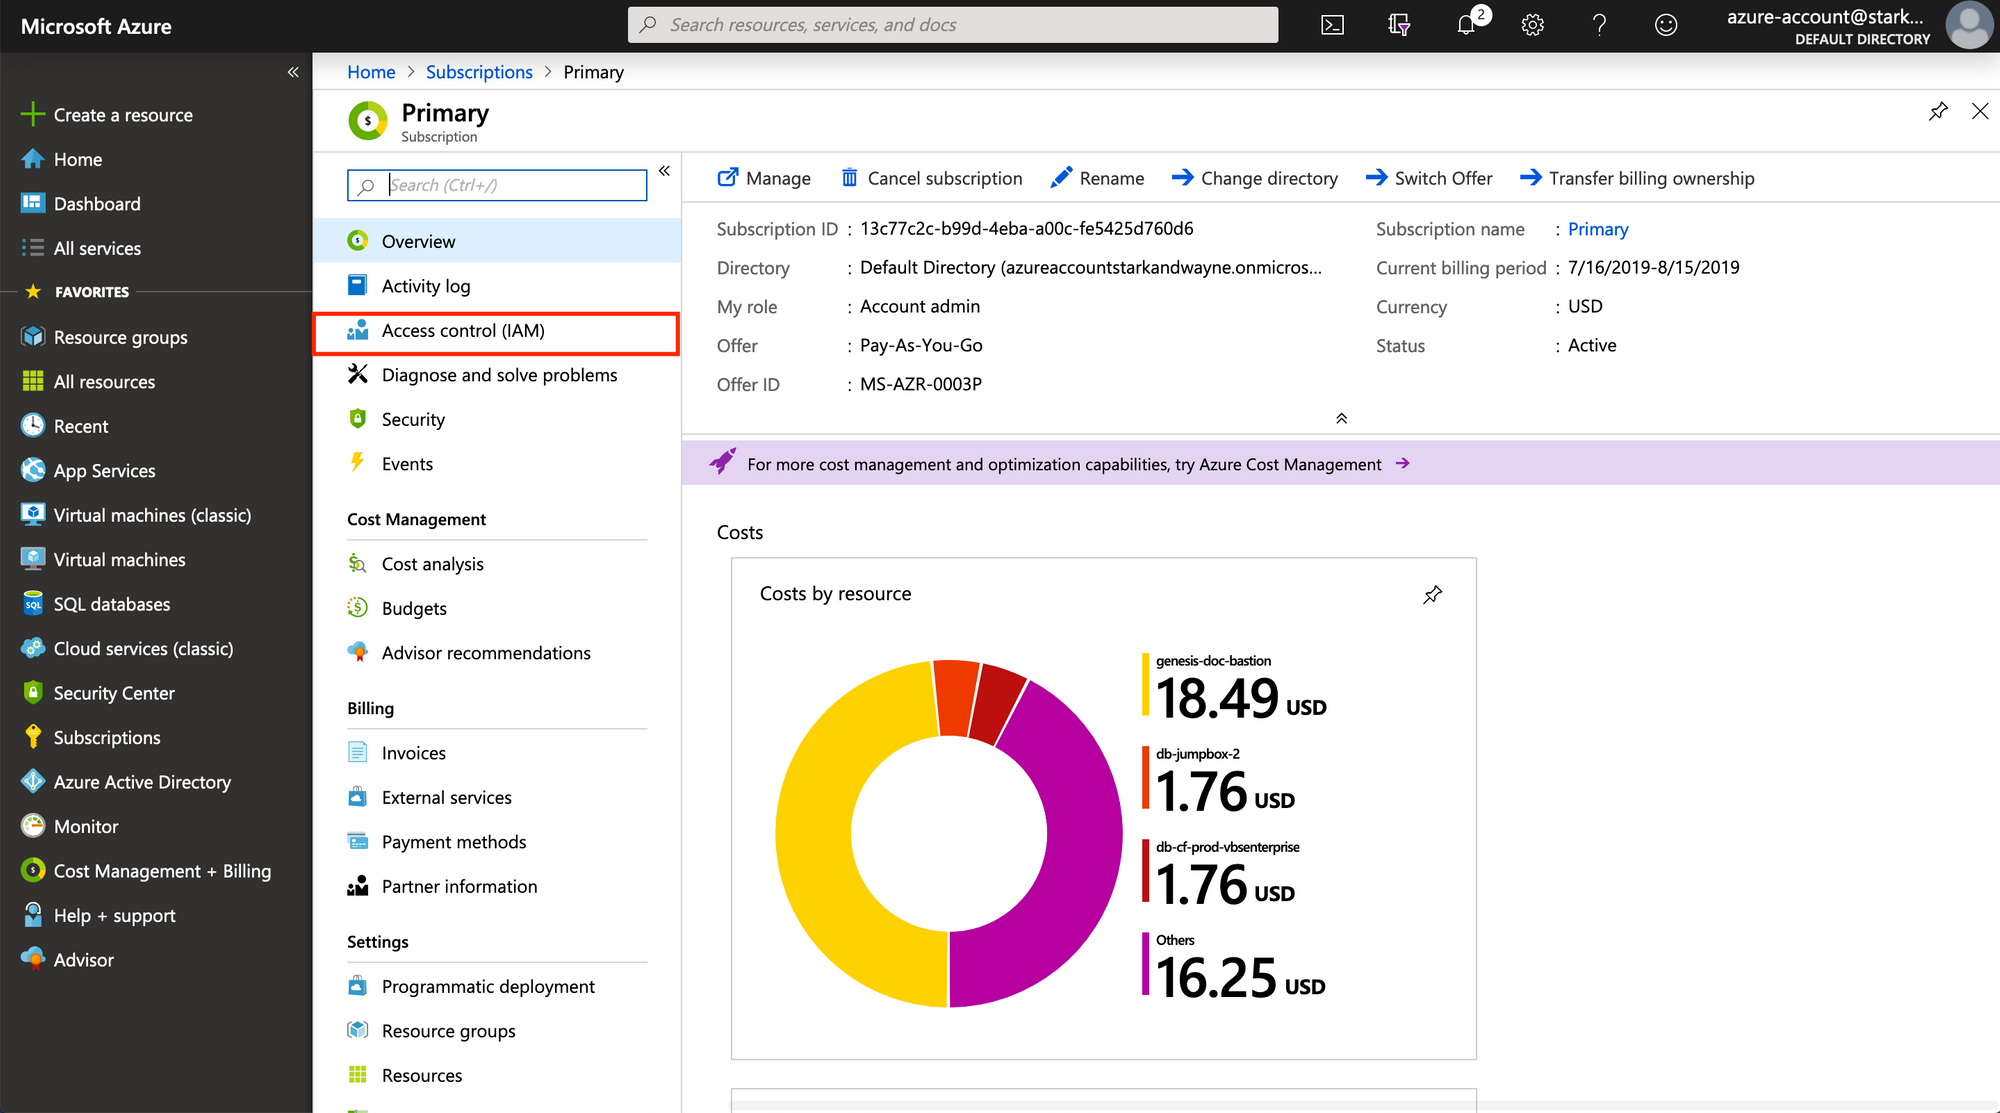
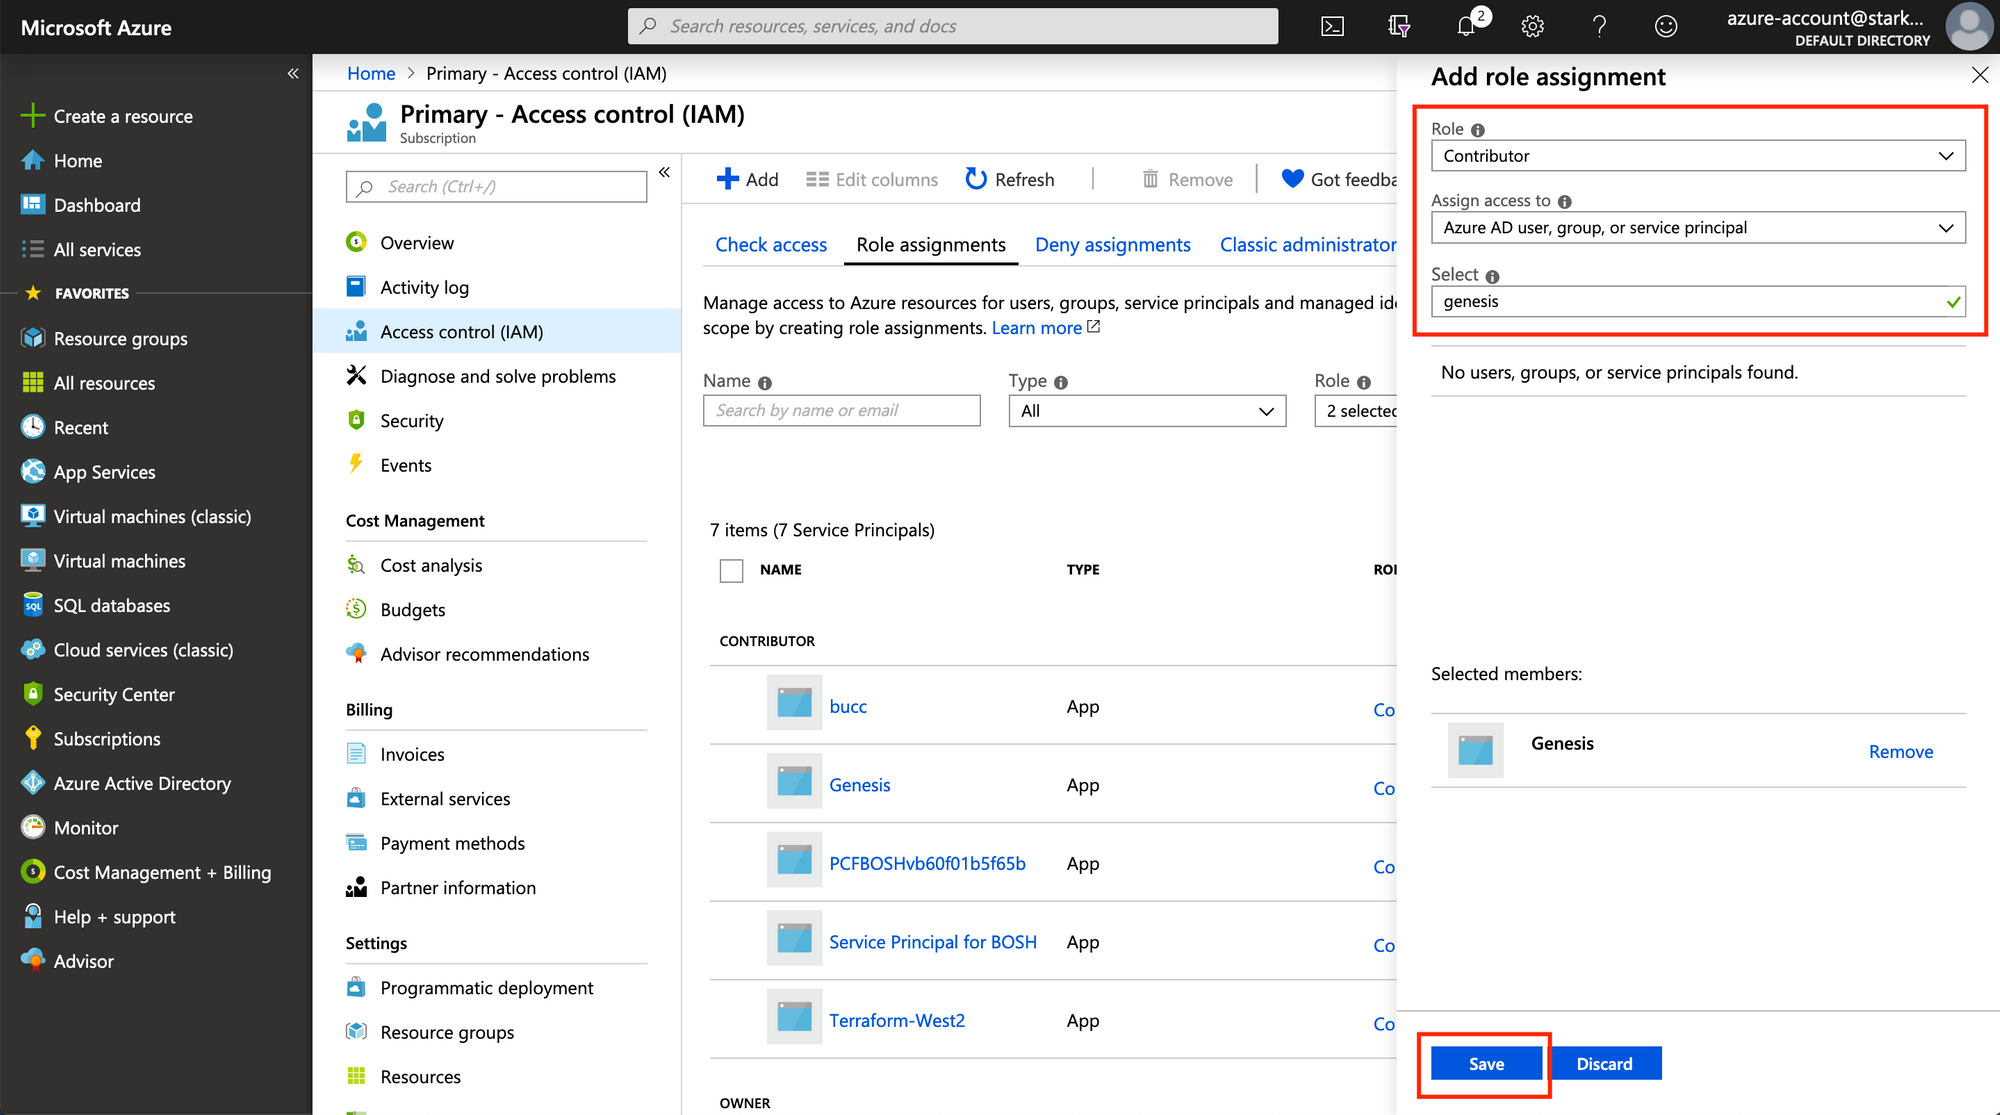
From the subscription’s overview page, you can give the application you
created access to create and manipulate resources in the target
subscription. To do so, click on Access Control (IAM) on the sidebar, and
then on Add a role assignment. Search for and select the name of the
application you previously created, and give it the role of Contributor.

Now you should have the credentials you need to go forth and automate your infrastructure.
Using the CLI
If you want to use the CLI, you need to get the CLI. You can get it here.
Login with the CLI.
az loginThen run:
az ad sp create-for-rbac -n DESIRED-APP-NAME --subscription YOUR-SUBSCRIPTION-NAMEIt will output a JSON object with your Client ID, Client Secret, and Tenant ID.
{  "appId": "01234567-89ab-cdef-0123-456789abcdef",
  "displayName": "DESIRED-APP-NAME",
  "name": "http://DESIRED-APP-NAME",
  "password": "23456789-abcd-ef01-2345-6789abcdef01",
  "tenant": "12345678-9abc-def0-1234-56789abcdef0"
}
Lastly, you’ll need to get your subscription ID. You can look this up with the CLI too!
az account show --subscription YOUR-SUBSCRIPTION-NAMEThis outputs some more JSON. Grab the ID element out of that and note it down with the rest of your credentials.
{
  "environmentName": "AzureCloud",
  "id": "3456789a-bcde-f012-3456-789abcdef012",
  "isDefault": true,
  "name": "YOUR-SUBSCRIPTION-NAME",
  "state": "Enabled",
  "tenantId": "12345678-9abc-def0-1234-56789abcdef0",
  "user": {
    "name": "[email protected]",
    "type": "user"
  }
}
Then you’re good to go!

Spread the word